Configuring SAP Connector (RFC)
Creating CPIC user (SU01)
User Profile:
S_A.CPIC
S_A.SCON
Common node settings
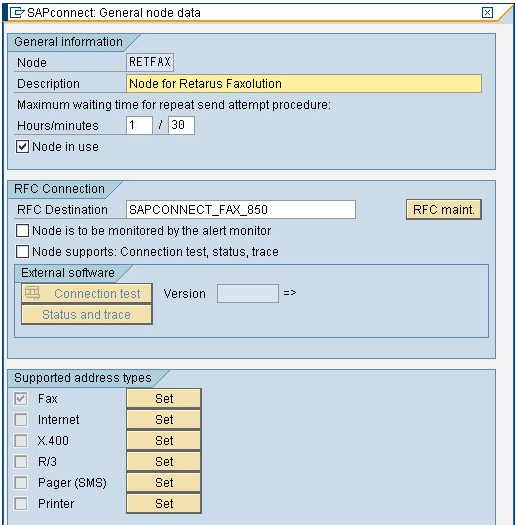
Select Create from the shortcut menu and add a node name (for example, RETFAX) and description to the new window.
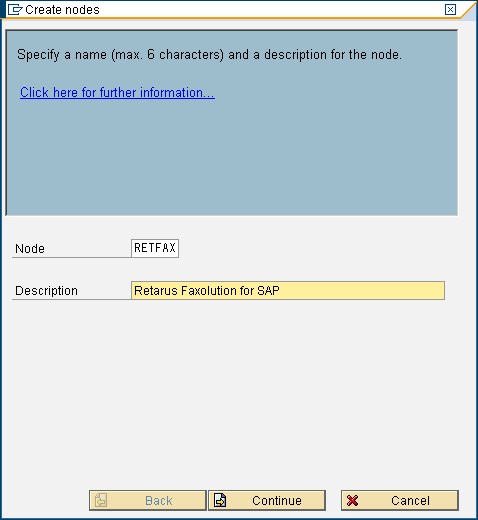
Click on Continue, select RFC as the node type in the following window, and click on Continue again.
Creating an RFC destination (SM59)
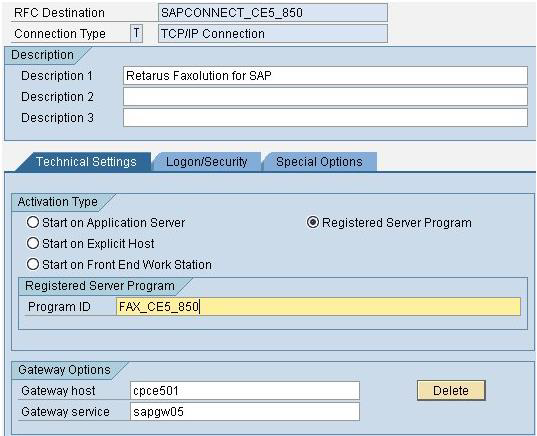
RFC Destination | SAPCONNECT_FAX_<client> (e.g. SAPCONNECT_FAX_850) |
Connection Type | T (TCP/IP) |
Gateway Options | Gateway Host (IP address or SAP Hostname) Gateway Service (Port) |
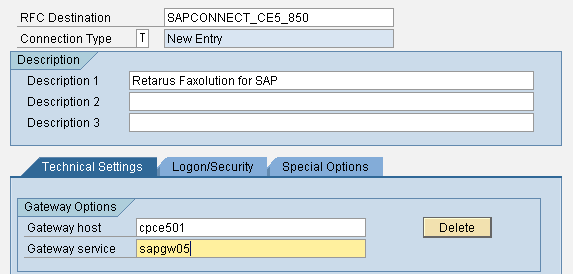
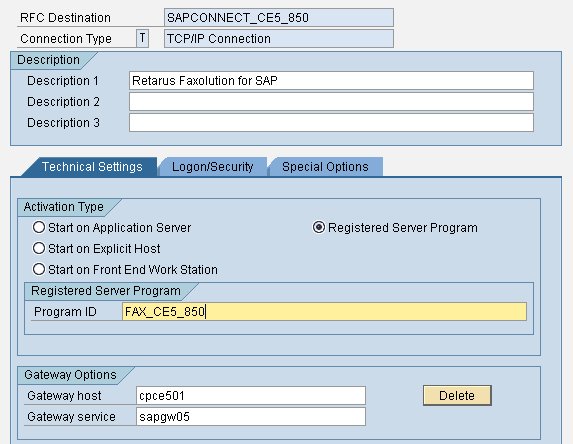
Select the following options:
Activation Type - Registered Server Program
Program ID - Fax_<system>_<client> (e.g. FAX_CE5_850)
Gateway Options - Gateway Host (IP address or SAP Hostname) Gateway Service (Port)
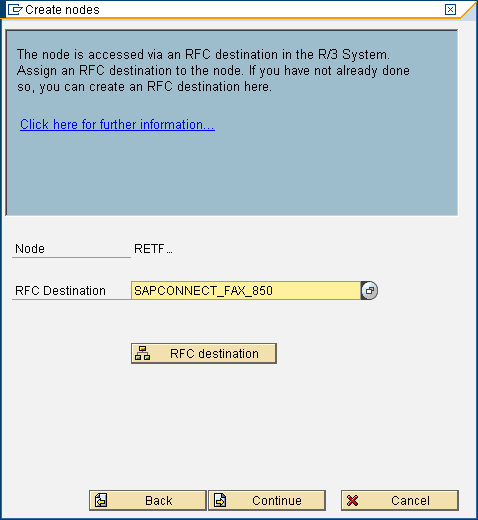
Select the new RFC Destination and click on Continue.
Select Fax as the address type in the following window and click on Continue.
In the next window, add “*” as the address area to route all faxes over the new node.
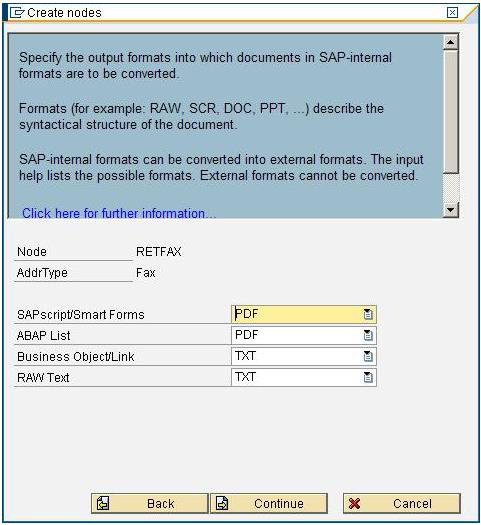
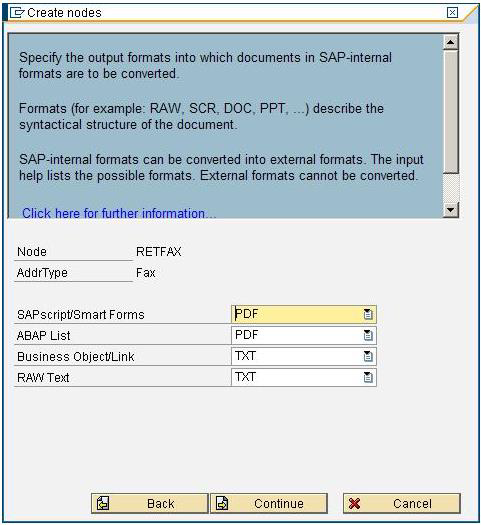
Click on Continue and select the correct output formats in the next window (e.g., PCL, PS, or PDF for SAPSCRIPT/ Smart Forms).
Do not select Restrict send time in the following window and click on Continue.
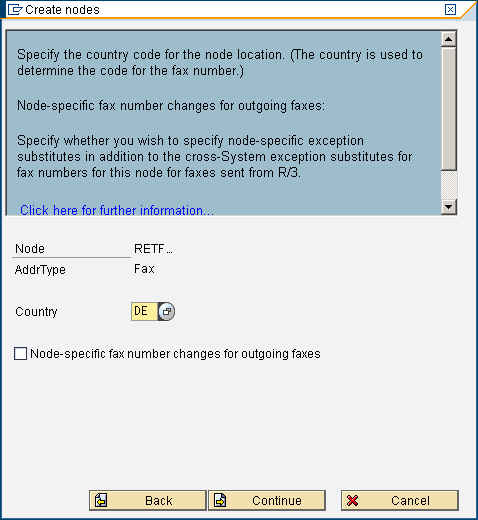
Set DE as the country (regardless of where the system is located) and click once again on Continue.
Select No as the answer when you are queried whether you want to set further address types.
In the next window, select 1 hour as Maximum Waiting Time for repeat send attempt procedures and click on Continue.
Select the following parameters:
Node can resolve path references - not activated
Node is to be monitored by the alert monitor - not activated (optional)
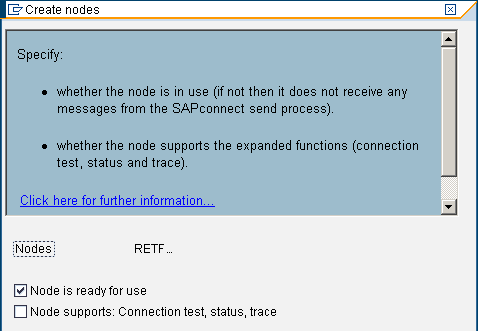
Click on Continue and select the following parameters:
Node is ready for use - activated
Node supports: Connection tests, status, trace - not activated
Scheduling the sending process (SCOT/SCON)
Choose ![]() and enter a job name:
and enter a job name:
Choose Schedule, specify the first date for execution, and enter the following settings:
Enable fax transmission for SAPoffice and send a test fax, e.g., from SAPoffice (SO02).
Application settings
Set message conditions and connect document types to be faxed to the appropriate transmission media (for each document type that will be sent by fax).
Sample
Doc.-Type:
NB:
Rule
LF
Transmission media
2 (=Telefax)
After a document is sent from an application, if it has been requested via the SAPoffice interface, it will be visible in the sender’s outbox. At the conclusion of the next SAPconnect transmission process (which corresponds to the job’s scheduled time of transmission), it will appear in the recipient’s inbox.
📌 SAP configuration adjustments
Due to some variations in settings by release and/or previously configured parameters, the SAP-specific configuration can be fine-tuned telephonically after a connection with Retarus is set up.
Checking the configuration
Notes for systems up to Version 4.6c
In addition to the settings described here, depending on the version, supplementary ones may be necessary.
Conversion rules
Format | By format | Functional block |
|---|---|---|
OTF | PCL | SX_OBJECT_CONVERT_OTF_PRT |
SCR | OTF | SX_OBJECT_CONVERT_SCR_OTF |
RAW | SCR | SX_OBJECT_CONVERT_RAW_SCR |
INT | RAW | SX_OBJECT_CONVERT_INT_RAW |
TXT | INT | SX_OBJECT_CONVERT_TXT_INT |
