
To enhance efficiency, the address book allows admins with “Address book admin” access for the tenant to create and store contacts, including fax numbers, for clients and businesses they frequently fax.
📌 Address book admin access
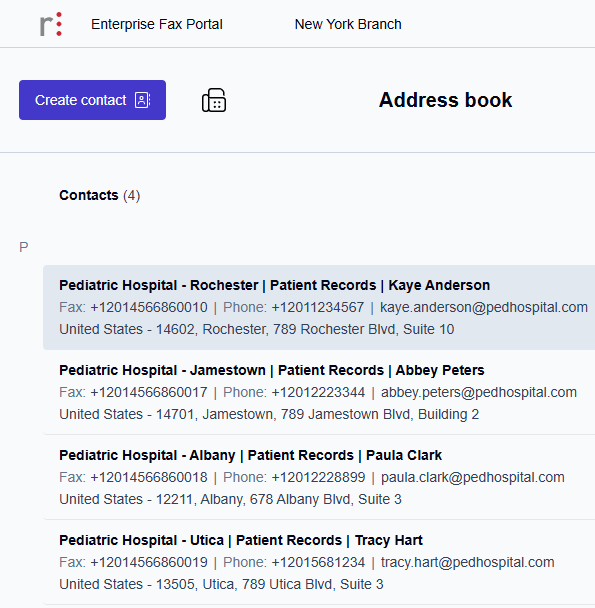
Administrators with Address book admin access can create, update, and delete address book contacts. Only admins with Address Book Admin access will see the Create Contact button when they open the address book.
Create a new address book contact
-
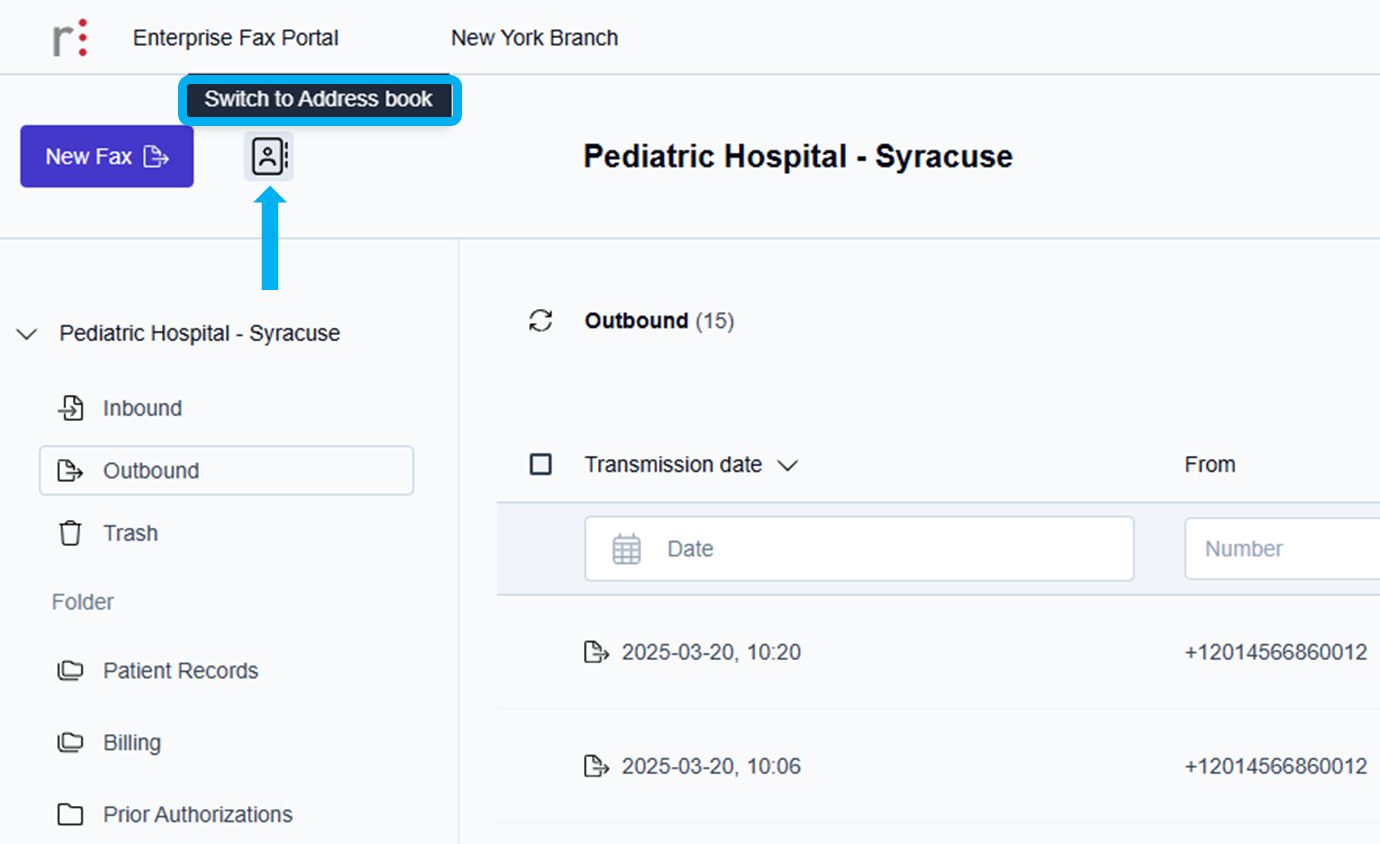
Click the Address book icon (

→ When you hover over the Address book icon (
→ The Address book screen is displayed, showing any address book contacts that were previously created.
-
Click the Create contact button on the Address book screen.
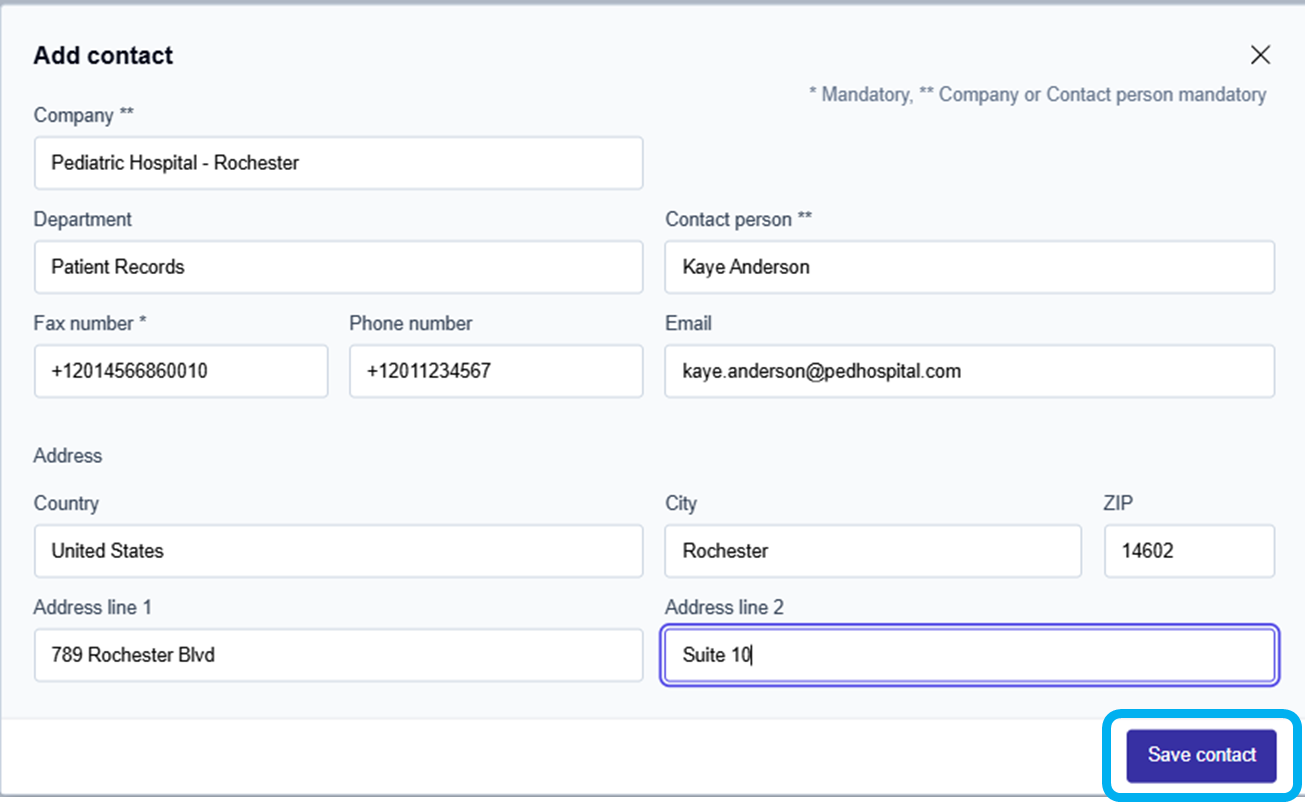
→ The Add contact window prompts you to enter the client’s fax number and other contact information.
📌 Mandatory contact fields
There are three mandatory fields: Company name, Contact person’s name, and fax number.
-
Enter the following contact information:
-
Click inside the Company field and type the company name (mandatory if no contact person’s name is going to be entered).
-
Click inside the Department field and type the department/area/group/region name.
-
Click inside the Contact person field and type the contact person’s first and last name (mandatory if no company name was entered).
-
Click inside the Fax number field and type the mandatory fax number.
-
The fax number must start with ‘+’, e.g., +491525890890.
-
-
Click inside the Phone number field and type the phone number.
-
Click inside the Email field and type a valid Internet email address.
-
Click inside the Country field and type the country name.
-
Click inside the City field and type the city name.
-
Click inside the Zip field and type the zip code.
-
Click inside the Address line 1 field and type the line 1 address.
-
Click inside the Address line 2 field and type the line 2 address.
-
When all address contact information has been entered:
-
Click the Save Contact button in the bottom right corner of the Add contact page.
→ The Contact added to address book message is displayed at the bottom center of the page, and the contact you created is shown in the address book.