Send a test fax to your Retarus fax number
As a best practice, send a test fax to your Retarus fax number when:
You or your group is first assigned to a faxbox.
A new Retarus fax number is added to your faxbox.
You need to troubleshoot fax transmission issues.
Create and send a test fax to your Retarus fax number
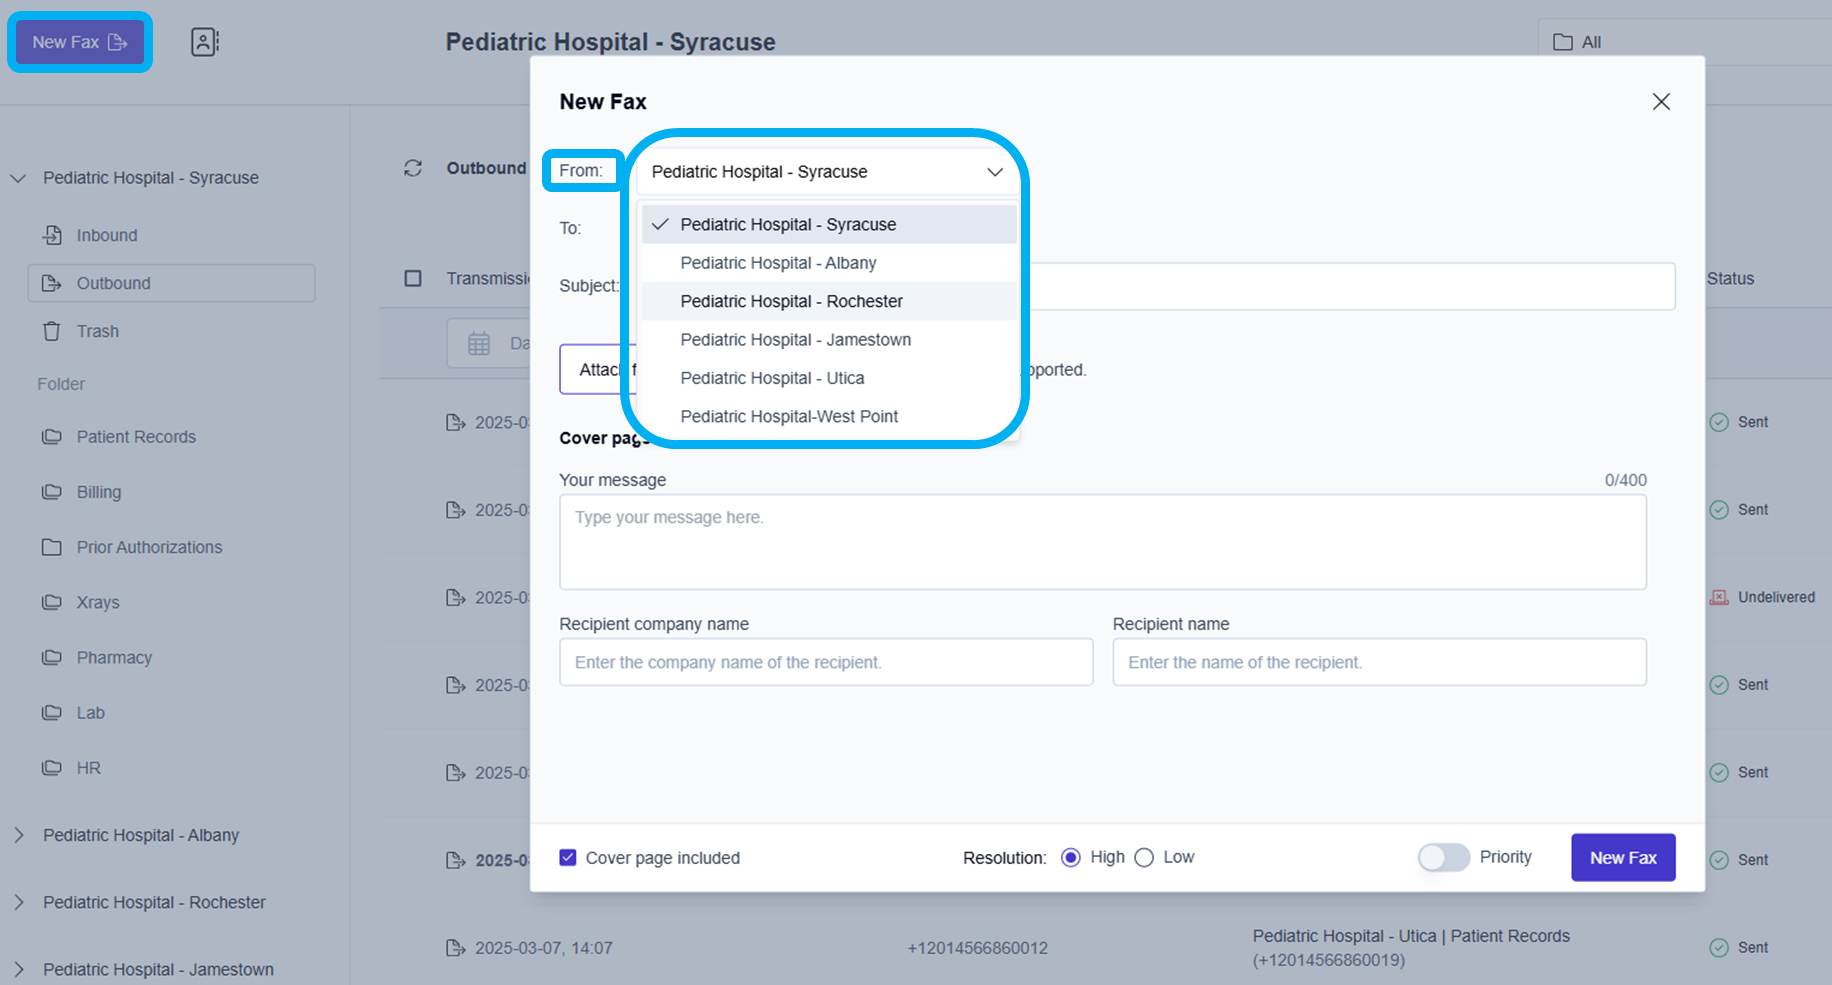
Click the New Fax button.

Click the From faxbox dropdown list and select the faxbox from which you want to send the fax.

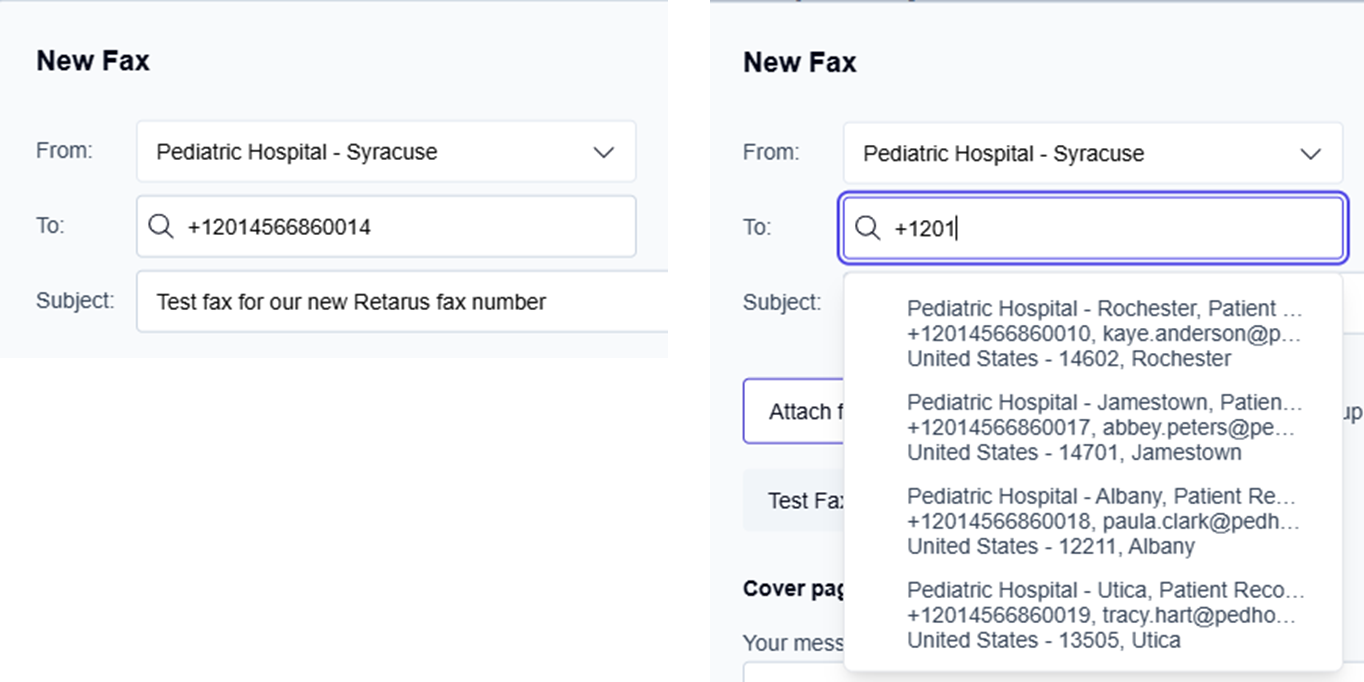
Click inside the To field.
To manually enter your Retarus fax number, use the following format and type: a plus sign, the country code, and the fax number without any spaces (e.g., +12013770597, +4989902694001).
To leverage the address book contacts to enter your Retarus fax number: type a + (plus sign), or type a + and the first 2 or 3 digits of the recipient’s fax number, or type the first 2 or 3 characters of the recipient’s company name, or type the recipient’s first name to display the autocomplete list of available fax numbers/address book contacts and select the recipient’s contact.
→The plus sign and domain are automatically added to the selected fax number.

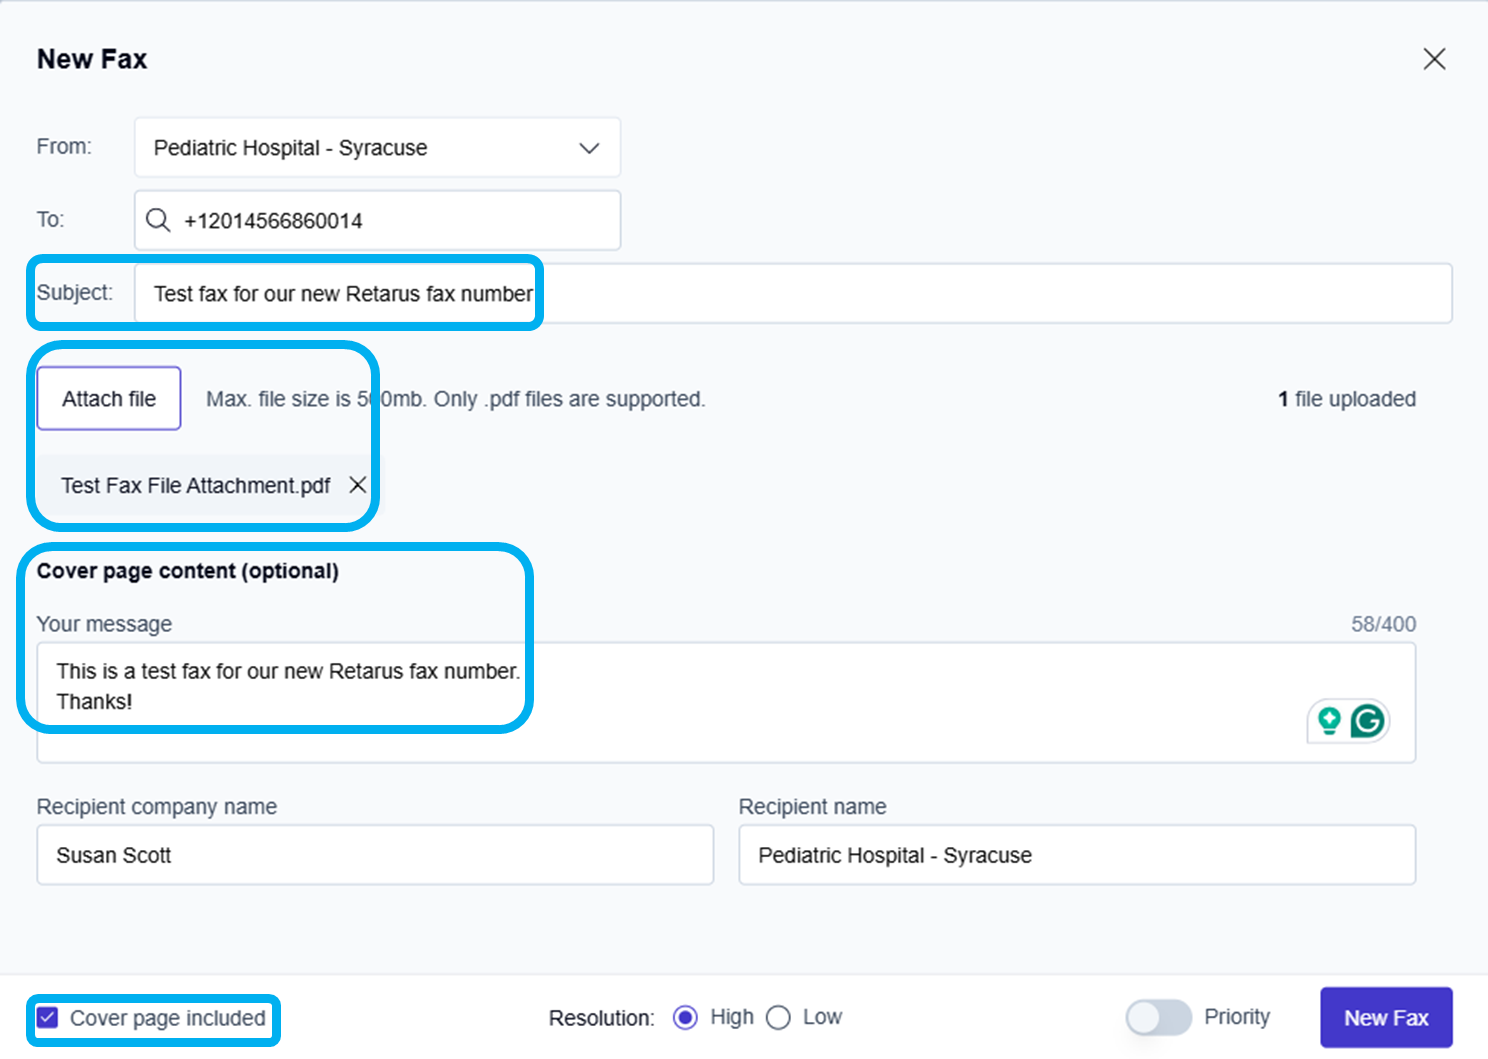
Click inside the Subject: field and type the subject for your fax message.
Attach a file to your outbound fax
Click the Attach file button, go to the folder containing the file you want to attach, and select the document you want to send with your fax.
Click the Open button to attach the document to your fax message.
→ The file you select displays directly under the Attach file button.
Include a cover page with your fax message
Click to check the Cover page included checkbox at the bottom left corner of the New Fax message screen.
Click inside the Your message field and type a message to your recipient.
→ The message you enter is included on the first page of the outbound fax.The Recipient company name and Recipient name fields may already be auto-filled if you selected the fax number/contact from the address book.
To manually enter the Recipient company name and Recipient name fields, click inside each field and type the contact’s information.
→ The first page of the outbound fax includes the message, the recipient's company name, and the recipient's name you entered.

Send the new fax message using High resolution
Select the High Resolution radio button in the bottom middle of the New Fax message screen.
→ By default, the High Resolution radio button is selected and is recommended for any business-critical faxes.
→ If there are situations where Low Resolution is acceptable, click to select the Low Resolution radio button option.
Send an urgent fax message using Priority delivery
📌 Priority delivery charges
There is an additional charge for each fax transmitted using the Priority delivery option. Please work with your organization’s administrator to understand if Priority delivery is an option for your organization when urgent delivery is needed for critical faxes.
Toggle on the Priority delivery toggle switch to move your urgent fax to the front of the outbound fax queue.
→ By default, the Priority delivery toggle switch is toggled off and recommended for business-as-usual, non-critical faxes.
Send the fax message to your Retarus fax number
Click the Send Fax button.
→ Retarus transmits your fax message, and then it becomes visible in the Outbound folder.
→ Shortly after the status changes from sending to sent, you should receive your test fax.

View the fax you sent to your Retarus fax number with its current transmission status
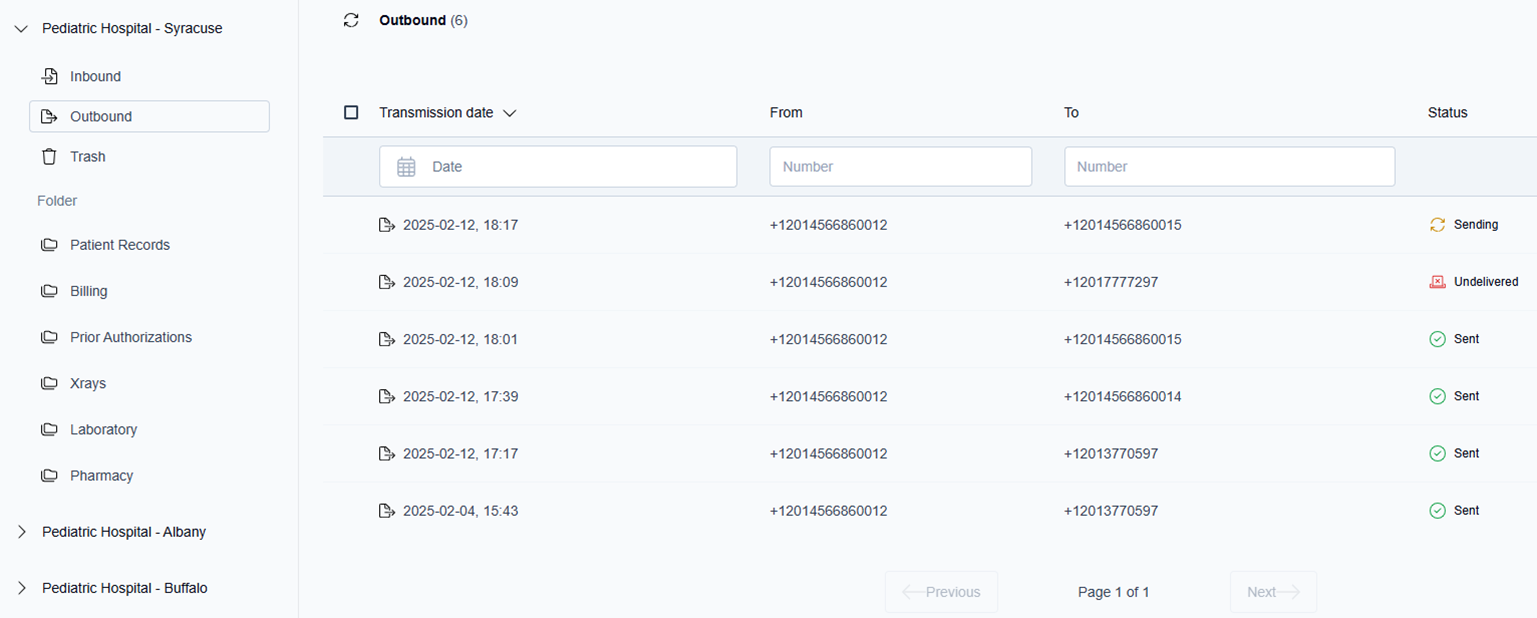
Click the Outbound faxbox button to view the fax you just sent.
Identify the fax you just sent using the To fax number and the Transmission date and time.
If you don’t see the fax messages you just sent, click the window refresh icon (
 ).
). → The current status of your fax is displayed under the Status column as one of the following:
 = The status is displayed as “Sending” if the fax is still transmitting.
 = The status is displayed as “Sent” if the fax transmission is completed successfully.
 = The status is displayed as “Undelivered” if there is a transmission error.
