
-
Administrators have the required access to update, delete, and add fax numbers to a faxbox.
-
Updating and deleting inbound fax numbers may be required when employees leave, when employees move to a different department, or if a department or a process is changed or eliminated.
-
It may also be necessary to change the assigned fax number that will be used for sending outbound faxes.
-
Each faxbox must have at least one inbound fax number assigned, but multiple fax numbers can be assigned if needed.
📌 Assigning inbound fax numbers
When updating and deleting fax numbers, please remember that a faxbox must be assigned at least one inbound fax number to receive faxes.
Update sending fax number and update or delete inbound fax numbers
-
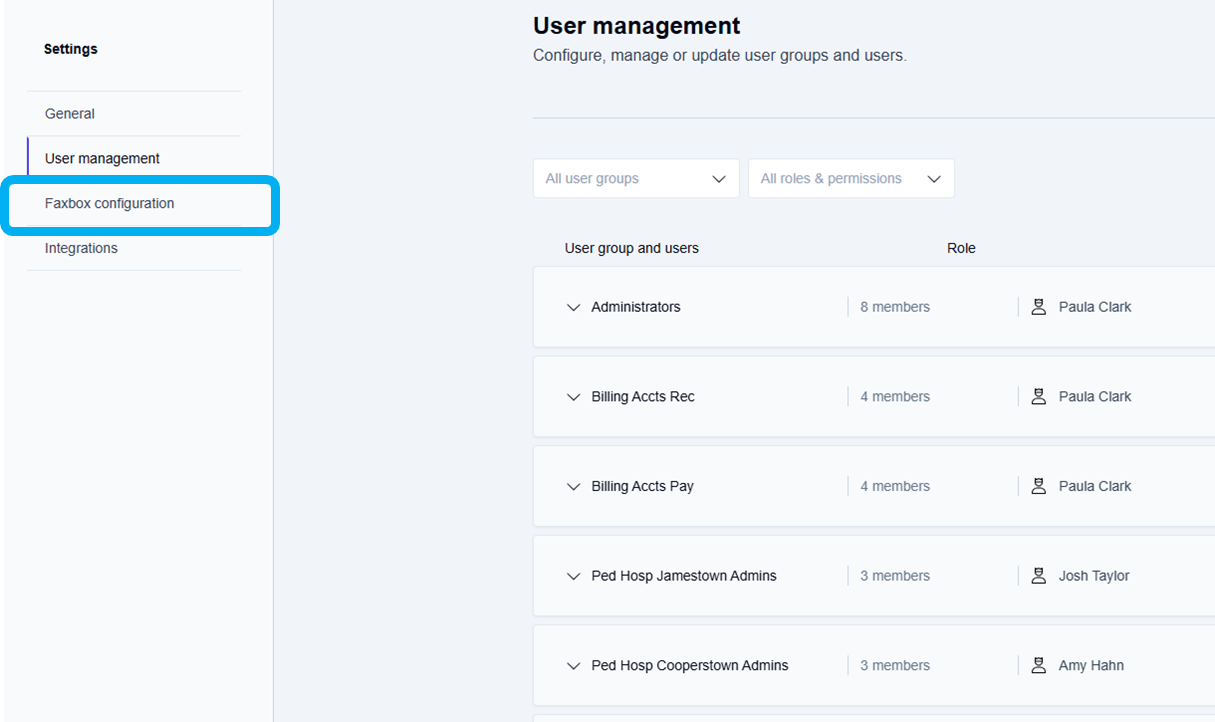
Click the Settings icon on the main Enterprise Fax Portal page.
→ The User management screen displays.
-
Click the Faxbox configuration tab.
→ The Faxbox configuration screen displays your available faxboxes.
→ Use the Edit--> option at the end of each faxbox listing to make changes to a faxbox.
-
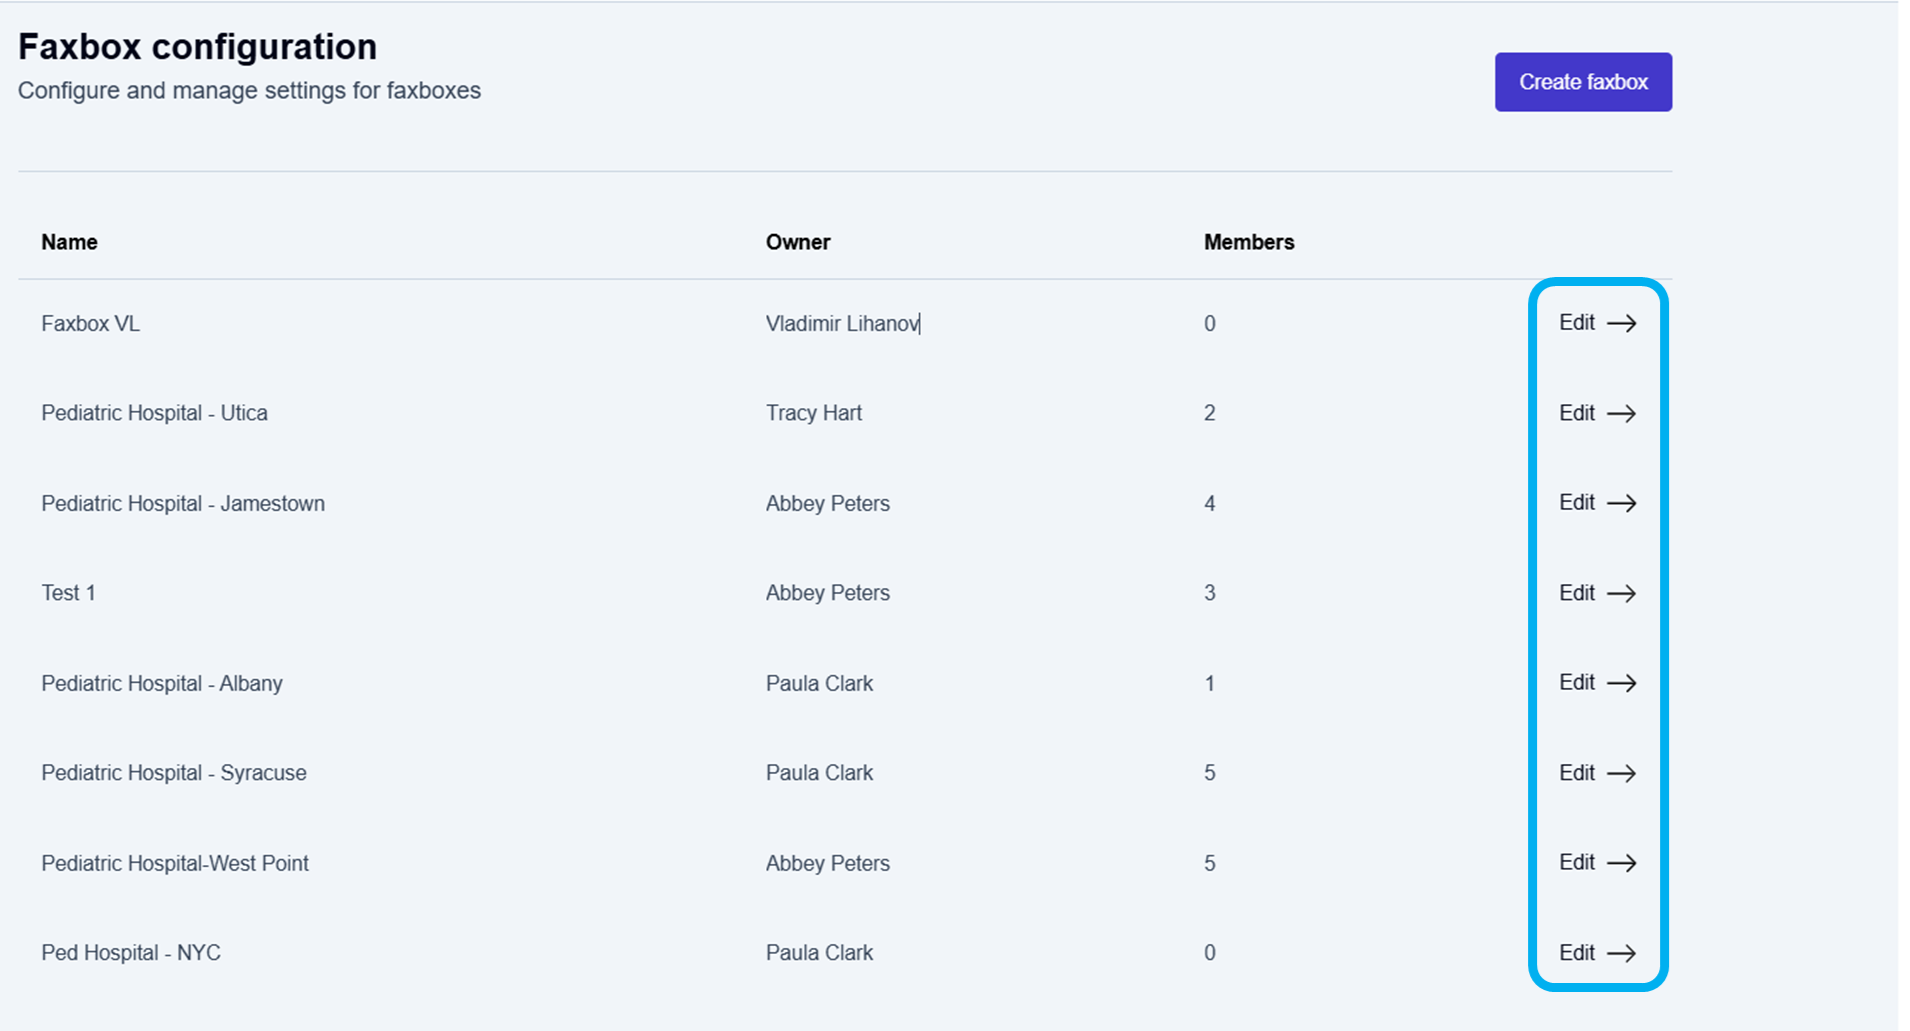
Click Edit--> at the end of the row for the faxbox that needs to be updated.
→ The Edit faxbox screen is displayed and allows you to add and update fax numbers. -
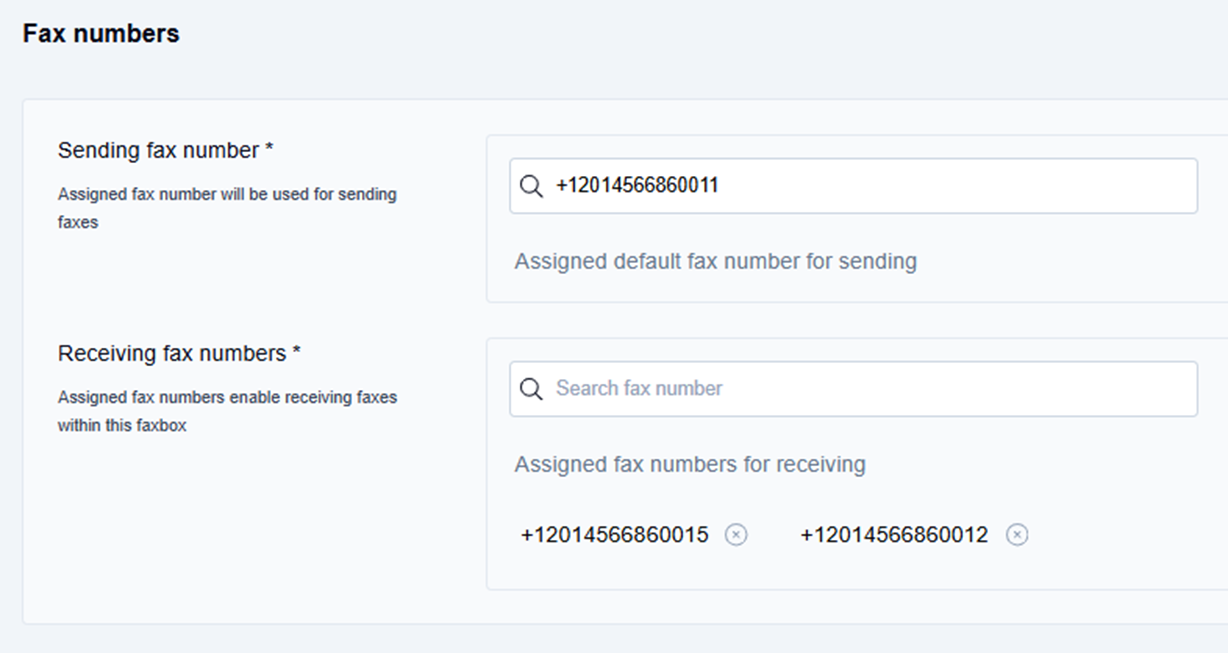
Scroll through the Edit faxbox options to the Fax numbers section to update the sending fax number and update or delete the inbound fax numbers.
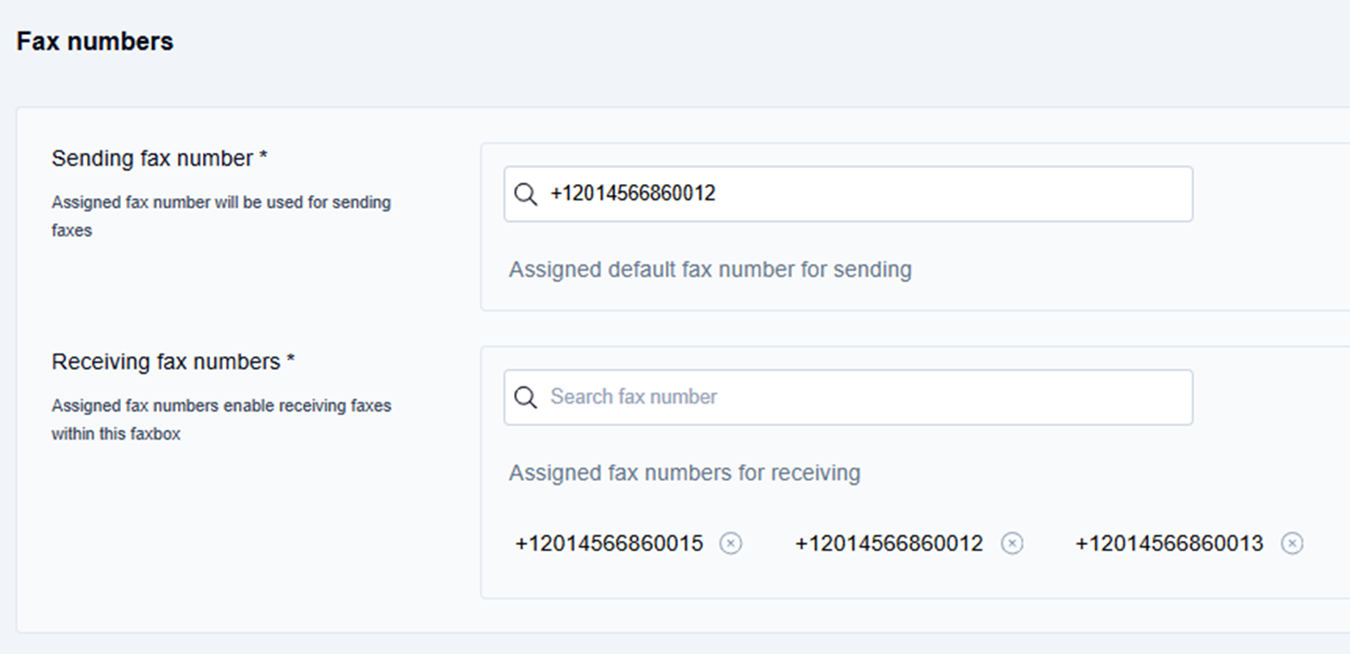
Change the default fax number for sending
-
Click inside the Sending fax number field and delete the current sending number.
-
Type a plus sign or the first few digits of the country code and fax number to display the autocomplete list of available fax numbers, and select a fax number from the list of available sending fax numbers.
→ The new sending number is displayed in the Assigned default fax number for sending field.
-
Update inbound fax numbers
-
Click inside the Receiving fax numbers field:
-
Type a plus sign or the first few digits of the country code and fax number to display the autocomplete list of fax numbers, and select a fax number from the list of available inbound fax numbers.
→ The newly added inbound fax number is displayed below the Assigned fax numbers for receiving heading.
-
Delete inbound fax numbers
-
Click the delete icon (

→ The deleted inbound fax number is removed and no longer displayed below the Assigned fax numbers for receiving heading.
📌 Confirming changes to faxboxes
You must click the Update button at the top of the Edit faxbox screen to complete any updates or deletions made.
Save the changes made to the faxbox
-
Scroll to the top of the Edit faxbox screen, and click the Update button.
→ The Faxbox updated message displays at the bottom of the screen.
→ The updated information is saved and returns you to the Faxbox configuration page.
To go back to your list of faxboxes:
-
Click the Enterprise Fax Portal tab at the top left in the main menu ribbon.
→ Your list of available faxboxes is displayed.