User Guide for Retarus Fax for Outlook Add-In
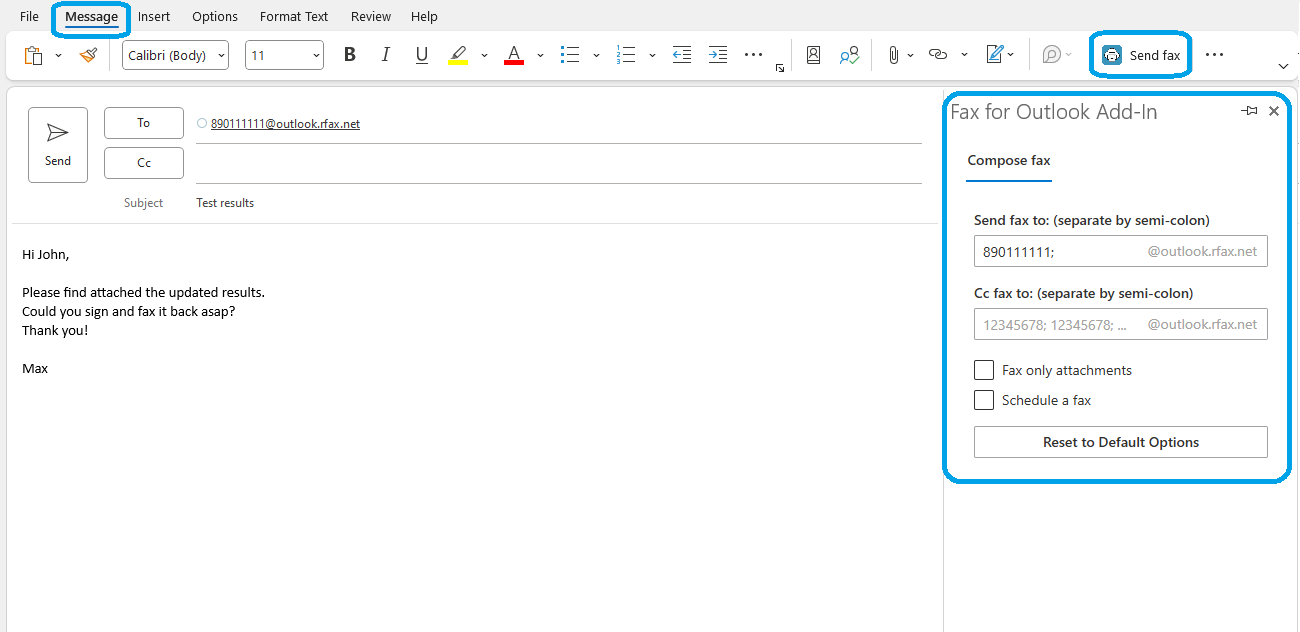
The Retarus Fax for Outlook Add-in enhances your Retarus Email-to-Fax and Fax-to-Fax experience, allowing you to send and receive faxes seamlessly within your Outlook email. Once you’ve installed the add-in, you’ll see the Send fax ![]() button when you create a new email. You'll find this button in different locations depending on your Outlook version. For example, if you use Outlook for PC, you'll see it in the ribbon on the Message tab when you open a new email.
button when you create a new email. You'll find this button in different locations depending on your Outlook version. For example, if you use Outlook for PC, you'll see it in the ribbon on the Message tab when you open a new email.

Prerequisites
Microsoft Outlook installed, or Outlook Web Access
Retarus Email-to-Fax and/or Fax-to-Email account
Retarus Fax for Outlook Add-In installed
How to send an Email-to-Fax with Outlook
https://vimeo.com/1046740750Select New Email to start a new message.
Select the Send fax button.
→ This opens the Fax for Outlook Add-In interface in the right sidebar of your application.Type the fax number in the Send fax to field using the following format: +16145556789, +490123456789, +18661234567 OR 0016145556789, 00490123456789, 0018661234567.
Click anywhere outside the Send fax to field.
→ The fax number is displayed in the To field.Optional: Repeat steps 3 and 4 to fill in the Cc fax to field.
→ The fax number is now displayed in the Cc field of your application.Type a subject for your email.
Type your message in the body of the email. This will be sent as the first page, before the attached pages.
Select the paperclip/Include button to add attachments to the fax.
Click Send.
→ Your fax is transmitted.
→ After the fax is transmitted, you will receive either a successful delivery or an unsuccessful delivery notification in your email, with a comprehensive report about your fax transmission.
Delivery notifications
To get a detailed overview of the fax transmission for the fax you sent, open the successful or unsuccessful fax delivery email notification in your Outlook from no-reply.mail2fax@retarus.net.
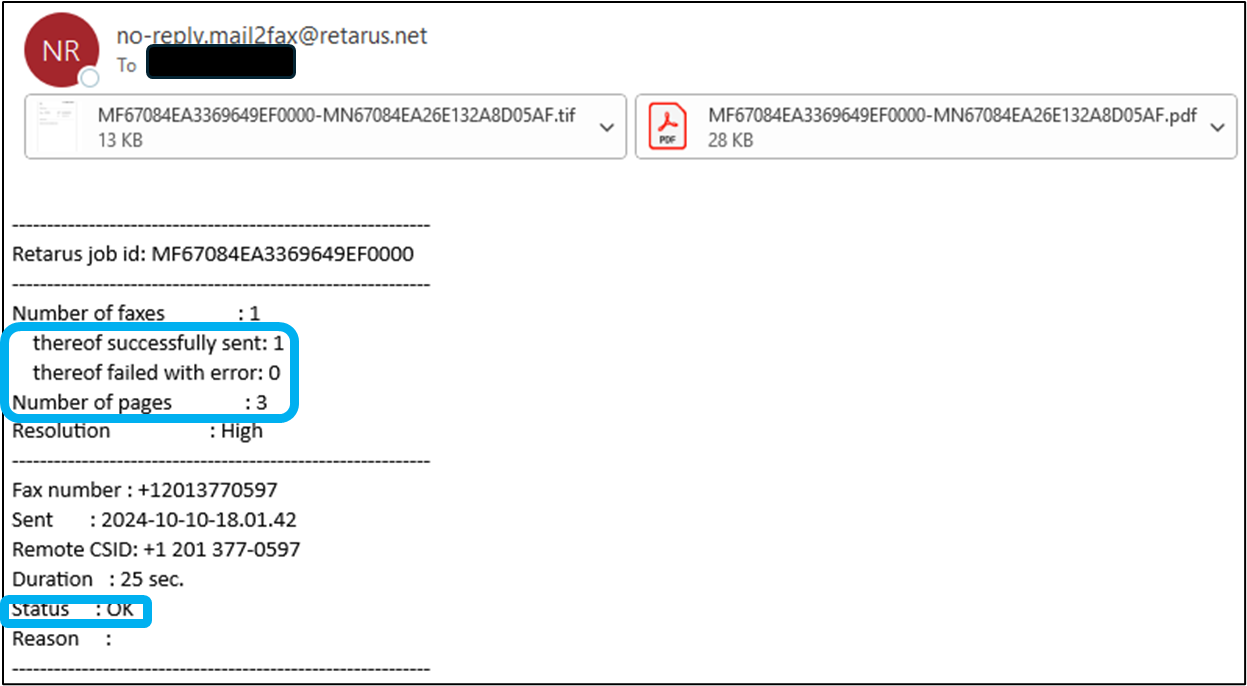
Successful fax delivery notification
In this example where the fax transmission is successful, there is 1 fax thereof successfully sent, with the Number of pages successfully sent being 3, and the Status is OK
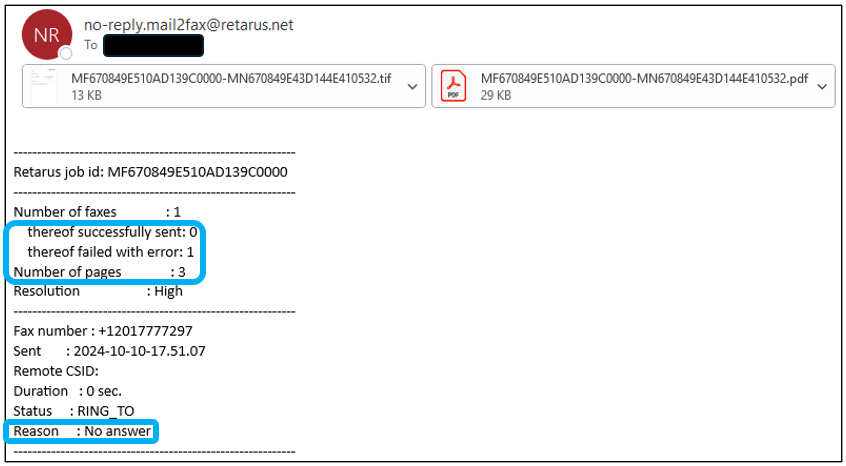
Unsuccessful fax delivery notification
In this example where the fax transmission is unsuccessful, there is 1 fax thereof failed with error, with the Number of pages unsuccessfully sent being 3, and the Reason is No Answer
Message format
Messages sent through Fax for Outlook Add-In are formatted with the recipient’s fax number followed by the Retarus Email-to-Fax gateway domain:[Fax number]@[Retarus Email-to-Fax Gateway Domain]
Examples+12011111111@outlook.rfax.net+498920202020@outlook.rfax.net
Using geolocation, the fax is automatically routed to and processed in the sender's region at one of Retarus' dedicated data centers (North America, EMEA, APAC).
Customize your faxes
While a default cover page is automatically included with your faxes, you can create personalized cover pages that reflect your company's identity. In the EAS portal, you can customize cover pages to include:
Business contact information
Custom messaging and disclaimers
Relevant company details
And more
To learn more about creating and managing custom cover pages, see Cover pages.
Fax sending options
📌 Modifying sending options
Your administrator can modify the default sending options.
Option/Field | Description |
|---|---|
Send fax to/Cc fax to | Sends a fax to several recipients at once. Use a semicolon to separate recipients. The gateway address (e.g., |
Fax only attachments | When enabled, the fax includes only the attachments without any accompanying email text. |
Schedule a fax | Schedules faxes for later delivery. When this feature is activated, additional fields are displayed where you specify the desired sending time and date. Select both a time and a date to ensure successful scheduling. 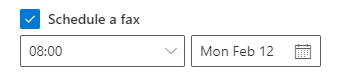 |
Reset to Default Options | Undoes any changes and restores the original settings. |
 | Opens the Retarus homepage. |
 | Opens the user documentation. |
Supported attachment formats
Retarus Email-to-Fax supports the following text, spreadsheet, and presentation file types, as well as standard graphic file formats:
DOC(X), PDF, TXT
XLS(X)
PPT
JPEG, GIF, TIFF, BMP, PNG
HTM, HTML
PS, PCL
More detailed information can be found in the Retarus Email-to-Fax user manual.
Working with fax messages received in your Outlook
Double-click the fax message you wish to view in your Outlook Inbox.
→ The fax messages you receive are displayed with the sender’s fax number (as long as the sender’s fax number was passed on from the sending fax service or fax machine to Retarus) and an email address with a Retarus domain such as gla.from@retarus.net.To view and work with the fax attachment:
Double-click the PDF or TIF attachment.
→ Open or Save the fax document as needed.For a quick action on the fax PDF or TIF attachment, open the dropdown menu next to the attachment and choose an action such as Open, Quick Print, Save As, Upload, Copy, or any other available option.
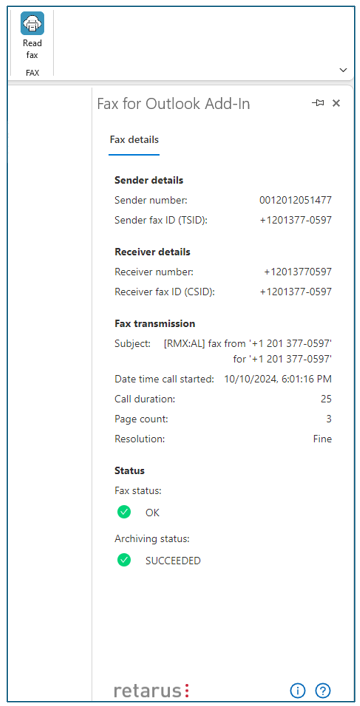
To view a detailed fax transmission report for the fax you received, click the Read fax button.
→ The Fax for Outlook Add-In fax transmission details open in the right sidebar.