Retarus SMS Connector for S/4HANA via BC-SMTP
You can use Retarus SMS for SAP to send SMS messages directly from your SAP system via the BC-SMTP interface. Status reports are delivered directly to your SAP system. This manual explains the installation of Retarus SMS for SAP for the BC-SMTP interface. All of the installation steps and screenshots are for SAP Netweaver Version 7.31.
The installation process consists of the following steps:
Configuration of SMTP routing
Optional configuration of a TLS or VPN connection
Configuration of the SAP default domain
Configuration of a SAP SMTP node
SAP address book administration
User management for the service in the EAS portal
Validation of the service
Configuration of SMTP routing
In the SAP BC-SMTP interface, SMS messages and their corresponding status reports are addressed in email address format. These email addresses have to be configured so that they can be sent and received directly via the SAP system. For this reason, we recommend that a subdomain be installed just for communication via SAP in order to ensure that administration and email routing is as simplified as possible.
Sample
Sender address: your_mobile_number@sap.yourdomain.com
Recipient address: recipient_mobile_number@sms.retarus.com
Sample SAP subdomain: @sap.yourdomain.com
This subdomain must later be configured as the default domain in the SAP system.
Configuration of the SAP default domain
Use SAP Easy Access to reach the SAPconnect application:
Via the SAP menu: Tools - Business Communication - Communication - SAPconnect (TC: “SCOT”).
In the Settings menu, select the Default Domain and enter the previously installed domain.

Configuration of an SAP SMTP node
In SAPconnect, at least one SAP SMTP node has to be installed in order for all communication parameters to be configured. The Configuration Wizard provides step-by-step assistance in entering these parameters. To begin the process, click on Create Using the Wizard in the Nodes menu.
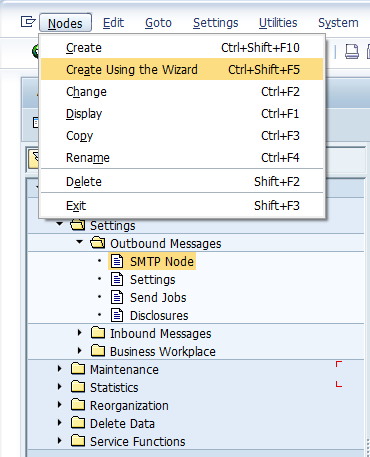
Wizard
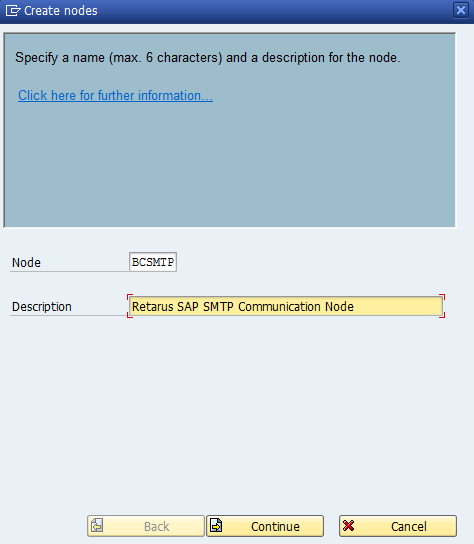
The initial step is to assign a unique name to SAP SMTP node in the Node field. The name can have a maximum of six characters. In the Description field, you can enter and save a clear description for the node.
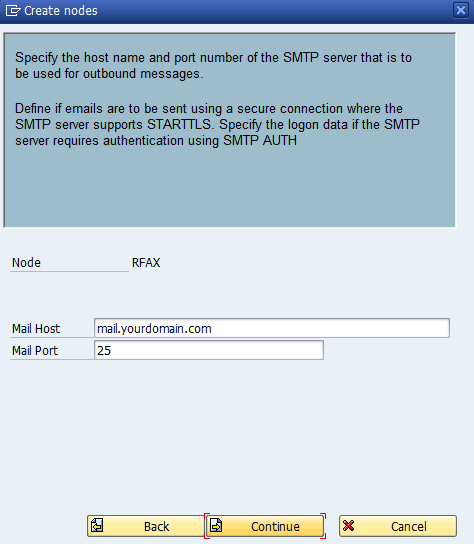
Enter your Mail Host for outbound messages (for example, “http://mail.yourdomain.com”) and add the mail host‘s corresponding Mail Port (generally, “25”) that was configured for the TLS handshake (http://tools.ietf.org/html/rfc3207).
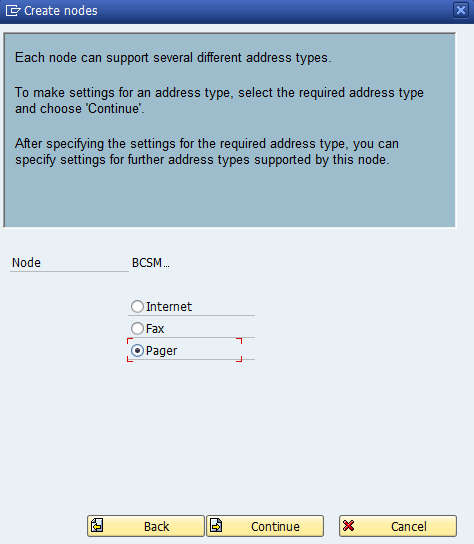
The next step is to select the service that you want to configure (in this case, it’s Pager).
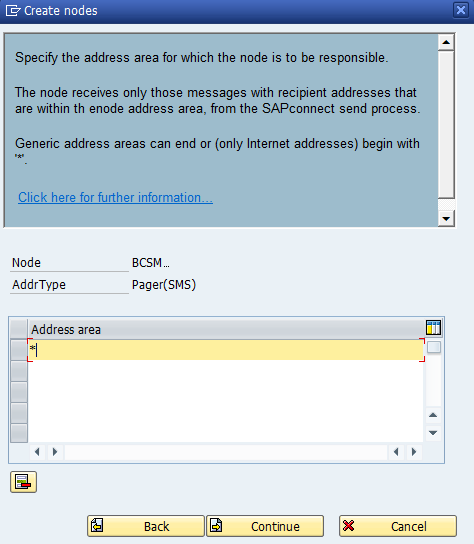
You will now create an address book for this node. If the node is used for all of the addresses, enter a “*”.
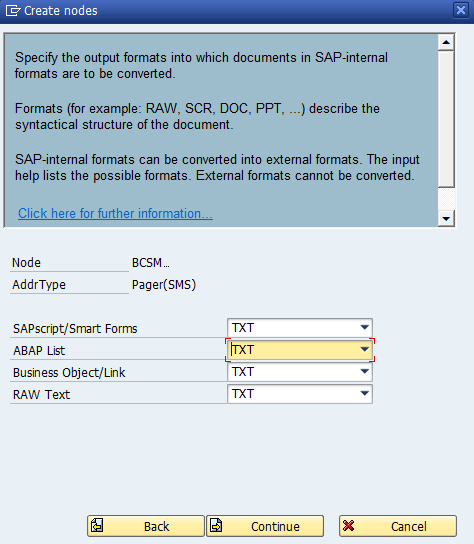
The following menu provides the opportunity to select a base output format regardless of its source. Select the TXT format.
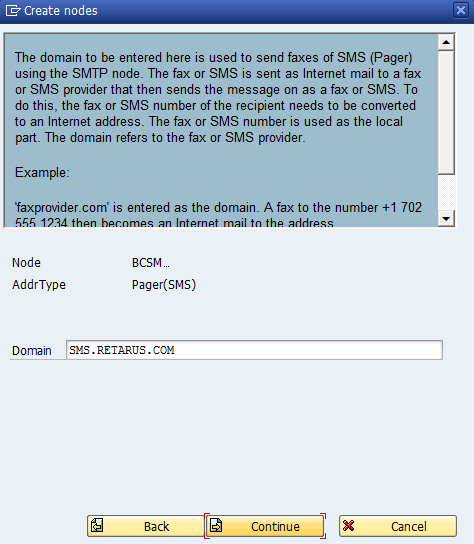
The next step is to specify the domain for Retarus SMS for SAP Services: sms.retarus.com. All SMS messages sent to the Retarus infrastructure via SMTP will be sent to this domain.
Sample: recipient_mobile_number@sms.retarus.com
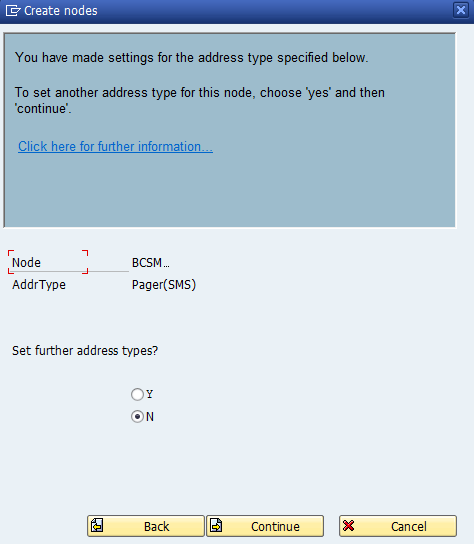
If you also want to configure Retarus Faxolution for SAP, select Y instead of N.
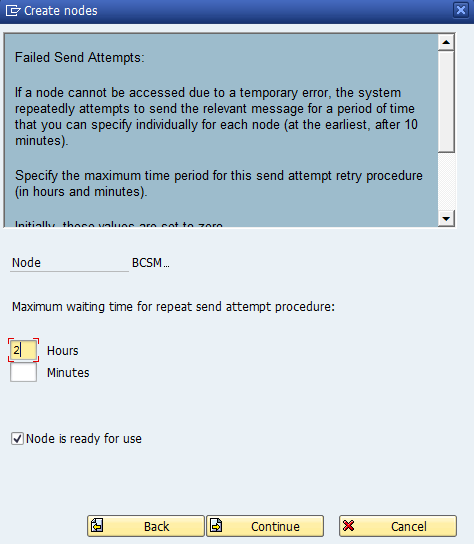
Next, you can configure the length of the period during which attempts to re-send a failed SMS transmission will be repeated. We recommend entering two hours.
The SAP SMTP node has now successfully been configured and is ready for use.
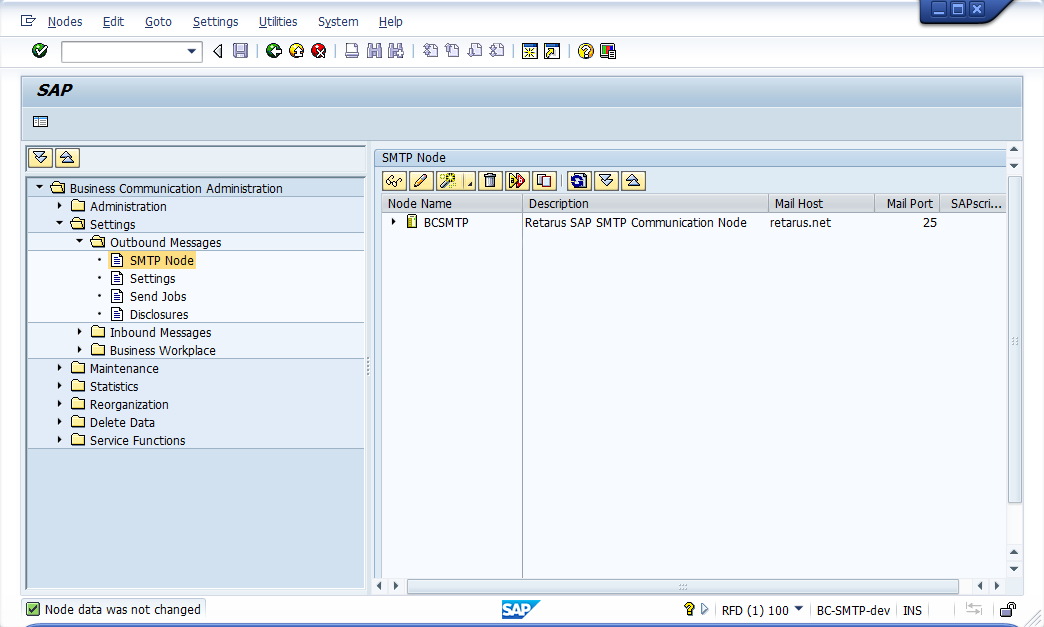
SAP address book management
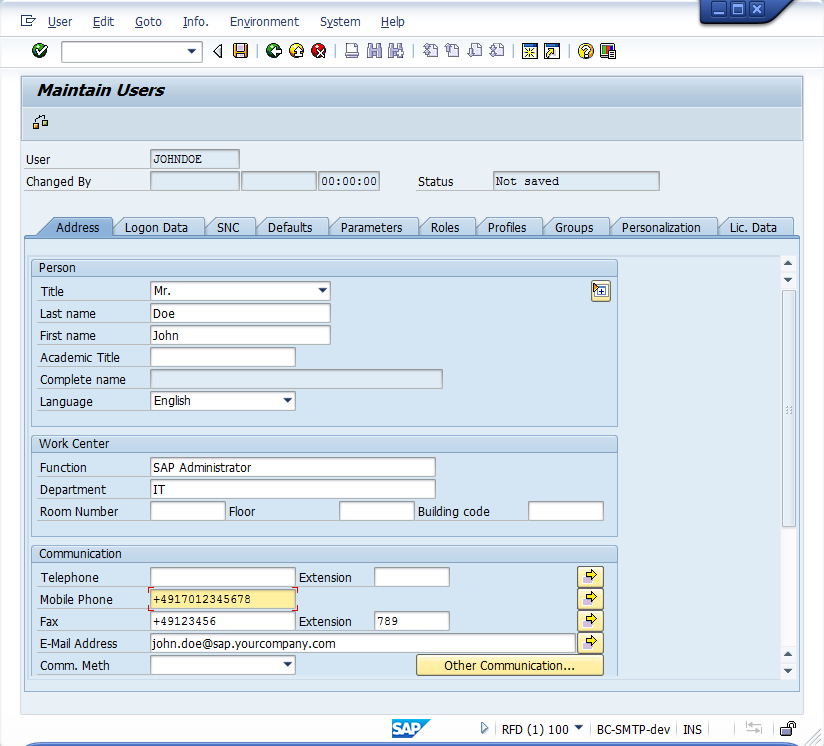
In order to send an SMS message using SAP via BC-SMTP, a user must save a mobile number that simultaneously serves as part of the sender address.
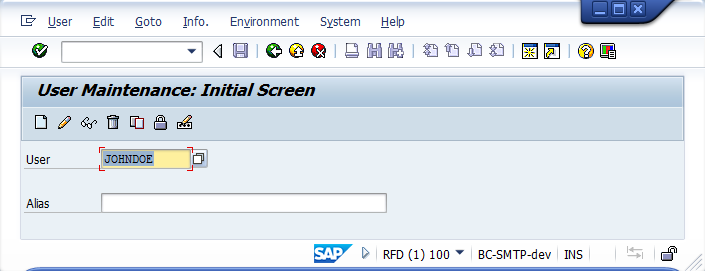
Use SAP Easy Access to reach User Maintenance.
Via the SAP menu: Tools - Administration - User Maintenance - Users
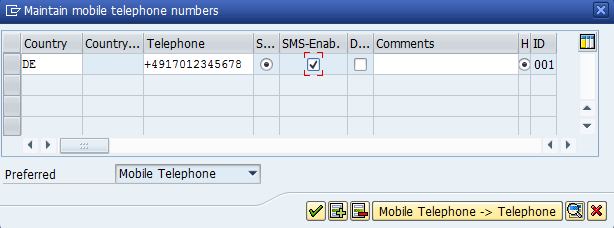
Enter the user’s mobile phone number in the Mobile Phone field under Communication. Complete this step for each user that needs to send SMS messages.
The next step is to click on the arrow symbol to the right of the Mobile Phone entry field. A valid value in the Country field (e.g., US) then must be entered. In the SMS Enab. column the checkbox for the specified number has to be activated.
EAS Configuration
Administration and configuration for users of the service takes place in the EAS portal. The configuration simultaneously doubles as the validation of the transmission. In addition, you can configure additional SMS settings. Because SMS for SAP is the base technology for Retarus Email-to-SMS, all configurations are made in the Email-to-SMS menu. An SAP client will already have been pre-configured by Retarus.
The next step is to log on to the EAS portal and navigate to the Email-to-SMS menu via Administration - SMS Services - Mail2SMS. Additional information on the general configuration of Retarus Email-to-SMS is available in the Email-to-SMS documentation.
Creating service users in EAS
A new user is created using the Add User button under the User tab. Accurate entry of the user name in the Name field (see below) is crucial. This name corresponds exactly to the SAP system’s exact sender address.
sms=your_mobile_number@sap.yourdomain.com (e.g. sms=+491701234567@sap.yourdomain.com)
In the Profile field, select the SAP profile (which has already been created by Retarus). The Report format field under Status messages has to be explicity set to SAP in order for status reports from your SAP system to be interpreted.
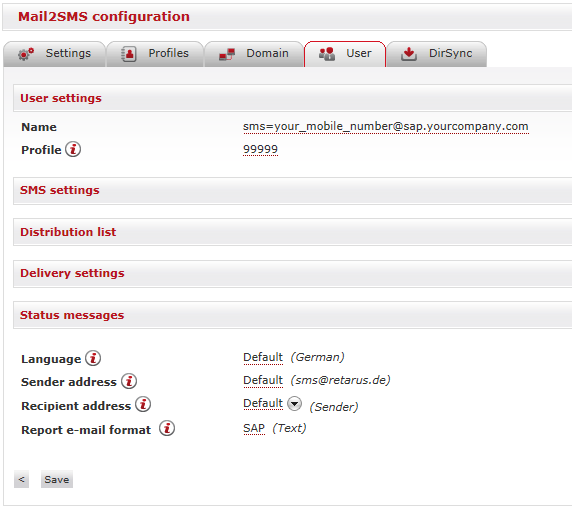
The new service user or any configuration updates are saved by clicking on the Save button.
Service validation with SAP Workplace
Once all configuration steps are completed, SMS transmission can be validated with the assistance of the SAP Workplace application.
Use SAP Easy Access to reach the SAP Workplace application:
Via the SAP menu: Office - Workplace
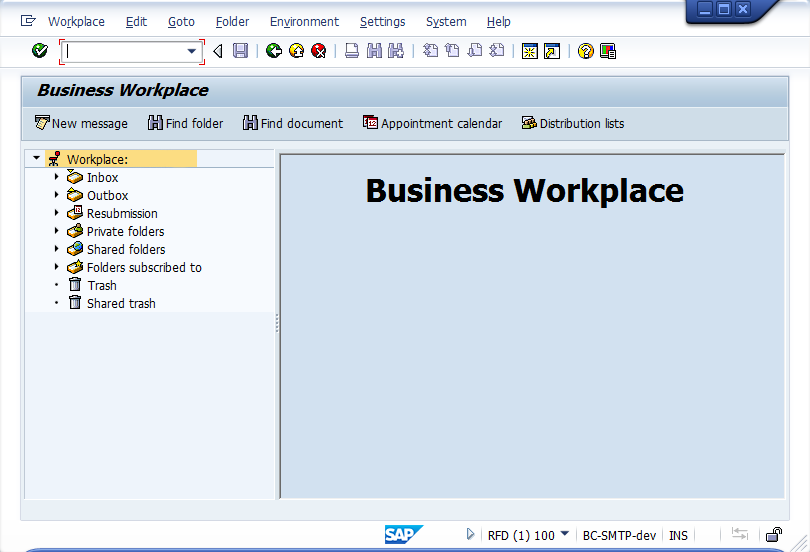
Click on New message in order to compose a new SMS message.
Enter the recipient’s SMS number in the Recipient column, while observing the format displayed below. Pager number must be selected from the Recip. Typ drop-down menu. Depending on the value selected in drop-down menu in the SMS source field in the EAS portal, the SMS message can be entered in the Title (subject), the message text box (body), or in both. Regardless of the value in the Max. SMS parts field in EAS, only the maximum number of characters for a single SMS is available to you.
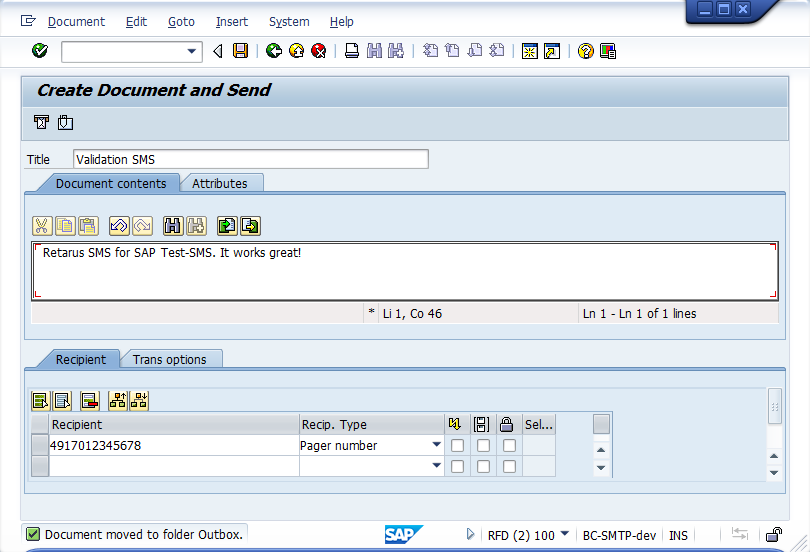
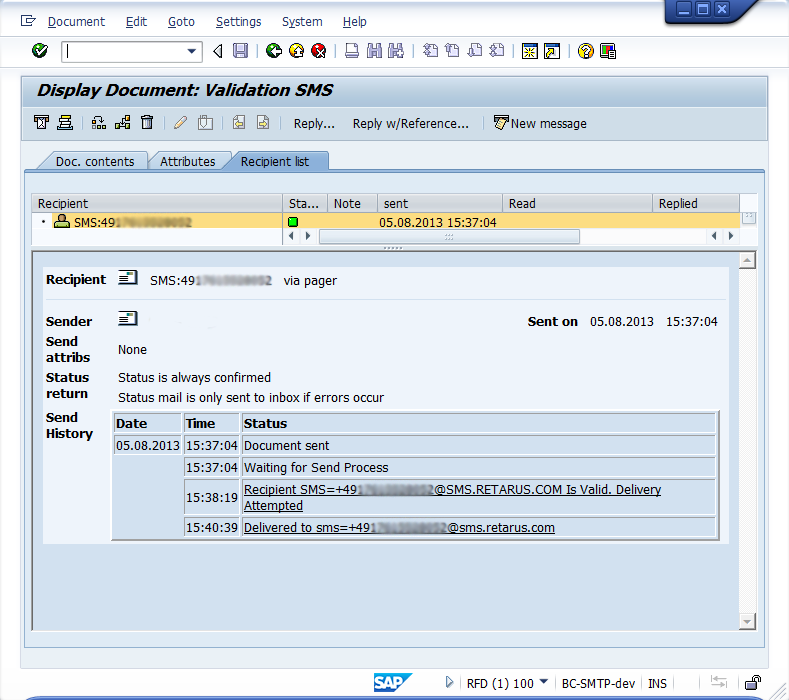
Next, open the Outbox in SAP Workplace and select a sent SMS message by double-clicking on it. The document’s current status can be monitored under the Recipient list tab. The recipient list is not automatically updated in SAP Workplace, which means that the message has to be continually retrieved for updates until the Delivered to status appears. If you receive the status displayed below along with a green status symbol, the SMS was successfully delivered and the status report successfully received. The configuration is now complete.
SAP reference document
SAP Note 455140: Configuration of email, fax, paging or SMS using SMTP
