
Prerequisites
In order to create an OAuth profile, the customer needs a Romanian tax number issued by the Romanian tax authority ANAF (Agenția Națională de Administrare Fiscală).
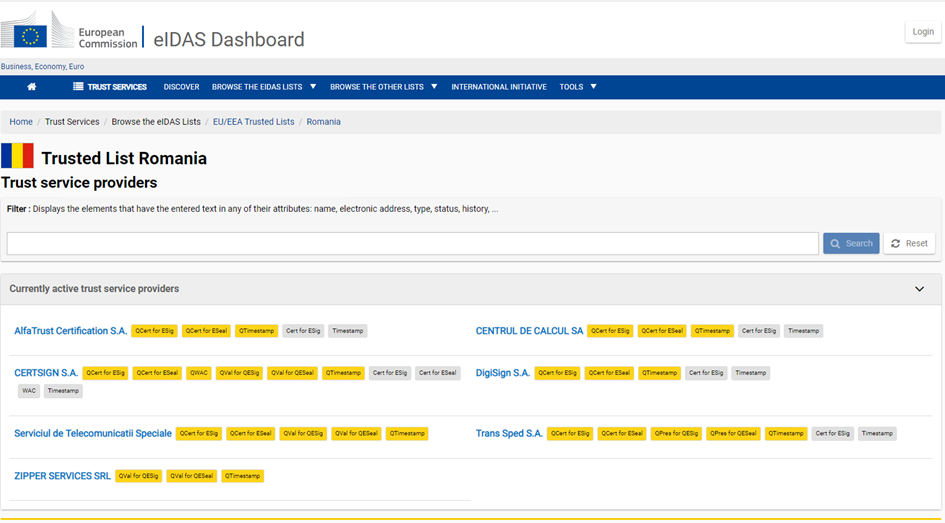
To obtain an OAuth profile, the taxpayer must acquire a qualified certificate for electronic signature from one of the Trust Service Providers in Romania.
Link https://eidas.ec.europa.eu/efda/tl-browser/#/screen/tl/RO
How to generate the authorization token
To integrate ANAF services exposed on the Internet with third-party applications (web, desktop, or mobile), ANAF has implemented a solution to authorize access to API-type services, using standard mechanisms based on the use of the OAUTH protocol. This solution uses standard mechanisms based on the OAUTH protocol and is intended for application developers with knowledge of IT and of the Oauth 2.0 protocol. This is because application development is required to use this solution.
The following steps are required to obtain the credentials:
Retrieve the client ID and the client secret
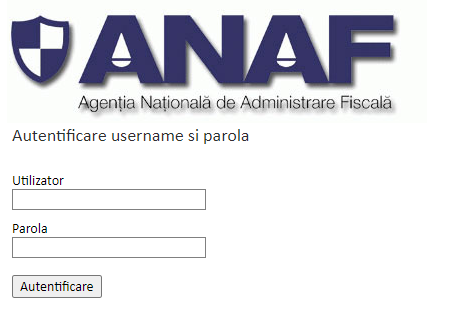
Go to the ANAF web page, then select the link under Autentificare utilizator (user authentication):

Enter the username and the password and proceed to log in:
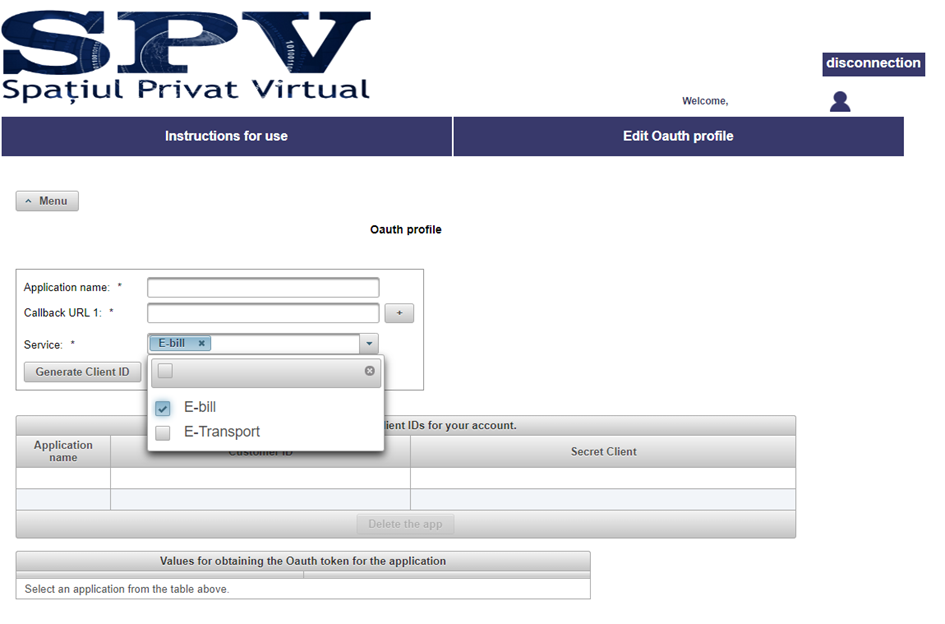
Once logged in, go to Editare profil Oauth (Edit Oauth profile):
After reaching the application registration page, multiple services will be available under the Meniu (Menu):
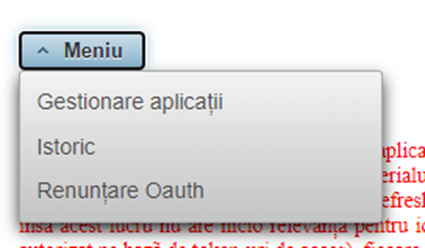
Select the Gestionare aplicații (Application management) option:
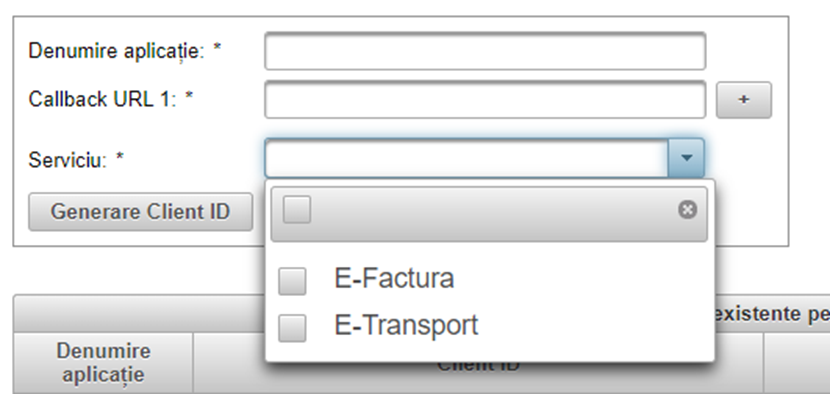
Next, fill in the information and select the E-Factura for Serviciu (Service).
Additionally, select E-Transport if you intend to use the RO e-Transport system.
If the customer uses the Postman application, it’s possible to use https://oauth.pstmn.io/v1/callback as a callback URL. This is where the response from ANAF is sent received when the request is processed, but it will simply appear in your browser along with authorization code (explained in more detail in the next chapter).
In case the customer is not using Postman, it’s possible to use any URL, it just needs to exist as your browser will call it during successful authorization later.
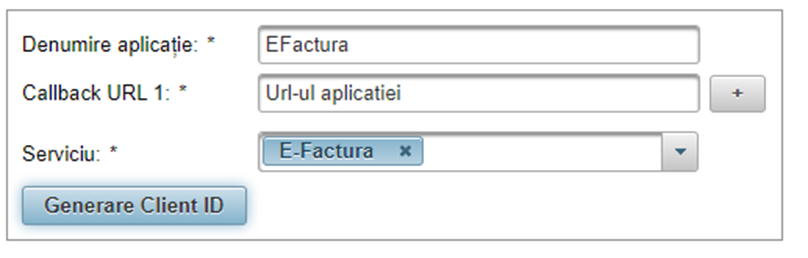
After pressing the Generare Client ID button, the customer can retrieve the client ID and the client secret.

Retrieve access and refresh token
In this step, after registering an application (obtaining the client ID and secret), we can proceed to obtain the access and refresh tokens. This process consists of two main steps. It is recommended to prepare step 2 in Postman before executing both steps, as the ‘authorization code’ is short-lived.
GET authorization code:
-
Customers must open the following link in the browser, replacing the clientId XXX and callback URL YYY with the values obtained when registering the application at ANAF:
https://logincert.anaf.ro/anaf-oauth2/v1/authorize?client_id=XXX&response_type=code&redirect_uri=YYY&token_content_type=jwt.
Note that the customer must do this in the same browser where their qualified certificate is installed. The process might involve popups, therefore we recommend disabling popup blockers for this part.
-
In the browser, the customer will be asked to authenticate against the Certificate Authority from which their qualified certificate was issued.
-
Upon successful authentication, there will be an authorization code in the response URL that should be copied from the browser.
POST authorization code:
The client must open Postman and configure the following call as in the image:

This is the URL used in the image for easier reference: https://logincert.anaf.ro/anaf-oauth2/v1/token
-
The following must be filled in, like in the image:
-
Grant type: The fixed value “Authorization Code”.
-
Redirect URI: Configured by the customer when enrolling the application.
-
Client ID: obtained by the customer when registering the application
-
Client secret: obtained by the customer when registering the application
-
Code: The authorization code obtained in step 1.3 (above).
-
Token Content Type: The fixed value “jwt”.
-
-
Select “Send” in Postman
-
The response will contain an access token and a refresh token.