Managing rules in Predelivery Logic
Access and overview
If the service has been booked and activated, the Predelivery Logic configuration can be accessed via
the portal: myEAS (https://myeas.retarus.com) - Administration - Predelivery Logic.
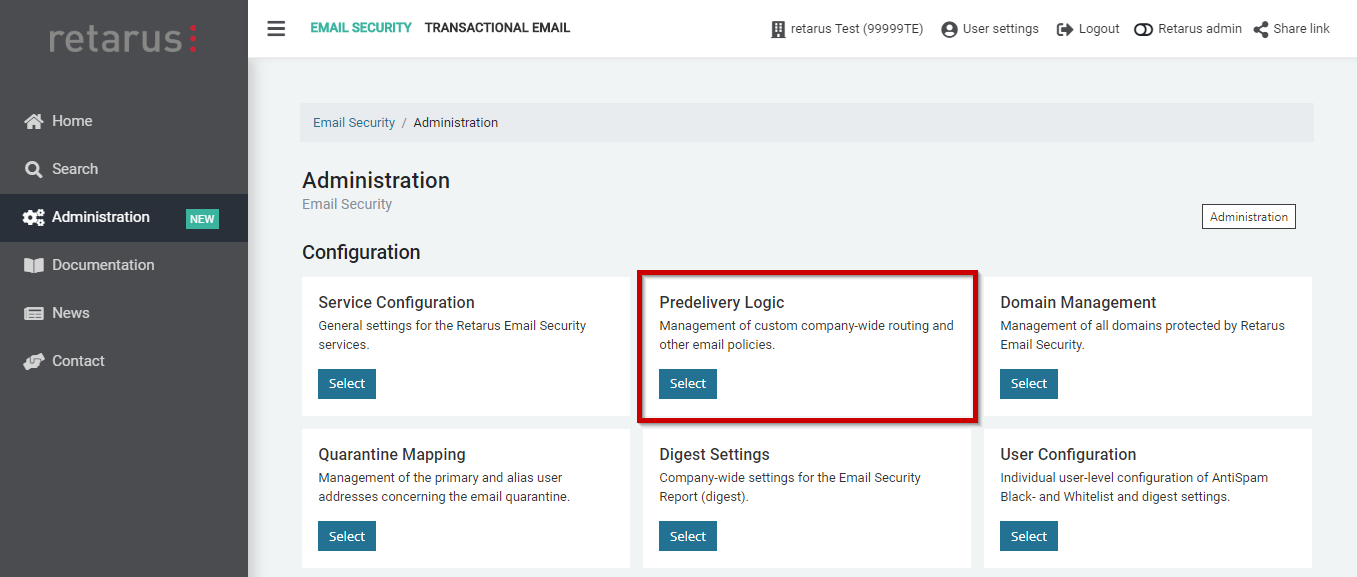
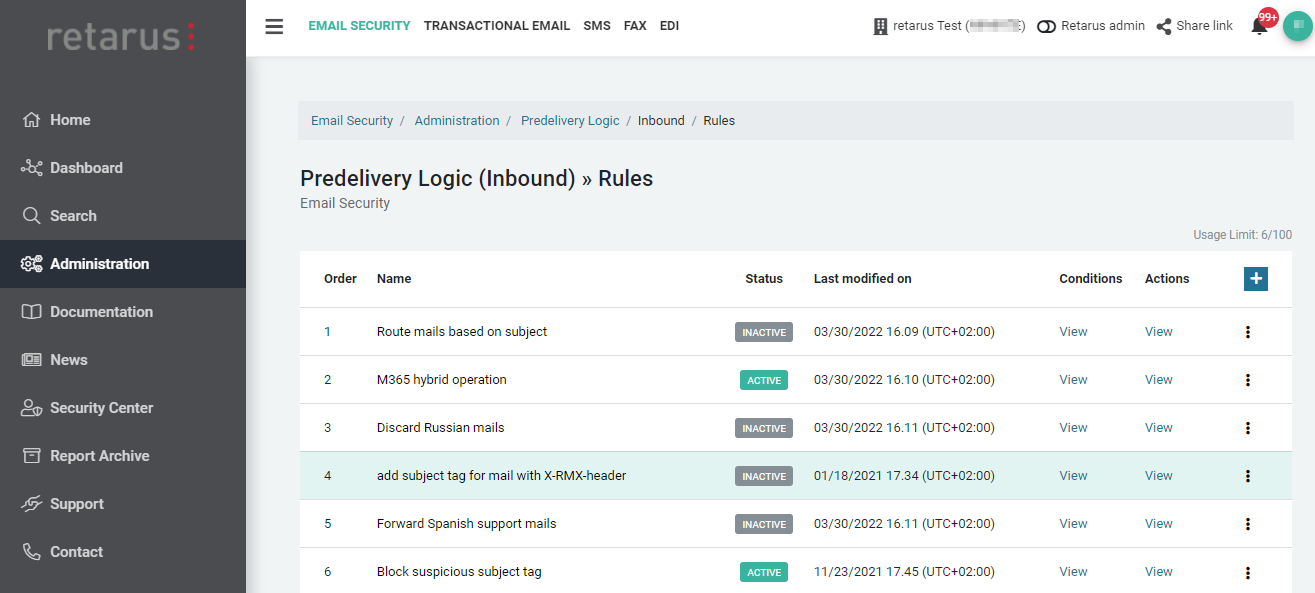
Here, you may choose between configuration of rules for Inbound or Outbound email traffic and then
get a list of your existing rules. At first start, the list is empty.
Creating/editing rules
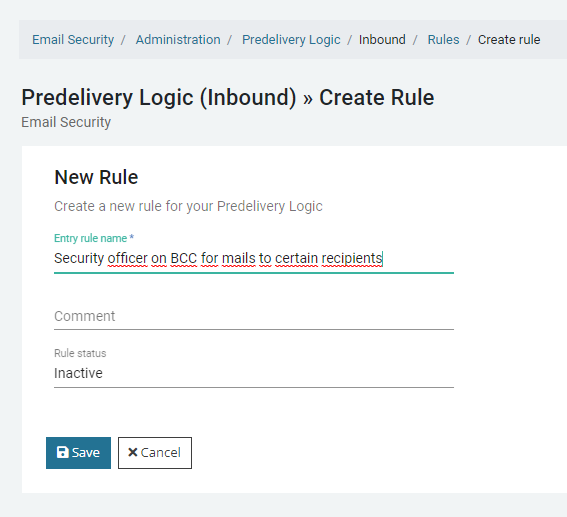
A new rule can be added by clicking on the “+” sign on the right side on the rule list overview. To edit a
rule, click on the “Edit” icon on the right side in the line of the respective rule.
A red counter to the right side indicates if you may still add an additional rule or if the maximum of 100
rules is already reached.
When creating a new rule, it is in the beginning an empty “container” consisting of a name and an optional description. A new rule is deactivated by default (in order to avoid rules being executed that are not completed yet). In a second and third step, conditions and actions are added to the rule.
Creating/editing conditions
After the rule “container” itself has been created, you may add one or more conditions to the rule.
In order to do this, on the overview page with your rules, click on “View” in the column “Conditions” of
the respective line of the rule for which you would like to add (or edit) a condition.
A red counter to the right side indicates if you may still add an additional condition or if the maximum of
100 conditions is already reached.

You get to see the list of all conditions contained in the respective rule. (At first start, the list is empty.)
You may now click on the “+” sign to the right side to add a new condition to the rule.
Enter a name for the condition, an optional description and choose the type of condition, the desired
operator and the values.
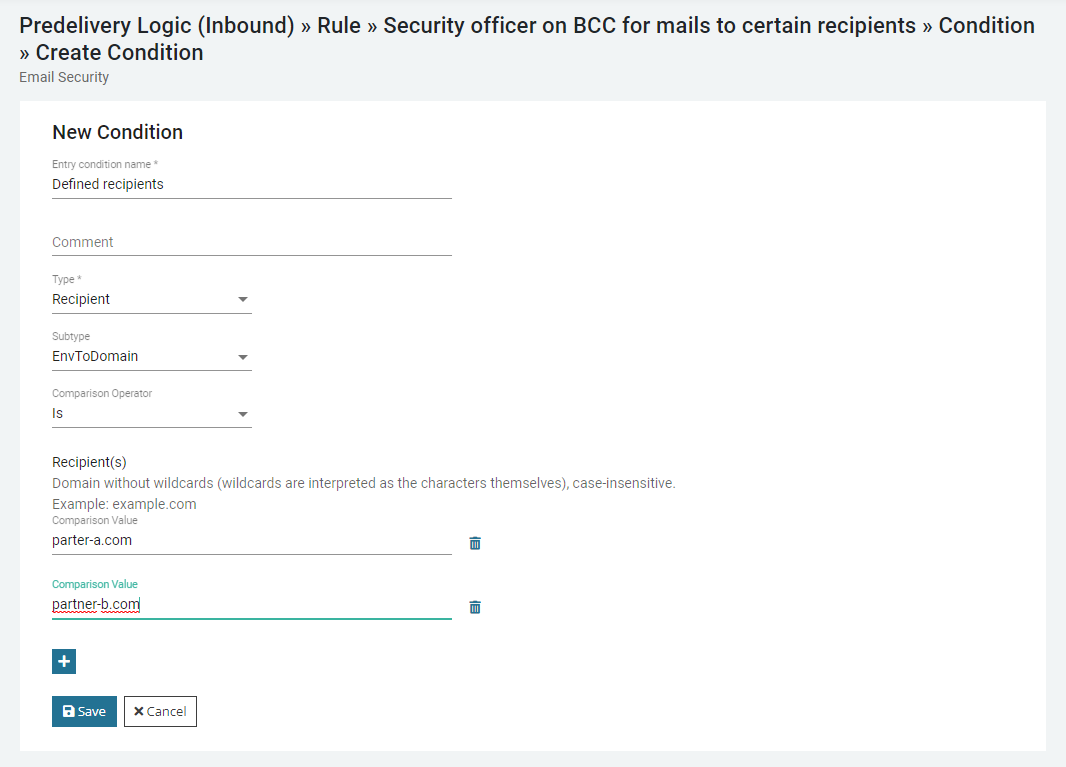
An overview and details about all available conditions can be found in Annex: Conditions.
Testing a rule
If you would like to test a rule before using it in your productive environment for all users, you may simply
add the condition “Recipient” and use a test email address as the recipient address, so that only emails to
your test address are affected by the rule.
Creating/editing actions
As for the condition, you may proceed to create/edit an action to be executed if all conditions match. In
the list of all rules, click on “View” in the column “Actions” in the line of the rule where you would like to
add/edit an action. You get to see the list of all actions contained in the respective rule. (At first start, the
list is empty.) You may now click on the “+” sign to the right side to add a new action to the rule.
A red counter to the right side indicates if you may still add an action or if there is already an action –
which means that an additional one cannot be added.
For the new action, enter a name, an optional description, choose the desired type of action and target
value (if applicable).
An overview and details about all available actions can be found in Annex: Actions.
Activating a rule
After the creation of a rule and its conditions and actions, the rule is still deactivated in order to avoid
rules being executed before all conditions and actions are finally created.
It may take up to 15 minutes before a newly activated rule is taken into consideration
for processing in all Retarus systems.
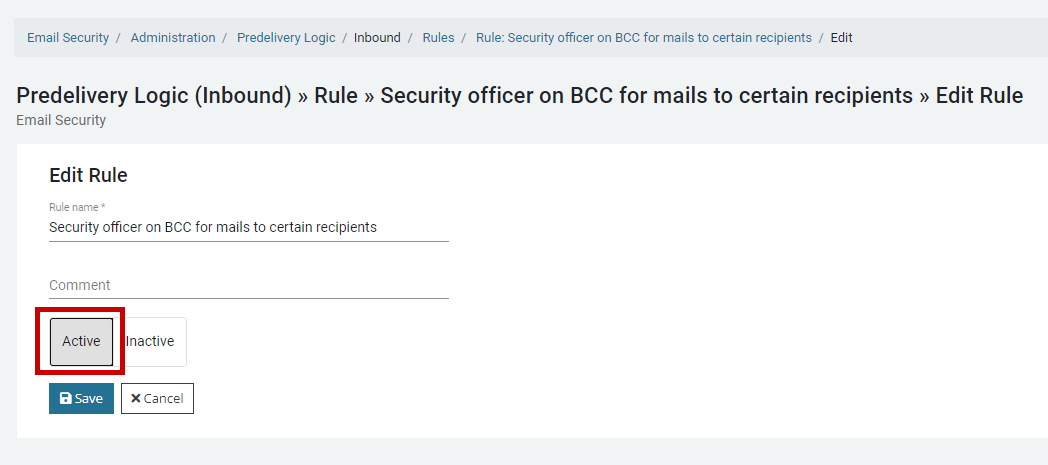
In order to activate the rule, click on the “Edit” icon (on the right side of the rule in the overview list of all
rules, probably hidden behind three dots if the screen is not wide enough), click the “Active” button and
save your changes by clicking on the “Save” button.

Changing the order of rules
For rules, the displayed order reflects the processing order and may be adapted.
The first rule, where all conditions match, is executed. All following rules are not regarded any more.
To change the order of rules, click on the arrow icon to the right side of the rule in the respective list (probably hidden behind three dots if the screen is not wide enough) – and choose where you would
like to put your selected entry.

Deleting a rule/condition/action
In order to delete an existing rule, condition or action, click on the trash can icon to the right side in the
respective overview list.

