Microsoft 365 Journaling
This manual explains how to configure Retarus Enterprise Email Archive as the destination for tamper-proof storage of your internal emails with the assistance of Microsoft 365 journaling functions. It is limited solely to demonstrating the specific configurations that are required for Microsoft 365 Exchange Online. These configurations may vary in other versions of Microsoft Exchange.
Retarus does not assume responsibility for the configuration, installation, or operation of any customer’s Microsoft 365 environment. This manual serves only as a guideline, so it is required to take note of the corresponding instructions from Microsoft, for example, in Journaling in Exchange Online.
Storage of internal emails
The Microsoft 365 journaling adapter as part of the Retarus Enterprise Email Archive is specifically designed to allow the storage of customer-internal emails in the Retarus Enterprise Email Archive, next to the inbound and outbound emails archived during the live processing of the email traffic. Internal emails are defined as emails with a valid sender and recipient address, where both fields include a domain belonging to the customer. This means that emails where the sender or the recipient address does NOT contain a customer domain are not archived by our journaling. This is important due to compliance and integrity reasons, but it also means that as a customer administrator, you have to make sure that all emails sent to Retarus via the journaling adapter contain a valid sender and recipient address with a domain registered at Retarus.
Customer tenant name
Add your Initial Microsoft Domain to Retarus configuration for journaling.
Retarus uses the customer’s tenant name (initial domain) to identify incoming messages for journaling. The initial domain name is created by Microsoft when you sign up for the service and cannot be changed for an existing subscription. The tenant name usually contains your organization domain name and takes the form yourorganization.onmicrosoft.com. The domain itself can be found, for instance, in the domain settings.

While this manual provides you with an overview of the workflow and parameters outlining how to configure Microsoft 365 journaling, Retarus currently handles this particular step in the setup process. Please provide your technical contact at Retarus with your initial domain name. We will then add the domain to your configuration.
Please do not activate any journaling rules as shown below prior to confirmation by Retarus.
Setting up journaling rules
Microsoft 365 uses journaling to archive emails by applying specific rules. As Retarus Enterprise Email Archive already automatically archives all external traffic, only internal emails have to be archived using Microsoft 365 journaling rules.
Selecting the address for undeliverable reports
Before you create a journal rule, you first need to specify an email account for receiving journal reports that can't be delivered to the journal destination.
In the Microsoft 365 admin center, go to Compliance Management and then to Journal rules. Select address to send undeliverable journal reports to. Browse to select a mailbox in your organization or an external contact as the recipient for the undeliverable reports.
We recommend using a dedicated mailbox for this purpose.

Creating a new journal rule using the Exchange Administration Console
The steps that need to be taken to create a journal rule for archiving internal emails are explained below:
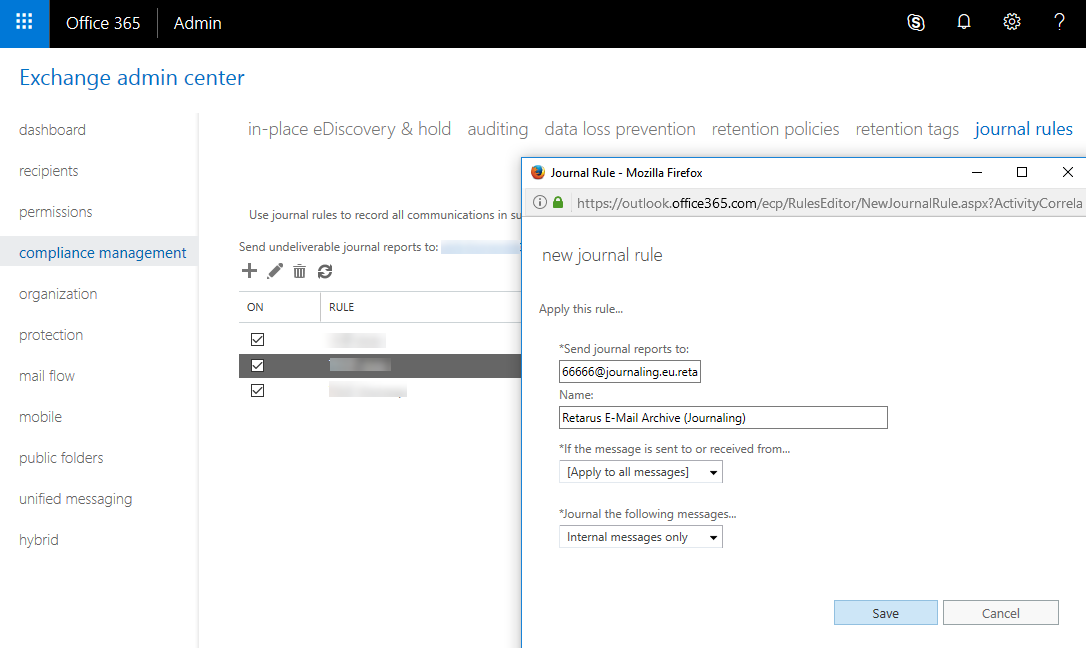
→ In the Microsoft 365 admin center, begin by clicking on Exchange under Admin Centers. Below Compliance Management, click on journal rules. Create a new journal rule by clicking on the + symbol.
→ Enter the destination address for the Retarus Enterprise Email Archive in Send journal reports to using the following format:[Your Customer Number]@journaling.eu.retarus.comExample: 66666@journaling.eu.retarus.com
→ Enter an appropriate name for the archiving rule, e.g., “Retarus Enterprise Email Archive”, and select [Apply to all messages] in If the message is sent to or received from. Set Journal the following messages to Internal messages only. Click on Save and confirm the next screen which asks Warning – Do you want this rule to apply to all future messages? with Yes.

→ Mark the checkbox to enable the rule if you intend to activate it immediately, but ensure that it is unmarked if the rule is still being set up and you would like the archiving process to be initiated at a later time.
Installing the Send Connector
To route targeted journal reports to Retarus, you must configure a send connector that defines the routing. Use the following configuration to install a new send connector:
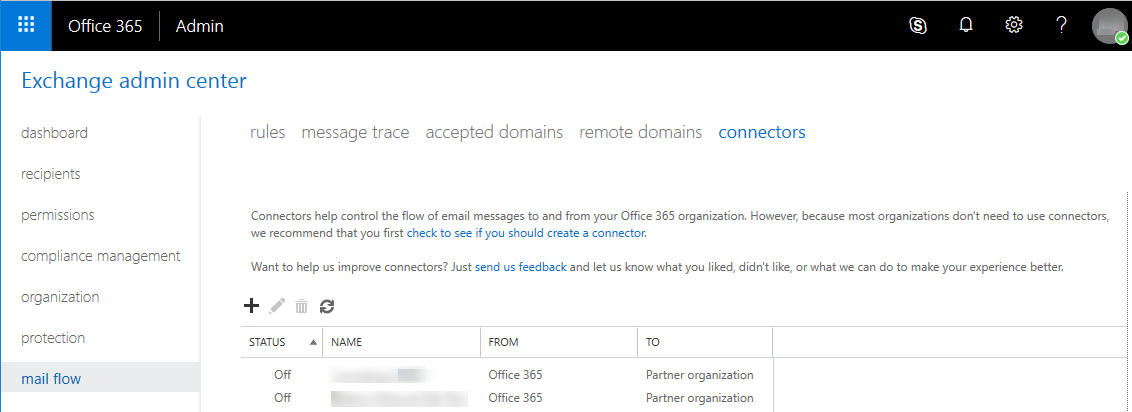
→ In the Exchange Admin Center, click on Connectors under mail flow. Create a new connector by clicking on the + symbol.
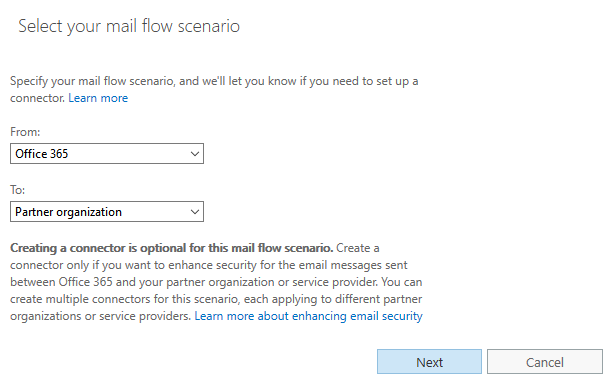
→ In the Select your mail flow scenario window, set From: to Office 365 and set To: to Partner Organization. Then click on Next.
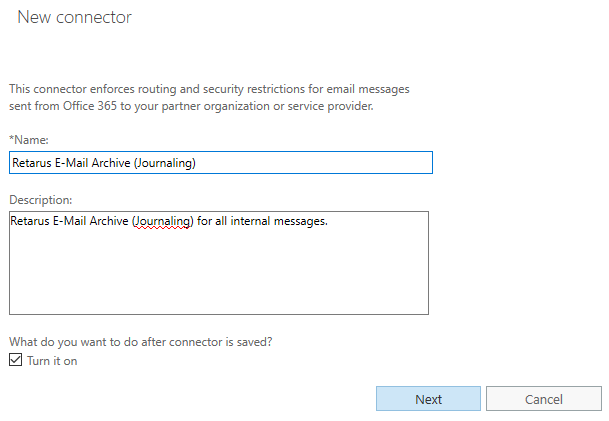
→ Enter an appropriate name and description for the new send connector in the New Connector window and activate the Turn it on field by checking the box. Click on Next to proceed.
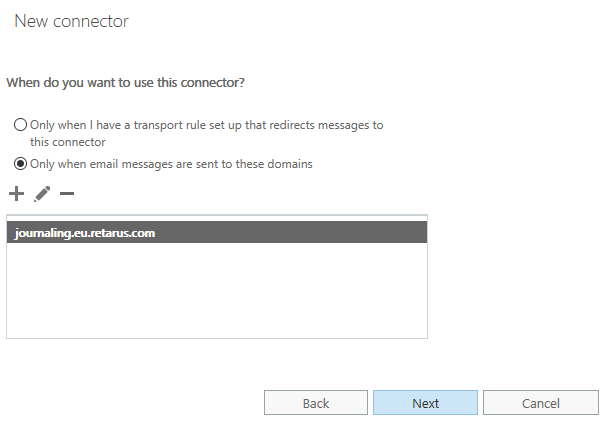
→ In the When do you want to use this connector? window, select Only when email messages are sent to these domains. Click on the + symbol and enter the destination domain journaling.eu.retarus.com. Confirm with OK.
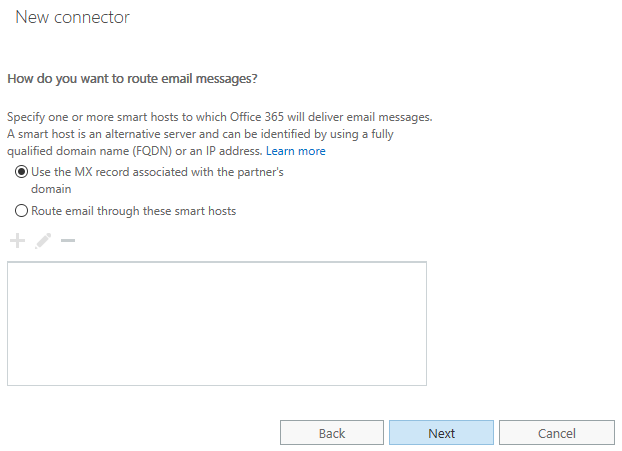
→ In the How do you want to route email messages? window, select Use the MX record associated with the partner's domain. Then click on Next.
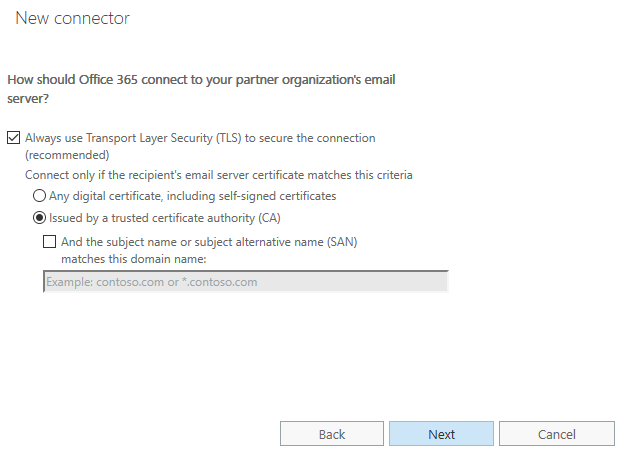
→ In the How should Office 365 connect to your partner organization's email server? window, make sure the Always use Transport Layer Security (TLS) to secure the connection (recommended) option is activated. We recommend selecting the Issued by a trusted certificate authority (CA) option. Click on Next to proceed to the summary screen.
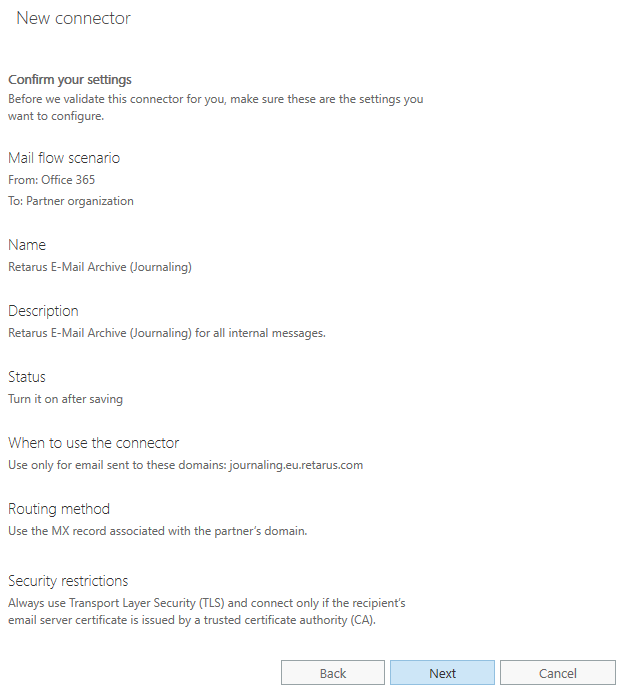
→ Verify whether the settings for the new connector shown in the summary are correct. If so, proceed with Next.
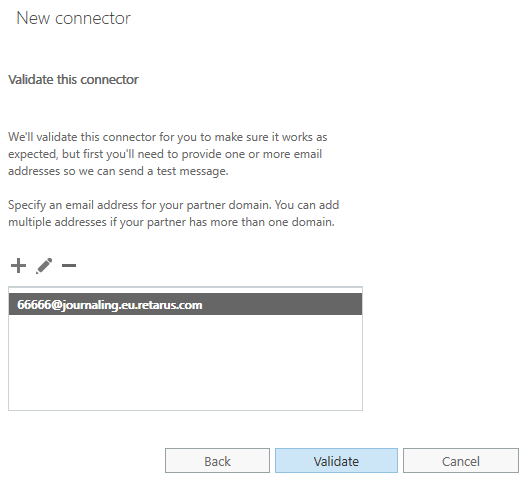
→ In the next window (Validate this connector), you can enter an address to test the new connector. To add an address, click on the + symbol.
→ Enter the email address used in the journal rule to test the new connector ([Your Customer Number]@journaling.eu.retarus.com). Confirming with OK returns you to the validation screen. Click on Validate to start the validation.
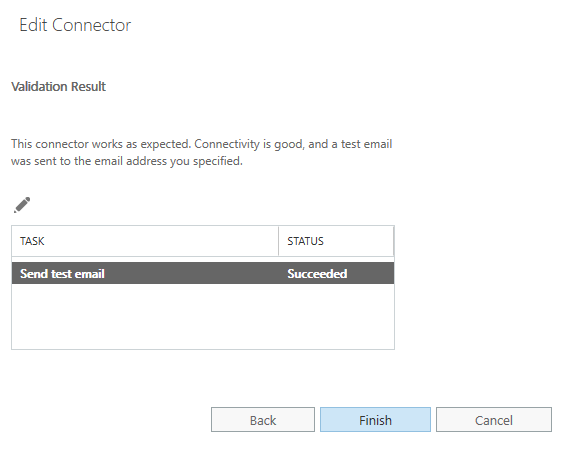
Once the validation has been completed, the Validation Result will be displayed. If the test returns the Succeeded result, click on Finish.
Should the validation have failed, click on the pen symbol. A new window opens, providing you with the test results and reason for failure in detail. You can Save the connector for now, but please keep in mind that the setup is most likely not functioning. This allows you to correct the settings later.
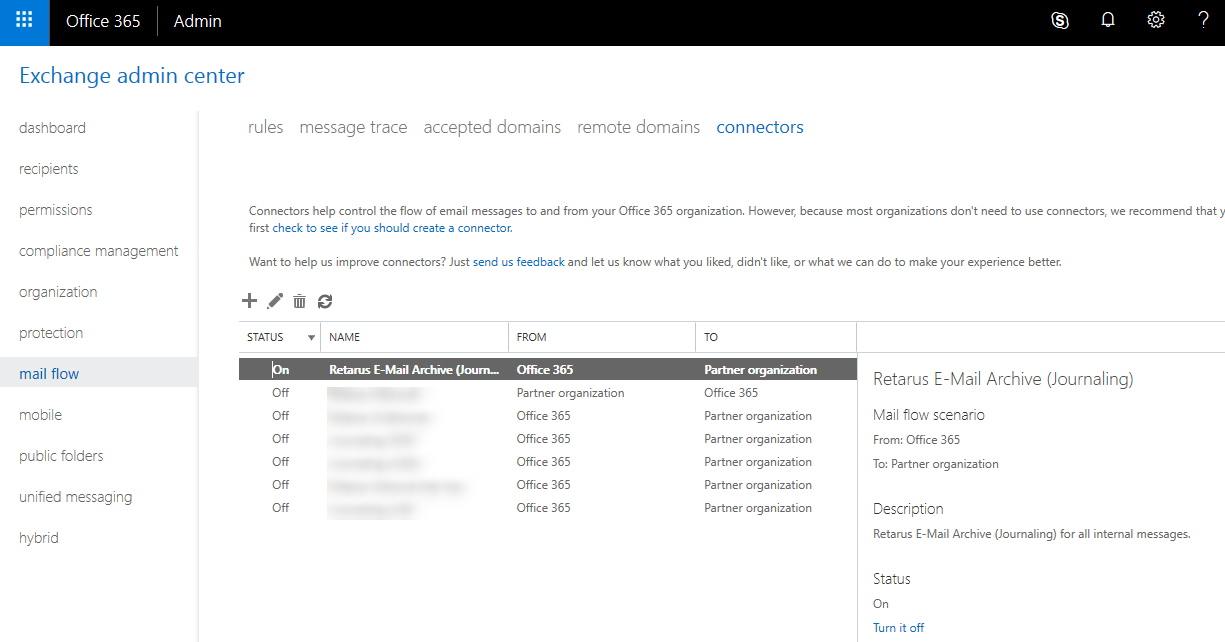
Please make sure the connector’s status is On. Otherwise, internal messages won’t get transferred to the Retarus Enterprise Email Archive.
Legal disclaimer
This manual serves the purpose to provide assistance with regard to the configurations required for Microsoft 365. However, this manual is not intended to be exhaustive. Specifics and deviations from this manual may result from, in particular without limitation, the respective version of Microsoft Exchange used by the customer in each case.
Therefore, Retarus does not warrant that the information contained in the manual is accurate and complete in each case and that the customer’s configuration will be successful.
Further, Retarus is not responsible for any software and technical equipment in place at the customer.
Retarus’ liability for any information contained in this manual is excluded. Such exclusion of liability, however, shall not apply in case of intentional misconduct or gross negligence of Retarus.
