Retarus Email Security can act as an inbound email gateway, processing all incoming email traffic for your domains before it reaches your Microsoft 365 accounts—without requiring any changes to your MX record. This ensures that spam, viruses, and other threats are filtered out, allowing only safe emails to be delivered to your mailboxes.
Prerequisites
-
Access to the Microsoft 365 Exchange admin center.
-
Retarus Email Security subscription and access credentials.
-
Basic understanding of email flow and routing configurations.
Inbound Configuration
To configure Microsoft 365, you need to set up two components in the following order:
-
Connector: The connector defines a rule for routing emails to the next hop.
-
Rules: Rules are configured to manage email flow. In this example, we add X-headers to prevent mail loops and reference the connector to route emails to Retarus Email Security.
Since the rules depend on the connector, you must create the connector first.
While the connector can technically be configured without creating a rule (e.g., by specifying that it applies to all messages from the domain), adding rules with X-headers is essential to prevent mail loops from occurring.
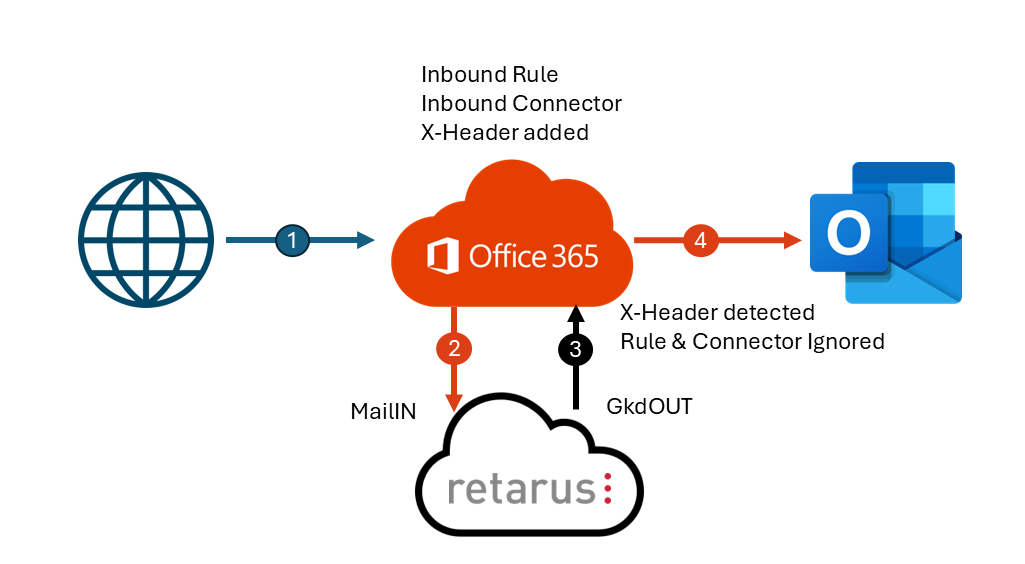
The diagram below illustrates the logical flow of a message originating from an external sender (Internet). The message first passes through EOP (Microsoft 365), then routes to Retarus for processing, and finally returns to EOP for delivery to the recipient (Mailbox).
How to get started
1. Set up an inbound connector
-
In the Exchange admin center, go to Mail Flow - Connectors.
-
Click Add a Connector to launch the New connector wizard.
-
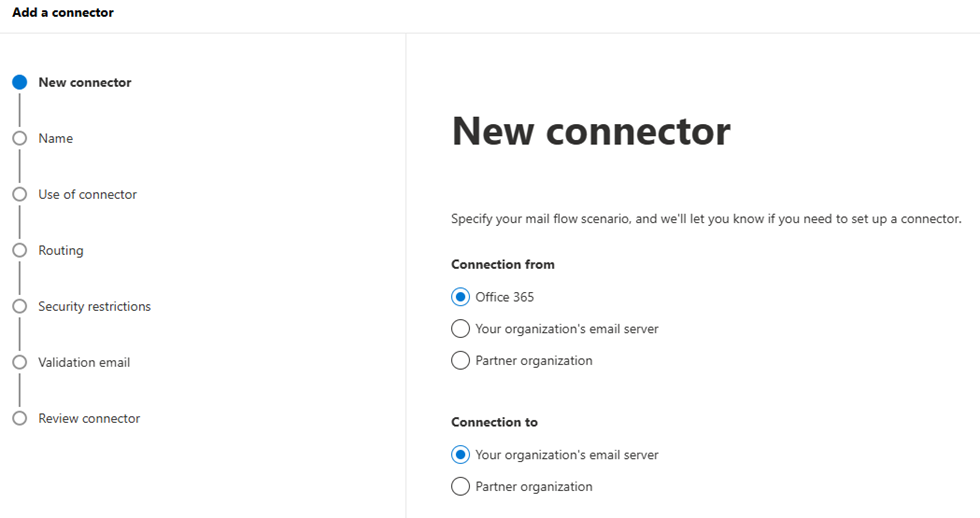
On the New connector page:
-
Ensure the Office 365 and Your organization’s email server options are selected.
-
Click Next.
-
-
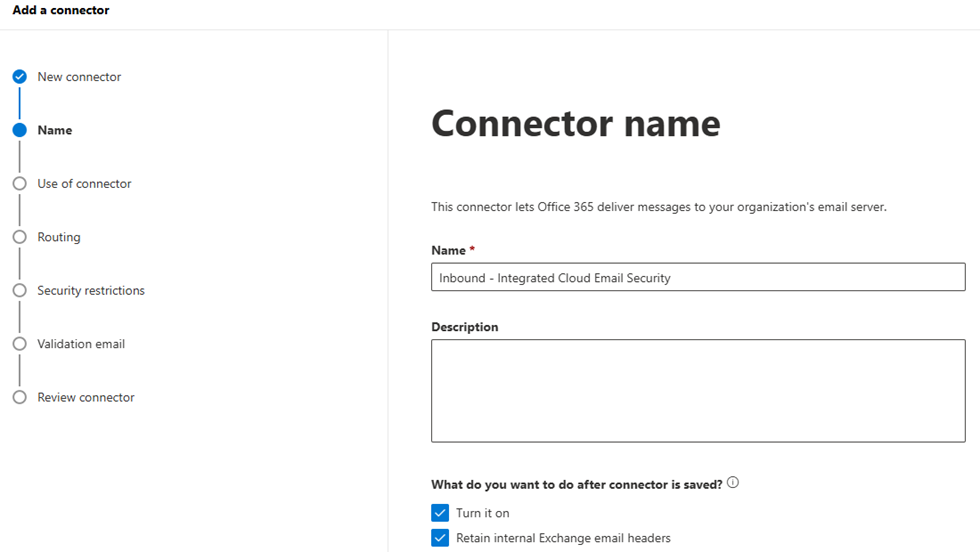
On the Connect name page:
-
Provide a meaningful name for the connector.
-
Add an optional description to clarify its purpose.
-
Click Next.
-
-
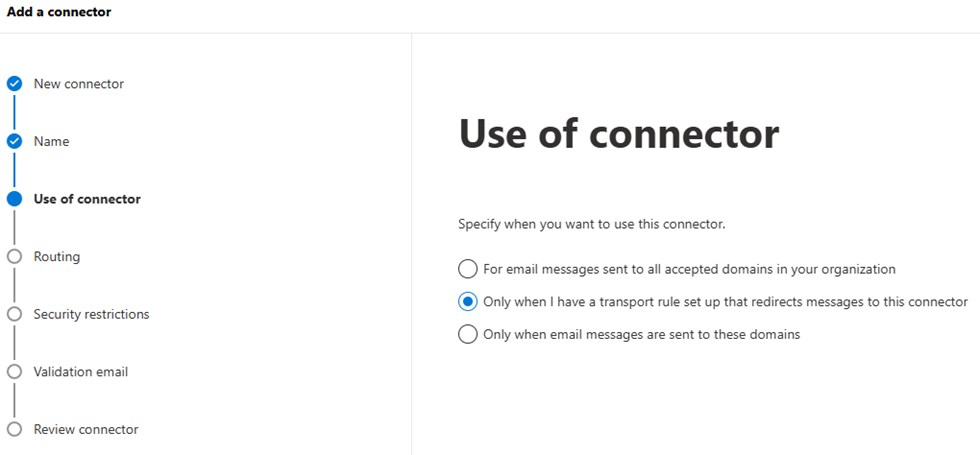
On the Use of connector page:
-
Select the Only when I have a transport rule setup… option.
-
Click Next.
-
-
On the Routing page:
-
Add the following servers to the routing configuration:
mx-in01.eu.retarus.com
mx-in02.eu.retarus.com -
Click Next.
-

-
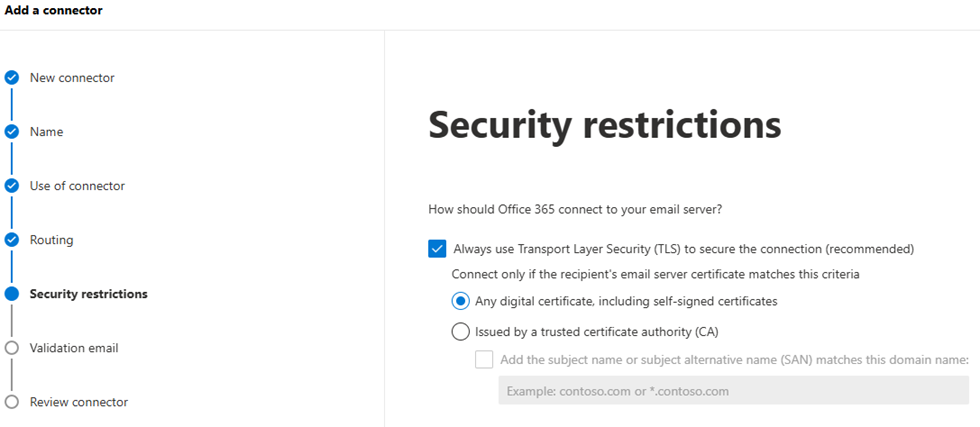
On the Security restrictions page:
-
Configure security restrictions according to your requirements.
-
Click Next.
-
-
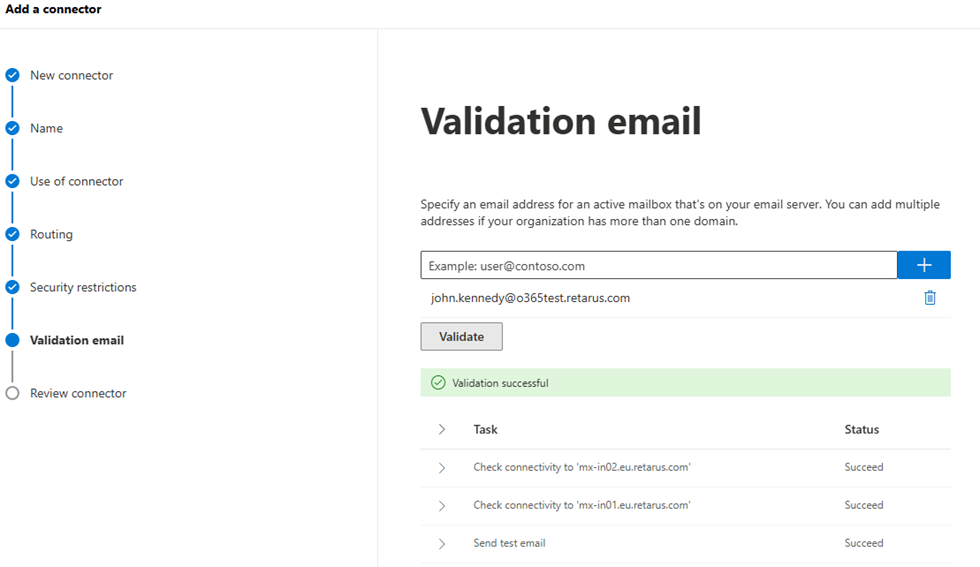
On the Validation email page:
-
Enter a valid email address to test and confirm that email routing is functioning correctly.
-
Click Next.
-
-
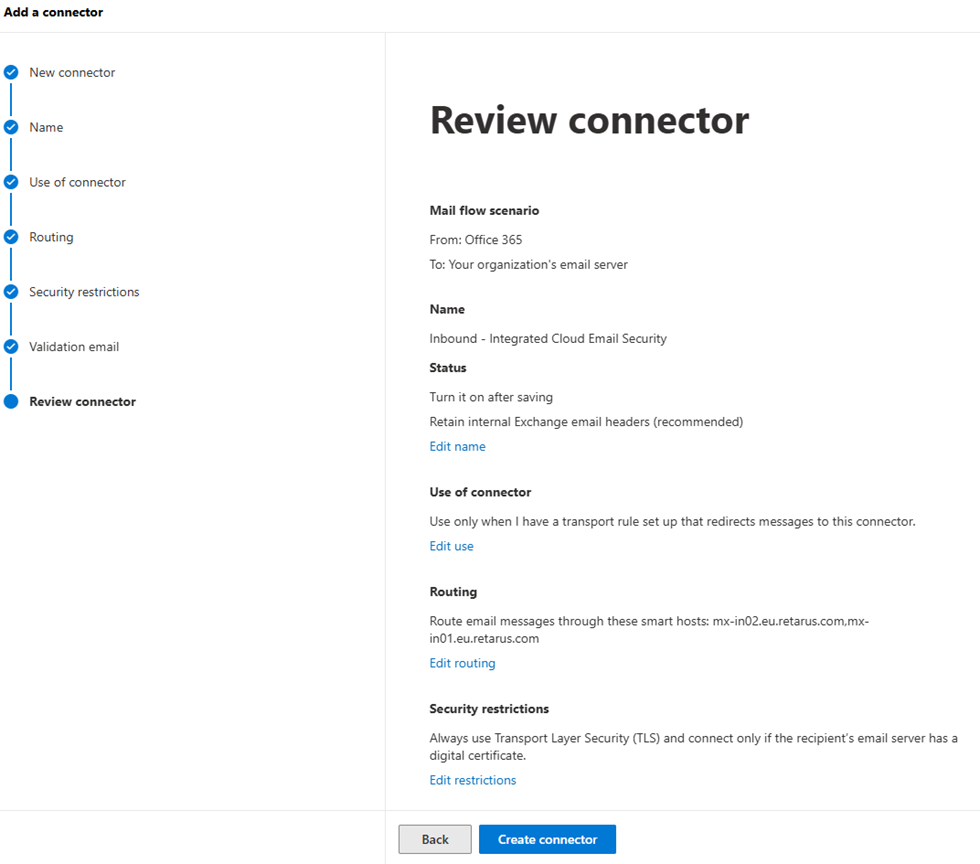
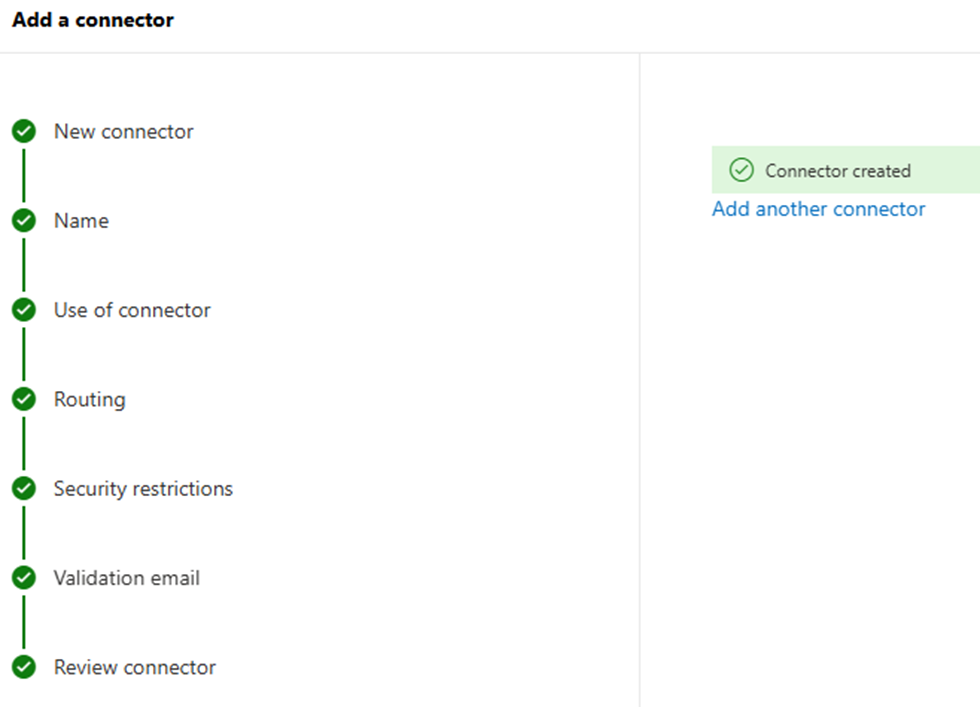
On the Review connector page:
-
Review all connector settings.
-
Click Create connector.
-
-
Confirm that the connector has been successfully created.
2. Configure inbound rules
-
Navigate to Mail flow - Rules.
-
Click Add a rule - Create a new rule to launch the New transport rule wizard.
-
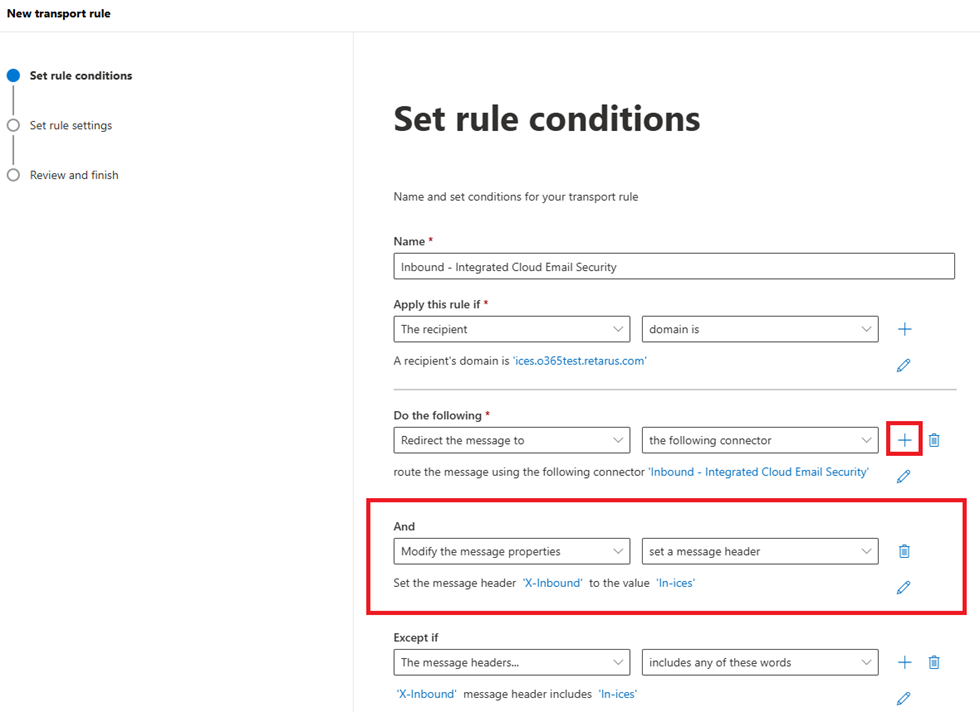
On the Set rule conditions page:
-
Name: Type a unique name for the rule.
-
Apply this rule if: Set the If the recipient > domain is condition and specify the domain(s) to be scanned.
-
Do the following: Set Redirect the message to > the following connector and specify the connector you created. Click the plus sign to add another action.
-
And: Set Modify the message properties > set a message header. It is recommended to use an X-header labeled X-Inbound with the In-SEG value.
-
Except if: Choose The message headers… > includes any of these words. Use the same X-header and value as above.
-
The X-header and value can be customized but must match in both action and exception settings.
-
Click Next.
-
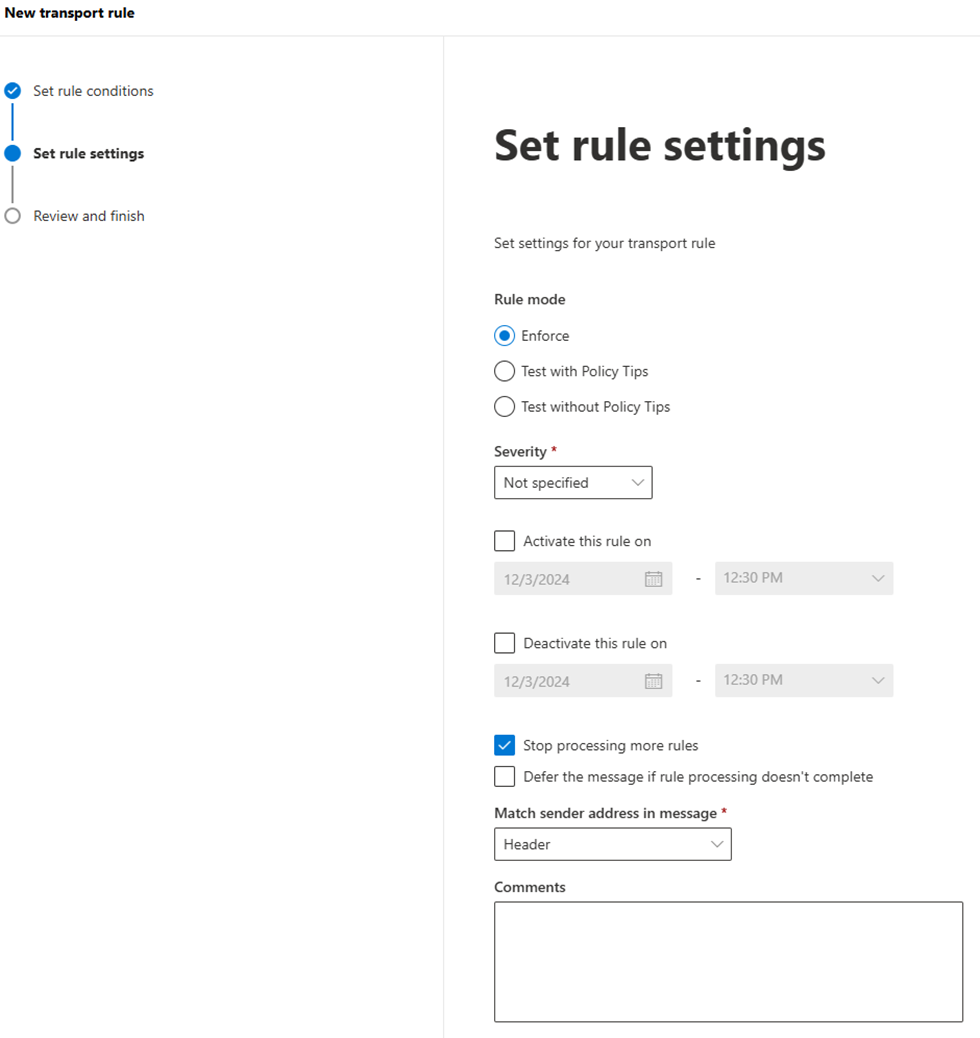
On the Set rule settings page:
-
Select the Enforce and Activate the Stop processing more rules options.
-
Click Next.
-
-
On the Review and finish page:
-
Review all rule settings.
-
Click Finish.
-
How to test inbound traffic
Ensure that emails sent from external sources successfully reach your internal mailboxes within Microsoft 365.
-
Send a test email from an external service to an internal Microsoft 365 email address.
-
In the Exchange admin center, go to Mail flow - Message trace.
-
Click Start a trace.
-
Search for the test message. Enter the sender's and recipient's email addresses to filter the trace results.
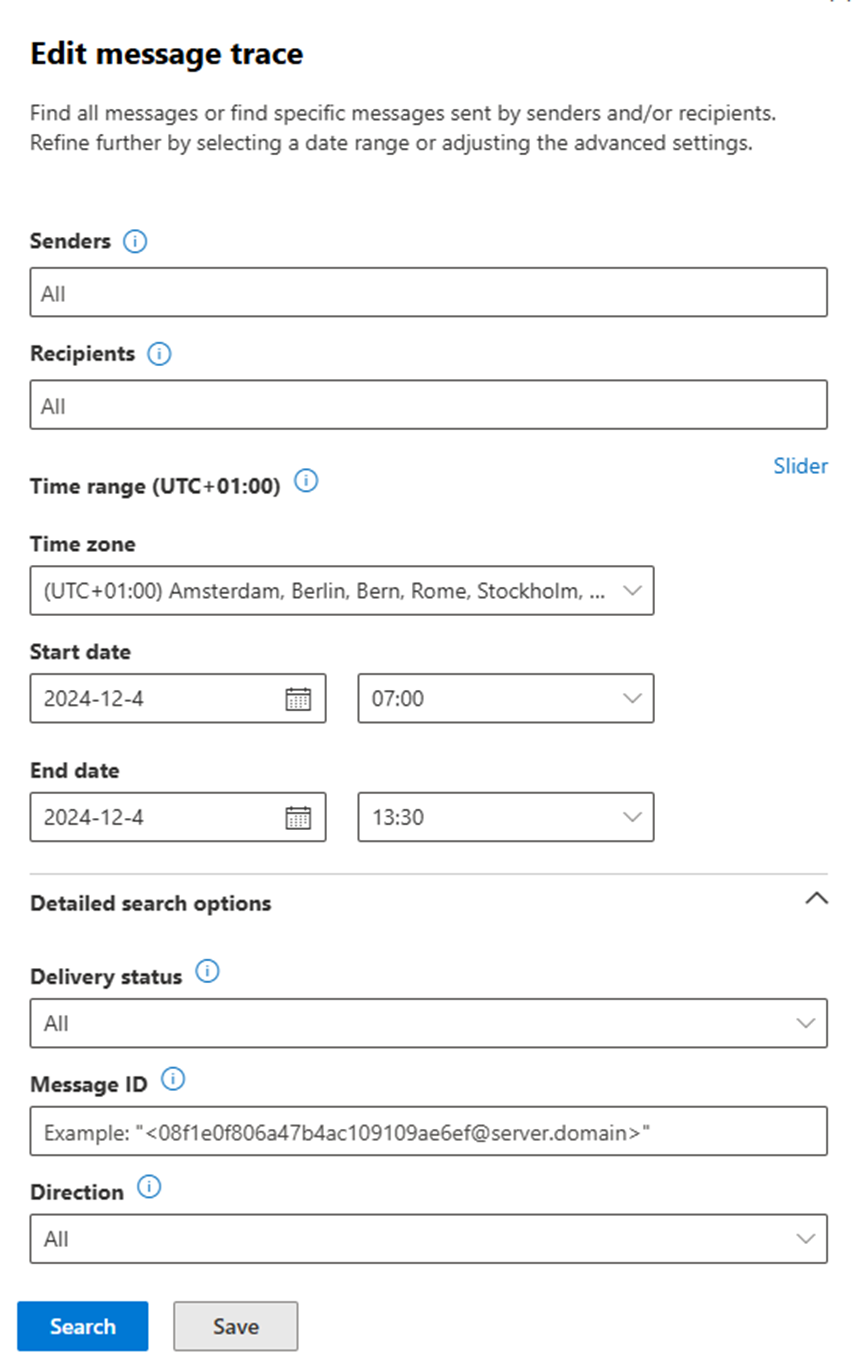
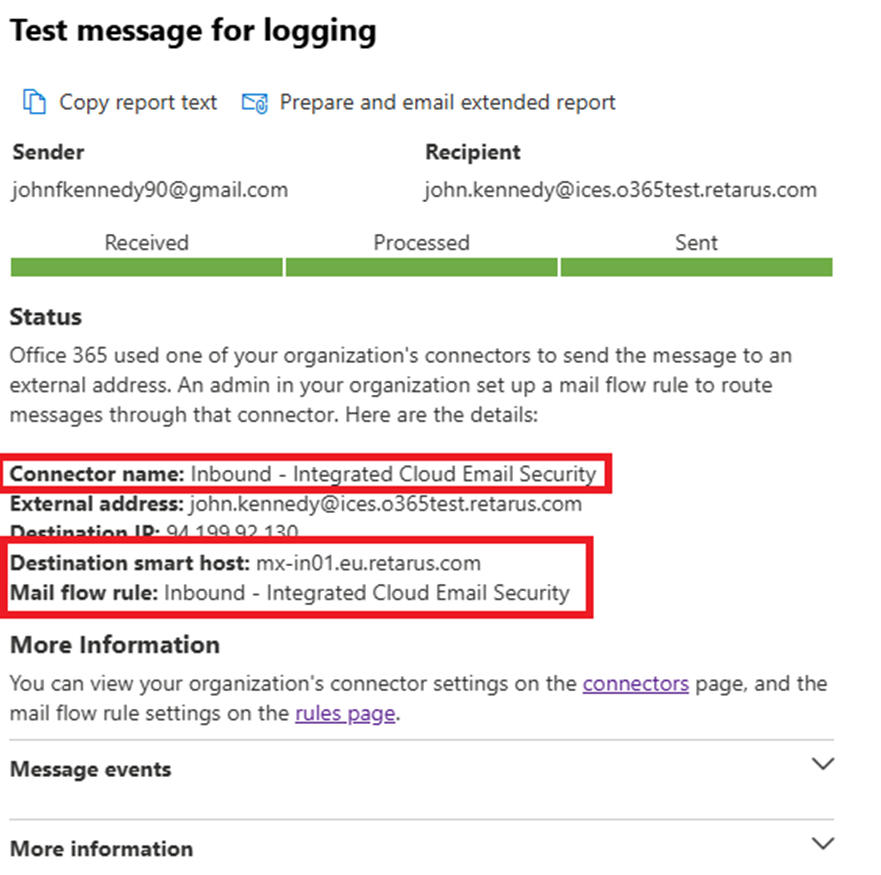
The first message log entry should display:
→ Connector name: The name of your inbound connector.
→ Destination smart host: The server specified in your routing configuration.
→ Mail flow rule: The name of your inbound rule.
Check that emails sent from Microsoft 365 are correctly routed to RMX.
-
Log in to the myEAS portal.
-
Go to Email Security - Search.
-
Search for the test message log. To narrow down the results, specify the sender and recipient criteria.
-
Locate the test message in the search results and expand its log entry.
→ The last entry in the message log should indicate that the message has been sent back to Microsoft 365.

Ensure that emails routed from Microsoft 365 to internal mailboxes are delivered correctly.
-
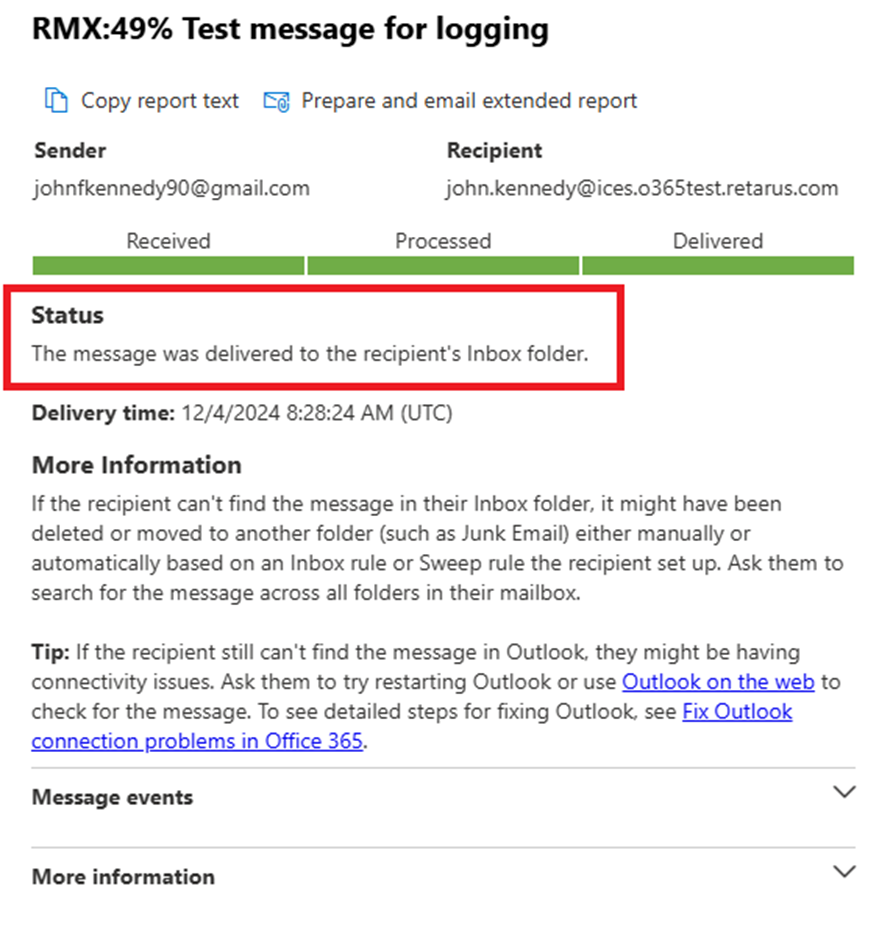
Check the message trace results in the Exchange admin center.
→ Under Status, the trace should display that the message was successfully delivered to the internal mailbox. Thanks to the X-header in the inbound rule, the message is passed through the normal email routing without being reprocessed.