You can configure SMS Inbound settings in the Enterprise Administration Services Portal (EAS). Various settings are available to you that help customize the services’ functions to your needs.
To navigate to the SMS inbound configuration menu once you have logged into the EAS portal, go to Administration - SMS Services - SMS Inbound Services in the navigation menu on the left-hand side of the screen.
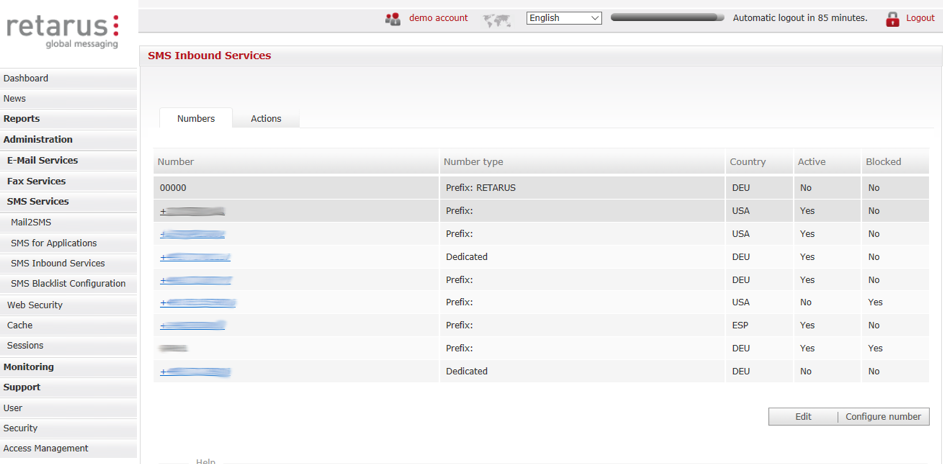
The SMS Inbound Services screen has two sections. The first is located under the Numbers tab and the second under the Actions tab.
Numbers tab
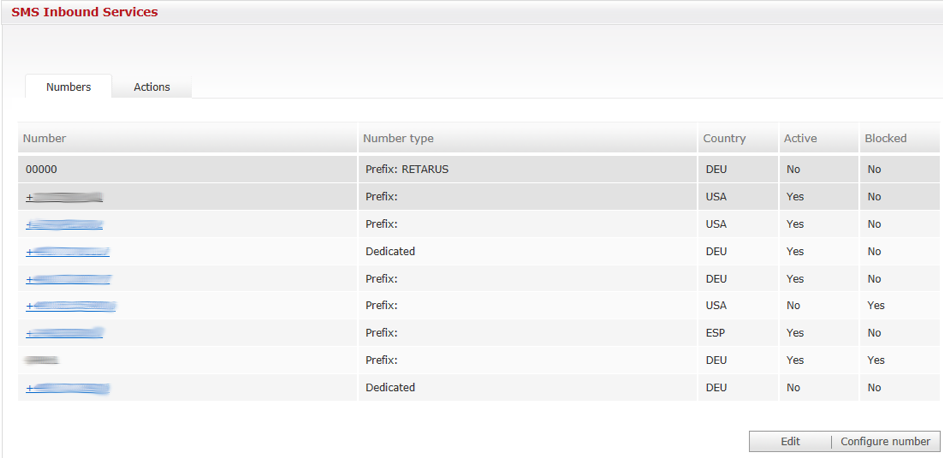
The Numbers tab consists of a table providing an overview of all long- and/or short codes you have received from Retarus. Here you can assign actions to each booked number. These actions are performed upon receipt of SMS messages. Individual actions are configured under the Actions tab.
Individual fields of this overview are explained in the following table.
|
Field |
Description |
|---|---|
|
Number |
Long code or short code number. |
|
Number type |
Indicates whether the number is a prefix, a dedicated number, or shared dynamically. If it is a prefix, it must be prepended to every inbound SMS message. If a number is shared dynamically, inbound messages are routed automatically to the company that most recently contacted the customer. |
|
Country |
The long or short code’s country of origin. |
|
Active |
Indicates whether the number is active. |
|
Blocked |
Indicates whether messages from the number are blocked. |
To configure a number, double click on it or select the corresponding row and then click on the Configure number button to bring up the configuration menu.
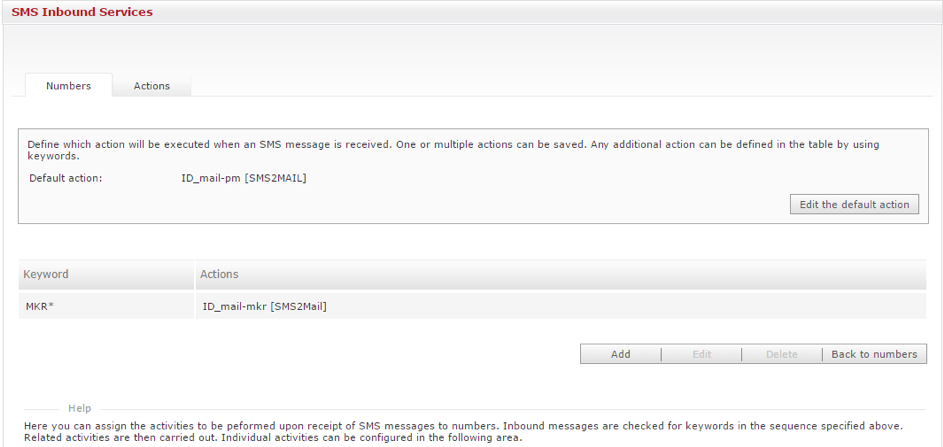
One or multiple standard actions are saved in the upper section and are executed when an SMS is received. In the lower section, any actions that deviate from them can be managed/regulated with the assistance of keywords. If an SMS begins with a configured keyword, the action/actions connected with the keyword is/are executed instead of the standard action in the lower section.
Creating a standard action
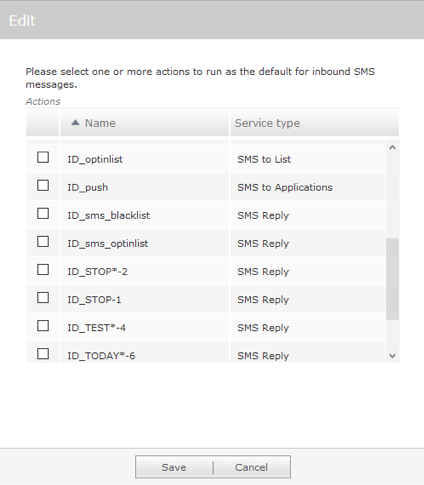
To define one or multiple standard actions, click on Edit the default action located in the upper box of the configuration menu (see the image above). The pop-up window which appears lists all of the actions configured under the Actions tab. Behind the names of the actions you will see the underlying service type in brackets. Select the action or actions to be executed when an SMS is received without a keyword, then click on Save. The pop-up window shuts and the box displays the selected actions. To close the pop-up window without saving any changes, click on Cancel.
Creating a keyword
Individual fields of the view are explained in the following table.
|
Column |
Description |
|---|---|
|
Keyword |
Keywords for workflows, which you can define as desired. |
|
Actions |
You can save specific actions for each keyword, e.g. automatic replies or push options. |
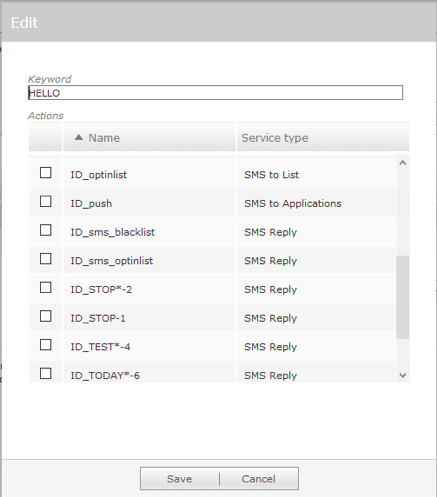
Begin the process of adding new keywords by clicking on the Add button. This opens a separate window in which you can set the keyword itself, and the associated action. You can add multiple actions. The * operator can be used for a wildcard search. When you click on Save, the new keyword is placed in the table. The table is automatically arranged in the sequence in which the keywords are processed. When you click on Cancel, the window closes and no changes are accepted.

Modifying a keyword
To modify a keyword, begin by selecting it in the table then click on Edit, which opens a separate window. You can alter the keyword itself and/or the associated action in the Edit window. When you click on Save, the window closes and all changes are saved. When you click on Cancel, the window closes without any changes.
Deleting a keyword
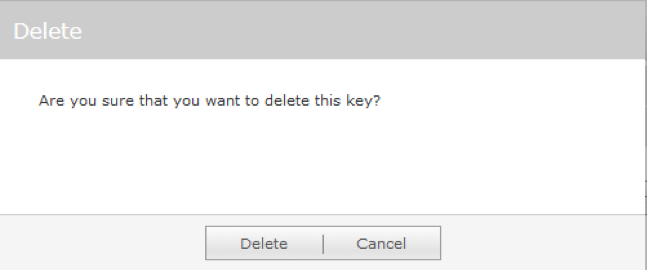
To delete a keyword, begin by selecting it from the table. When you click on Delete, a dialog window opens asking you to confirm the deletion. Clicking Delete, removes the keyword from the table.
Actions tab
Under the Actions tab, individual actions are configured to which you can assign one or multiple numbers.
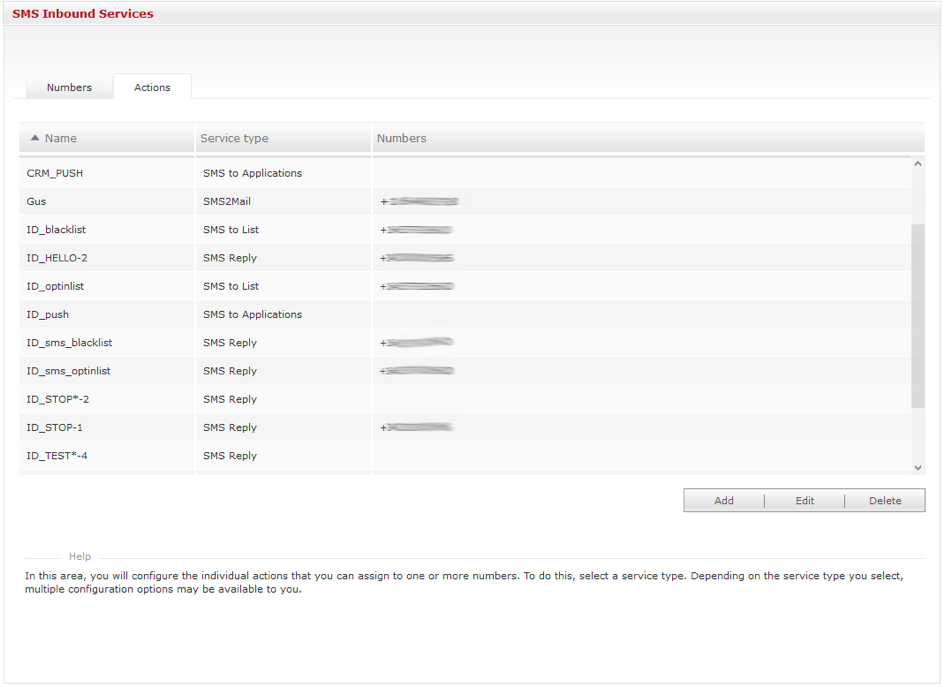
The Actions table displays all previously configured activities and indicates the underlying service behind an action as well as the number(s) using the action.
Individual fields of this overview are explained in the following table.
|
Field |
Description |
|---|---|
|
Name |
Name of the action. |
|
Service Type |
The underlying service type for the action. |
|
Number |
Displays the numbers using the action. |
Create an action
To set up a new action, begin by clicking on Add. A separate window then appears in which you can assign a unique name to the action and then select a service type. The selection of service types available to you depends on the SMS Inbound Services that you have booked.
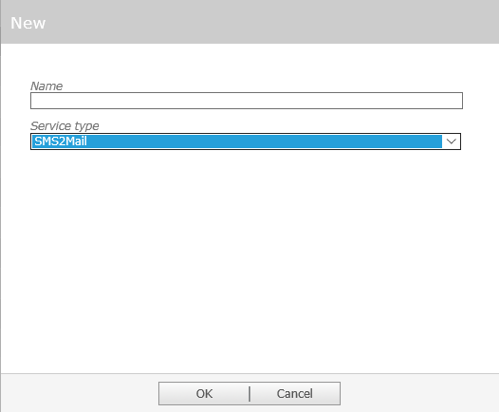
Following service types are available:
|
Field |
Description |
|---|---|
|
SMS Reply |
Automatic transmission of a response SMS. |
|
SMS to SMPP |
Forwards inbound SMS messages to an application via SMPP. |
|
SMS2Mail |
Delivers inbound SMS messages as emails. |
|
SMS to Applications |
Pushes inbound SMS messages to applications. |
|
SMS to List |
Adds the mobile phone number of the person who sent an inbound SMS message that matches a defined action to a list delivered daily via email. |
|
SMS to Global Blacklist |
Adds a mobile phone number to a list of blocked numbers. |
When you click on OK, the window will close and all configuration options available for the selected service type are displayed. When all mandatory fields have been completed, the new action is stored when you click on Save, and is available to the numbers.
Modifying an action
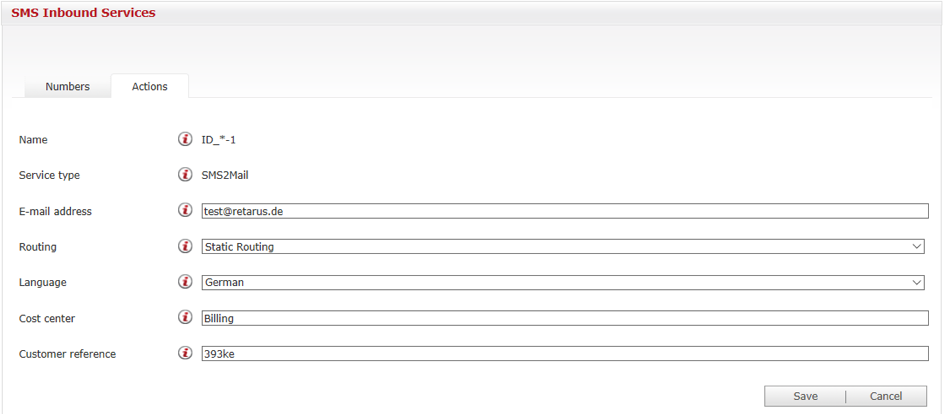
If you would like to alter the parameters for an action, select it in the table displayed below and click on Edit. Alternatively, you can double click on a row. You will then see all configuration options. The configuration options available to you will depend on the service type you have selected. Once you have made the desired change(s), click on Save.
The configuration window appears when you modify an action that has SMS2Mail as the service type.
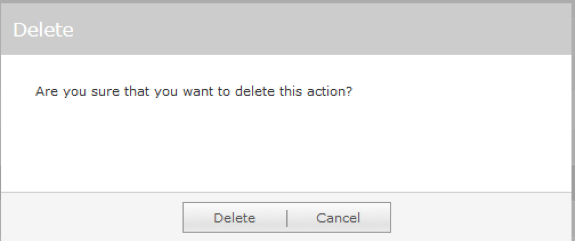
Deleting an action
If you want to delete an action, ensure beforehand that a number is not using it; otherwise it is not possible to delete the action. The next step is to select the action in the table. Click on Delete and then Delete again to delete the action, which will no longer be available to the numbers.