
Click on Administration - Security to initiate the process of configuring password criteria and install access restrictions by IP ranges for your company in the Security menu:
Password criteria
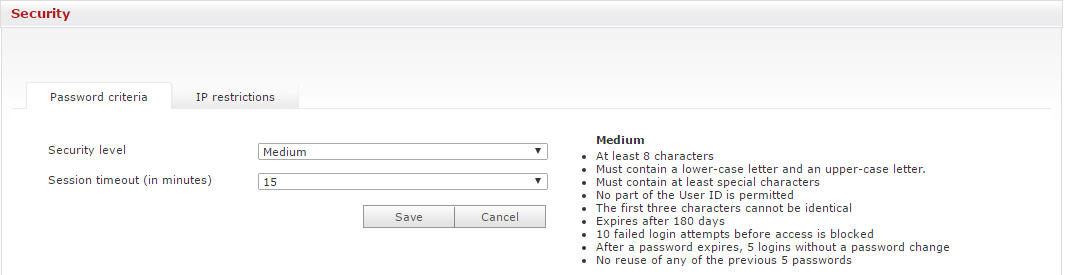
As an administrator, you can configure different password criteria for your company. Four security lev-els are available in the Security level drop-down menu: Low, Medium, High, and Very High, and their respective requirements are displayed below.
Here are the requirements of each security level:
Low
-
At least 8 characters
-
Must contain at least one letter
-
Expires after 365 days
-
20 failed login attempts before the account is blocked
-
After a password expires, 10 logins without a password change
Medium
-
At least 8 characters
-
Must contain a lower-case letter and an upper-case letter.
-
No part of the User ID is permitted
-
The first three characters cannot be identical
-
Expires after 180 days
-
10 failed login attempts before the account is blocked
-
After a password expires, 5 logins without a password change
-
No reuse of any of the previous 5 passwords
High
-
At least 10 characters
-
Must contain at least one number, a lower-case letter, and an upper-case letter.
-
No part of the User ID is permitted
-
Expires after 90 days
-
5 failed login attempts before the account is blocked
-
3 logins without a password change after expiration of the password
-
No reuse of any of the previous 10 passwords
Very high
-
At least 10 characters
-
Must contain at least one number, one upper case, and one lowercase character
-
Must contain at least one special character (valid characters are !\"#$%&'()*+,-./:;)
-
Parts of the user name are not allowed
-
Expires after 30 days
-
3 failed login attempts before the account is blocked
-
No logins without password change after password expiration
-
No reuse of last 30 passwords
Under the Session timeout drop-down menu, you can configure the number of minutes that elapses before a user is automatically logged out of the portal. The remaining time until automatic logout is displayed in the progress bar to the left of the logout button.
IP restrictions
Why? When you activate this function, access to your WebExpress accounts is only possible for authorized IP addresses or IP ranges. This type of access restriction is one of the most secure ways of preventing unauthorized access.
You will initially receive an overview of your configured IP addresses or IP address ranges. Each of these can be sorted with one or two clicks on Name IP range profile, Configured IPs, Last Modified, or Last Modifier.
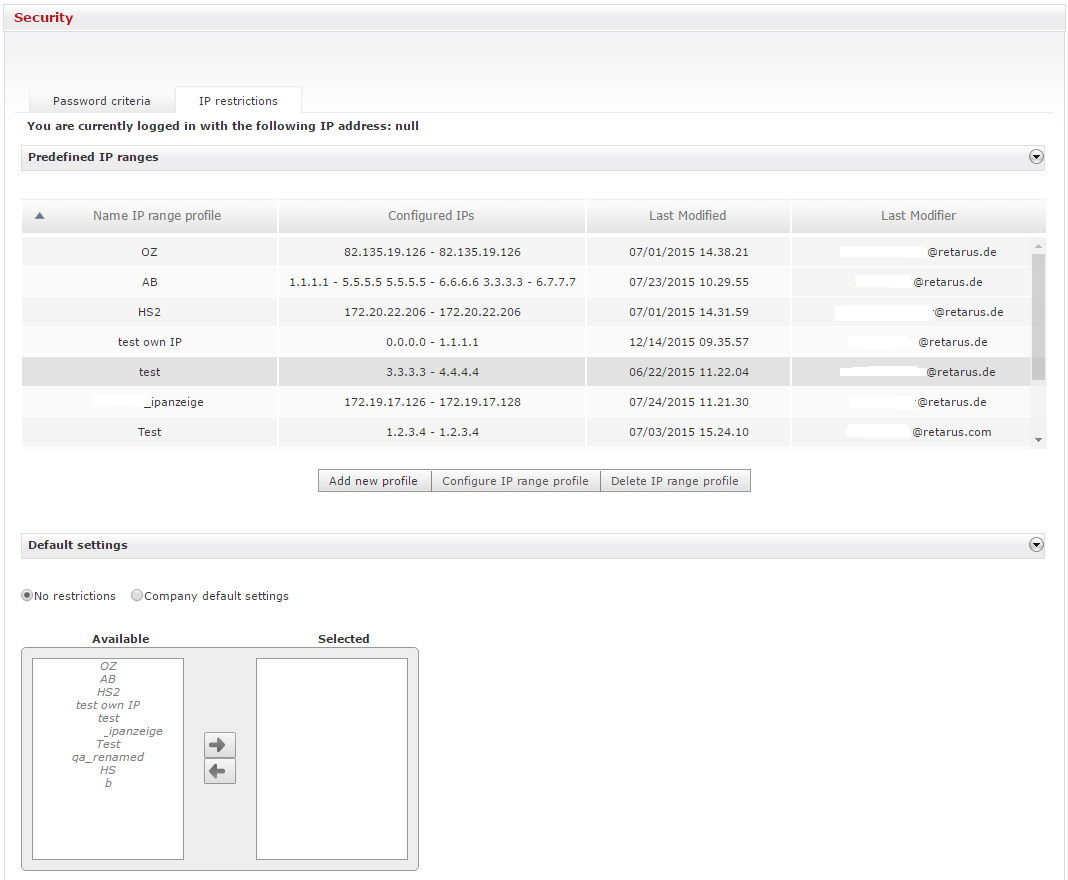
Using the Add new profile button, you can define an IP address (IPv4 / IPv6) or a new address range.
Begin by entering the profile in the Name field; for example, by using a location and/or the department for the IP address. The next step is to specify a Start IP Address in the pink field. This is done by clicking on the field or highlighting it with the Tab key and then pressing Enter. The next field is accessed either by clicking on it or using the Tab key. To define an address range, enter the last IP address in the IP address range that you want to use under End IP Address. Multiple addresses or address ranges can be saved in a profile. Please also be sure to save your entries.
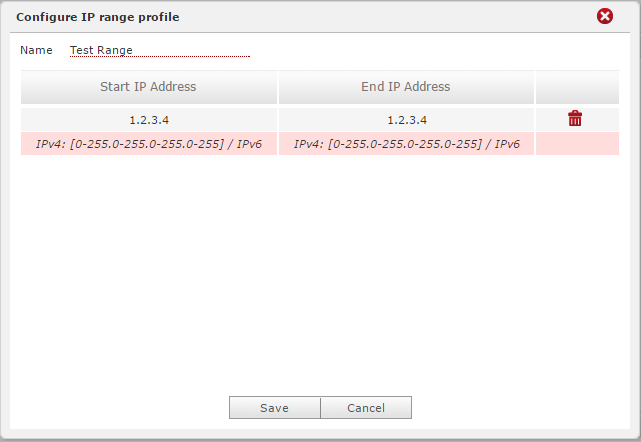
Your newly-defined IP address or IP address range now appears in the overview. Via the Configure IP range profile button, you have the option of modifying the IP addresses and profile names. One click on the Delete IP range profile button deletes each highlighted IP range profile.
In the lower section, you can configure the company-wide default settings. Just as in the User Management interface, the available IP address range profiles on the left-hand side. Clicking on the respective profile and then on the arrow in the middle adds it to the right-hand side. All entries located on the right-hand side will later correspond to the company-wide default settings.
Before you click in the Company default settings checkbox, be sure to verify that your own IP address is included.
You can then click in the Company default settings box. If you do not want to use the default settings, you can modify them as desired or deactivate them by clicking on No restrictions.
If you want to remove individual users from the default settings, you can do so individually by modifying them to No restrictions or User-specific settings.