
A faxbox owner or Tenant Administrator can use the Edit faxbox option to add users and user groups to an existing faxbox.
📌 Creating users/user groups first
Users and user groups must be created first with the User option before users and user groups can be assigned to a faxbox.
-
Click the Settings icon on the main Enterprise Fax Portal page.
→ The Users screen is displayed. -
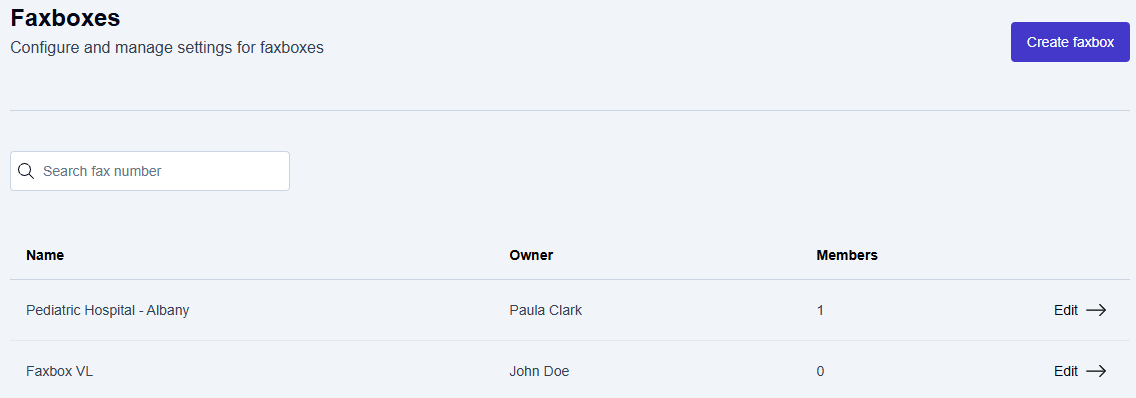
Click the Faxbox configuration tab.
→ The Faxboxes screen is displayed, showing your available faxboxes.
→ The Edit--> option is available at the end of each faxbox listing.
-
Click Edit--> at the end of the faxbox listing that needs to be updated.
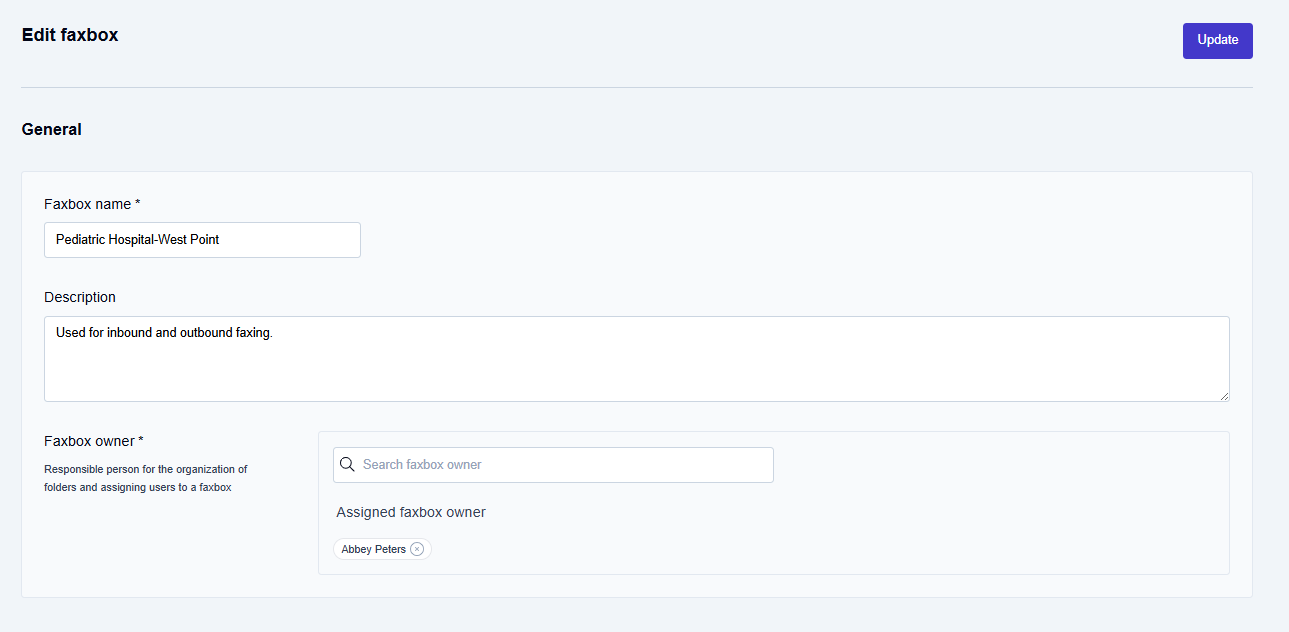
→ The Edit faxbox screen is displayed, allowing you to update the User Groups and Users.
-
Scroll down through the Edit Faxbox screen to the Assign members section.

To add a User group to the existing faxbox:
-
Click inside the Search user group field.
-
Type a few letters of the user group's name to display the autocomplete list of user groups, and select the User group from the list of available user groups.
To add a User to the existing faxbox:
-
Click inside the Select user field.
-
Type a few letters of the user's name to display the autocomplete list of users, and select the User from the list of available users.
📌 Applying user changes
The user groups and/or users will not be added to the existing faxbox until you click the Update button at the top right corner of the Edit faxbox screen.
-
Click the Update button in the top right corner of the Edit faxbox screen.
→ The Faxbox updated message is displayed at the bottom of the page, and you are returned to the Faxbox configuration page.
📌 Access change notifications
When a user or user group is assigned to or removed from a faxbox, the affected users receive a personalized email notification automatically. These notifications are sent regardless of the user's notification preferences and cannot be turned off.
All current faxbox owners also receive a group email notification when user group membership changes. For details, see Email notifications.