
By using a custom connector on SAP BTP Integration Suite, you can integrate fax communication directly into your SAP environment. This allows you to manage all fax-related processes from a central location and reduces manual effort.
The connector improves data security and scales with your business as demand grows. It also helps you meet regulatory requirements, keeps fax data synchronized in real time, and gives you access to detailed reports for better visibility and control.
📌 You can choose the approach that best fits your needs. Build your own Retarus Cloud Fax connector or use a ready-to-go package from Retarus, which is also available on the SAP Store.
Developer: Customer/Partner
Category: Third-Party Integration for Cloud Fax
Prerequisites
-
SAP BTP (Business Technology Platform) and Integration Suite:
-
Enabled capabilities: Open Connectors, Cloud Integration (optional), API Management (optional).
-
Cloud tenant ID and password (also called a cloud secret).
Basic authentication must be set up to gain access to an active instance of the integration solution. The necessary information can be found in the curl instructions of the API documentation.
A unique SAP Cloud URL within the operational service instance provides access to the service instance.
-
-
Retarus Cloud Fax account and login ID (username and password).
-
Fill out the contact form or talk to a Retarus representative to get a trial account.
-
Multiple login IDs can be created within the same customer tenant to allow for different processing configurations.
-
Importing the API specification
The required actions are described “from scratch,” but SAP may provide pre-built packages or artifacts that include the connector and the integration flow for download.
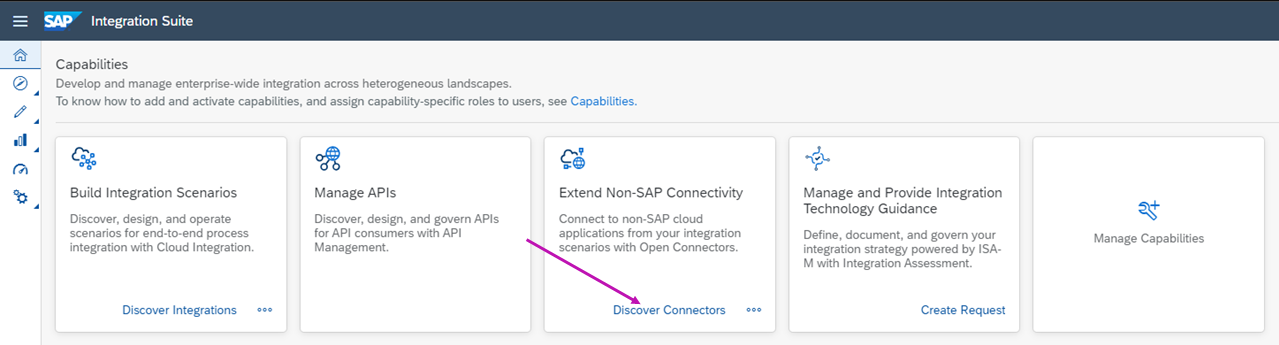
1. Access Open Connectors
-
Open the SAP Integration Suite Home page and scroll to the Capabilities section.
-
Under Extend Non-SAP Connectivity, select Discover Connectors.
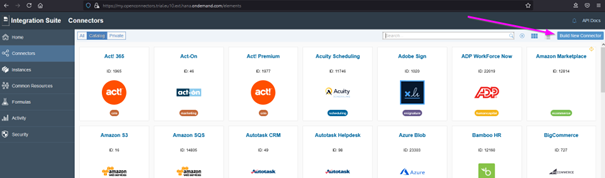
2. Launch the building interface
-
Navigate to the Connectors page, and select Build New Connector.
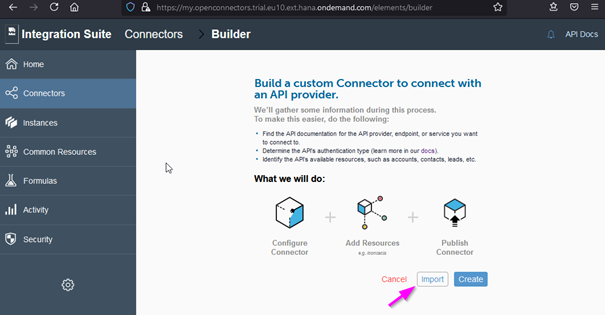
3. Import the OpenAPI specification for Retarus Cloud Fax
-
Select Import.
-
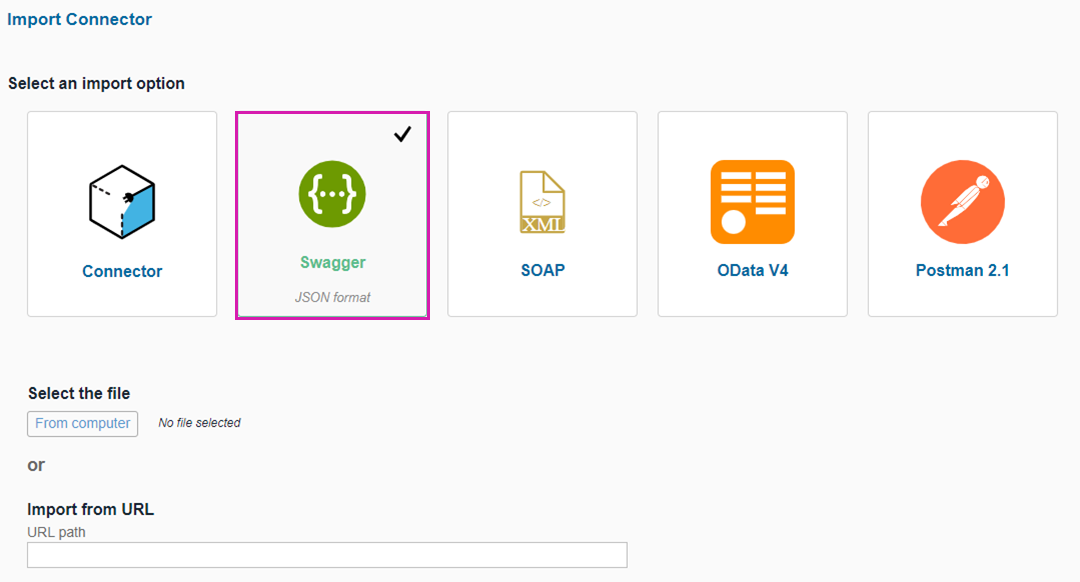
Select Swagger.
-
Download the Fax-for-Applications REST API JSON file to your computer (right-click the link and select Save Link As).
-
Go back to SAP Integration Suite, select From computer, and choose the downloaded file.
-
Select Continue Import.
-
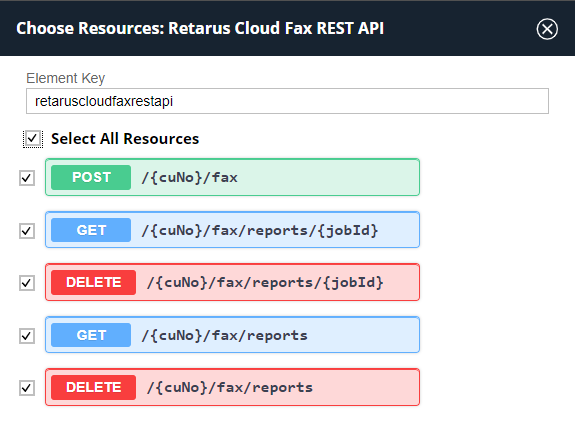
Choose resources for the connector:
-
Use this option to hide ‘out of scope’ REST resources from SAP users, without modifying the service itself.
-
In this example, select the Select All Resources checkbox.
-
Select Import in the lower right corner.
-
4. Configure connector settings
-
Enter the Base URL: https://faxws.retarus.com/rest/v1.
-
Choose basic as the authentication method. This authentication requires the username (also known as login ID) and password.
-
Select Save.

📌 Connector enhancement options
The username and password are not necessary in this step. These details can be entered while starting a running instance of the connector, as described below.
The connector can be enhanced in the Information tab by giving it a meaningful name, such as the raw service name and protocol, and adding a brief description of the service.
Starting a connector instance
The new connector needs to be turned into a working instance before it can be made available via an SAP-native cloud URL with REST resource suffixes.
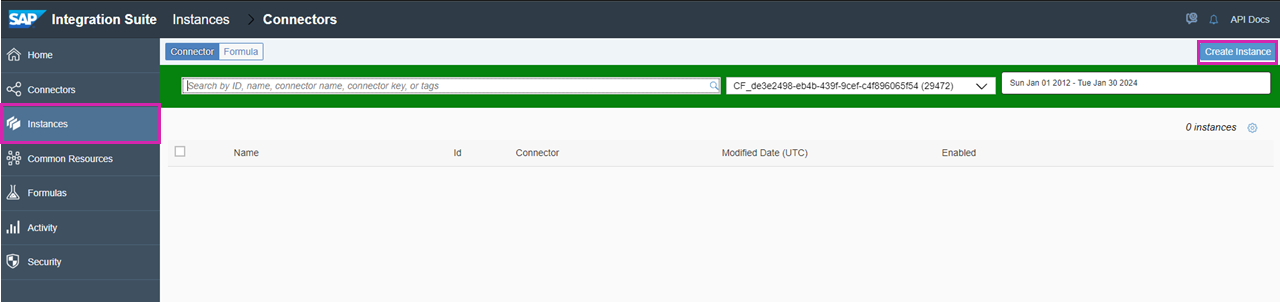
1. Search for the connector
-
On the Connectors page, select Create Instance to open the connector search widget.
-
Search for and select the previously created connector.

2. Initialize the instance
-
In the instance initialization dialog:
-
Type the name of the currently running instance that will be displayed in the instance overview later.
-
Enter the Retarus Cloud Fax login ID credentials obtained from Retarus.
-
Select Create Instance.
-

The connector is now instantiated and running.
Testing the connector instance
1. Configure the connector's connection
-
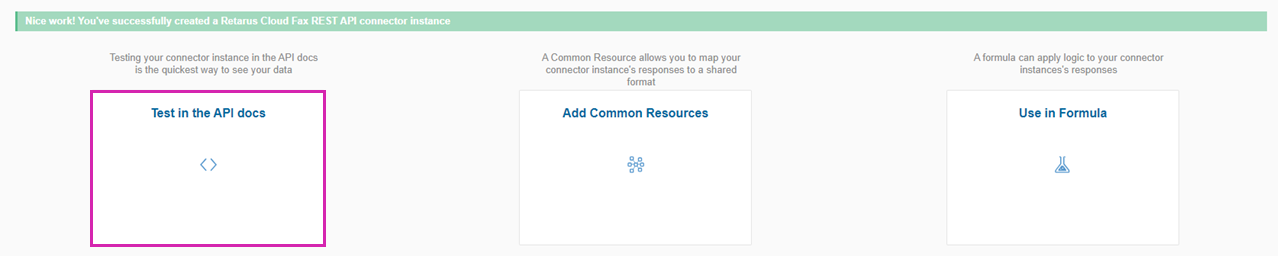
Select Test in the API docs to test the connector instance.
-
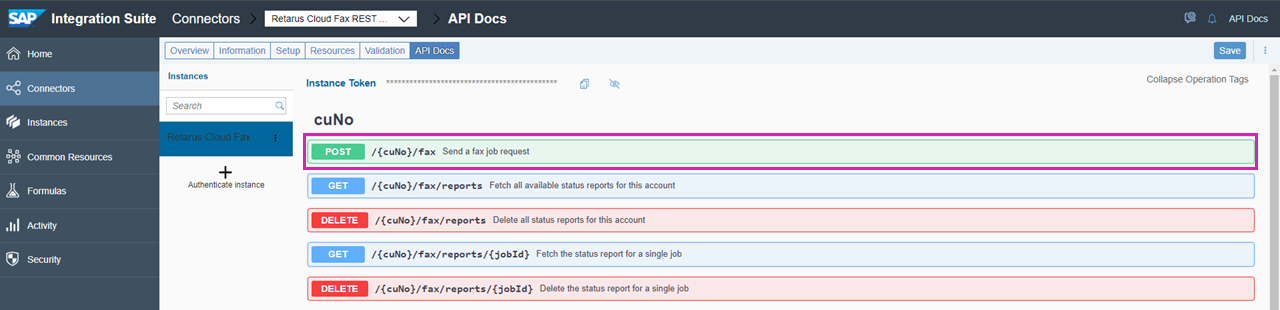
Click on the POST method to open it.
-
Select Try it out.
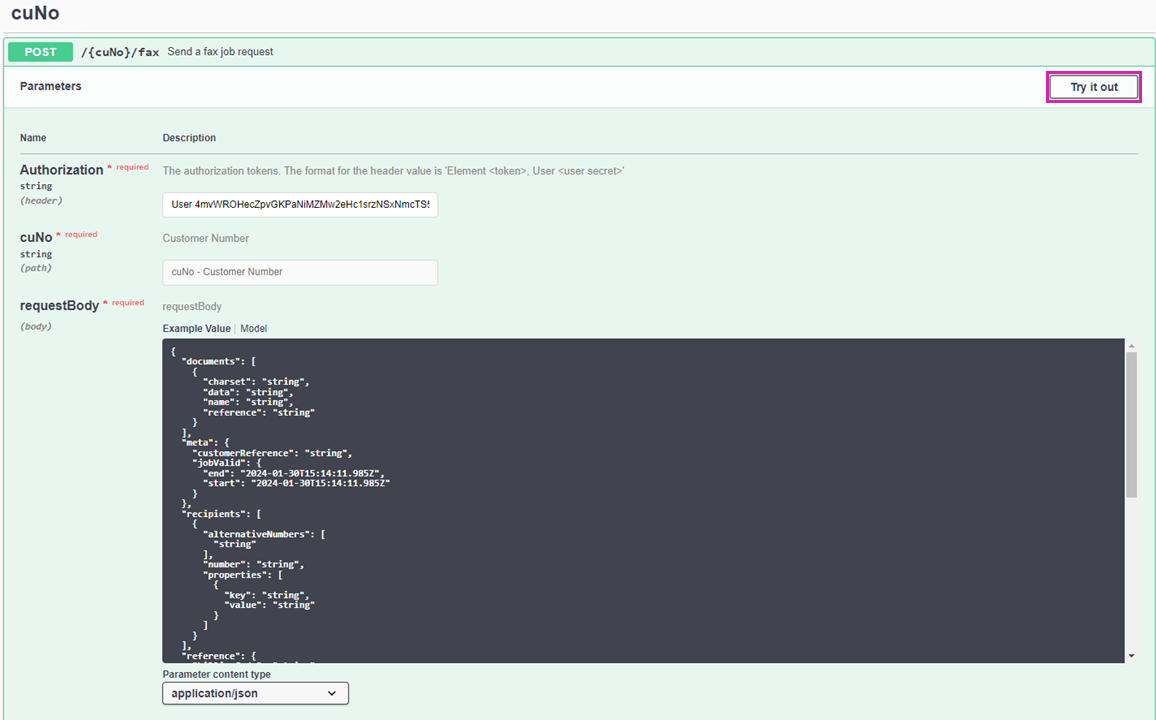
Upon clicking, the body field will become editable, indicated by its background color changing to white.
-
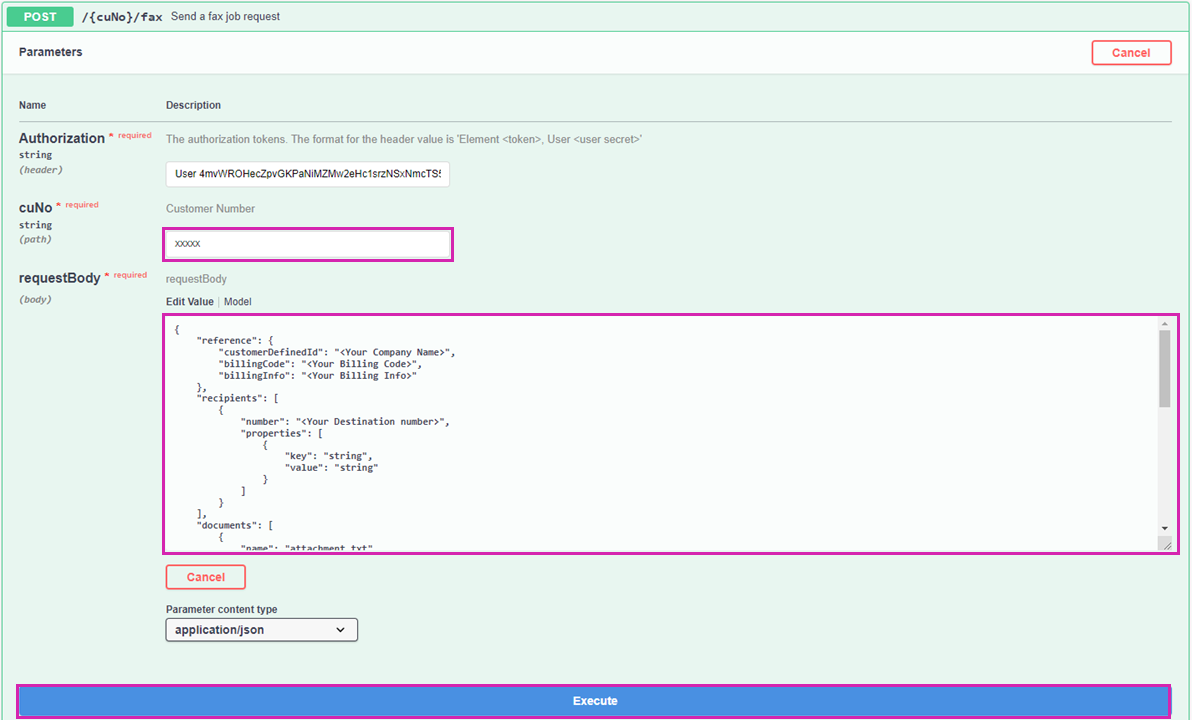
Enter the customer number provided by Retarus.

2. Perform the test
-
For a quick and straightforward functional test, clear everything from the body field and paste the following code.
{
    "reference": {
        "customerDefinedId": "<Your Company Name>",
        "billingCode": "<Your Billing Code>",
        "billingInfo": "<Your Billing Info>"
    },
    "recipients": [
        {
            "number": "<Your Destination Number>",
            "properties": [
                {
                    "key": "string",
                    "value": "string"
                }
            ]
        }
    ],
    "documents": [
        {
            "name": "attachment.txt",
            "charset": "UTF-8",
            "data": "UmV0YXJ1cyBDbG91ZCBGYXggU2VydmljZS4gDQpUZXN0IGF0dGFjaG1lbnQuDQoNCkhhdmUgYSBuaWNlIGRheQ=="
        }
    ],
    "meta": {
        "customerReference": "<Your Customer Number>",
        "jobValid": {
            "start": null,
            "end": null
        }
    },
    "renderingOptions": {
        "paperFormat": "A4",
        "resolution": "HIGH",
        "header": "%tz=CEST Testfax: CSID: %C Recipient Number: %# Date: %d.%m.%Y"
    },
    "transportOptions": {
        "csid": "<Your CSID>"
    },
    "statusReportOptions": {
        "reportPurgeTs": "2023-11-03T20:14:37.098+02:00",
        "reportMail": {
            "successAddress": "<Your email address>",
            "failureAddress": "<Your email address>",
            "attachedFaxImageMode": "SUCCESS_ONLY",
            "attachedFaxImageFormat": "TIFF"
        }
    }
}
📌 Make sure to replace the personalization parameters inside <…> with your specific details, and remove the <>.
-
Select Execute to send the job to Retarus Cloud Fax.
If the operation is successful, an OK/200 response is shown, along with the Retarus Cloud Fax job ID. Additionally, an email is sent to the specified mailbox.
-
Select Cancel to end the test.
The connector is now up and running and can be used by other integration consumers.
Tips
Tip 1 - curl command
In the response area, pay attention to the Curl section:
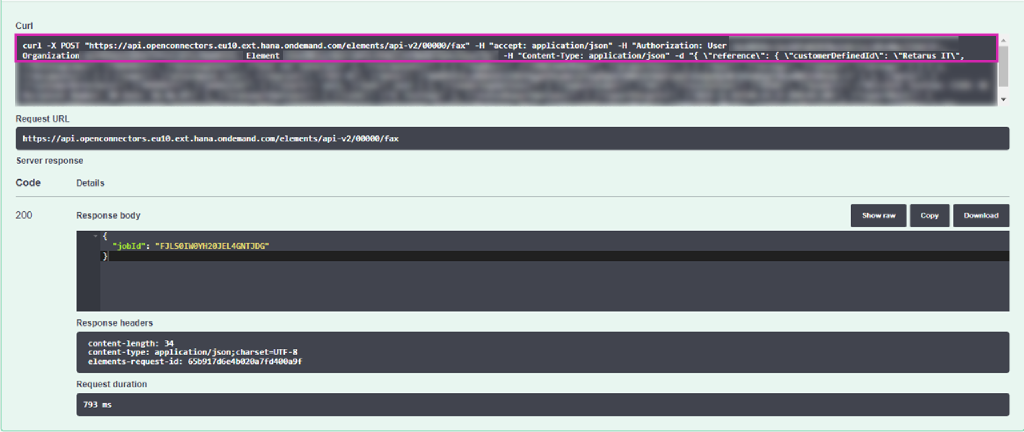
It displays the complete curl command that can be used in a DOS shell to send the job to Retarus. This section contains information valuable for future integrations. It is highly recommended to copy and safely store the following information:
-
SAP endpoint right after the POST command. It looks similar to https://api.openconnectors.eu10.ext.hana.ondemand.com/…. This endpoint is designated for SAP users who have permission to use this instance of the Retarus Cloud Fax connector. Any jobs that are sent in the correct format to this endpoint are directly forwarded through the Fax connector to Retarus Cloud Fax.
-
User, Organization, and Element strings, as these are required to create the SAP credentials for using this connector in other SAP integrations (e.g., integration flows).
📌 Copy the jobId from the response body to retrieve the report for this job using the
/{cuNo}/fax/reports/{jobId}resource.