
This tutorial outlines the necessary steps to set up the send connector in Exchange 2013 for using Retarus Email-to-Fax.
📌 Connector service settings
To configure service settings for the connector, refer to Email-to-Fax.
Developer: Retarus
Category: Cloud Fax Connector
Prerequisites
Microsoft Exchange
-
Administrative privileges within Microsoft Exchange.
-
A dedicated channel for receiving faxes.
Retarus
-
An Email-to-Fax account.
-
An EAS account, including login ID (username and password).
-
Administrative rights for configuring Fax-to-Email in the EAS portal.
How to get started
To allow users to use the [FAX:*] address space in emails, you must configure how this address space is used within the Exchange structure. The configuration in the Exchange Admin Center is used to do this.
You can access the Exchange Management Console through the Admin Center. The console uses a wizard to create the send connector.
The configuration is set at the organizational level under the Message flow subitem.
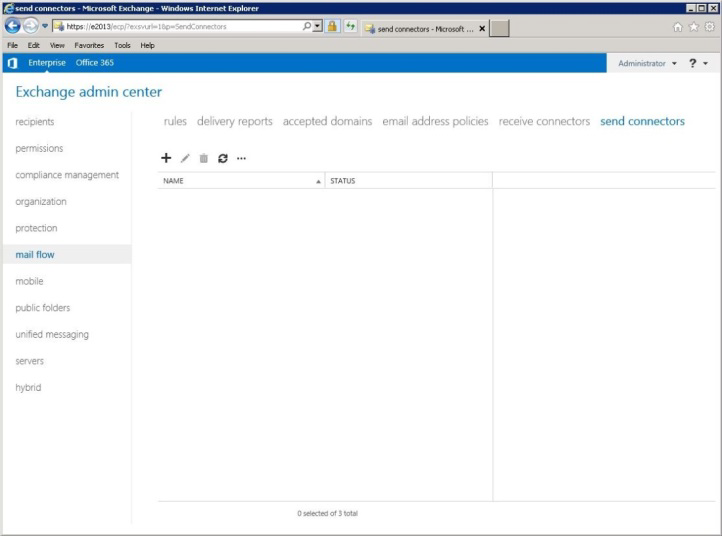
To add a new send connector, Click the + above the table. The setup assistant will appear in a newly opened window and guide you through the configuration step-by-step.
Under Introduction, Enter the connector name (Retarus Faxolution for Exchange) in the text box. In the menu directly below the text box, select Custom.
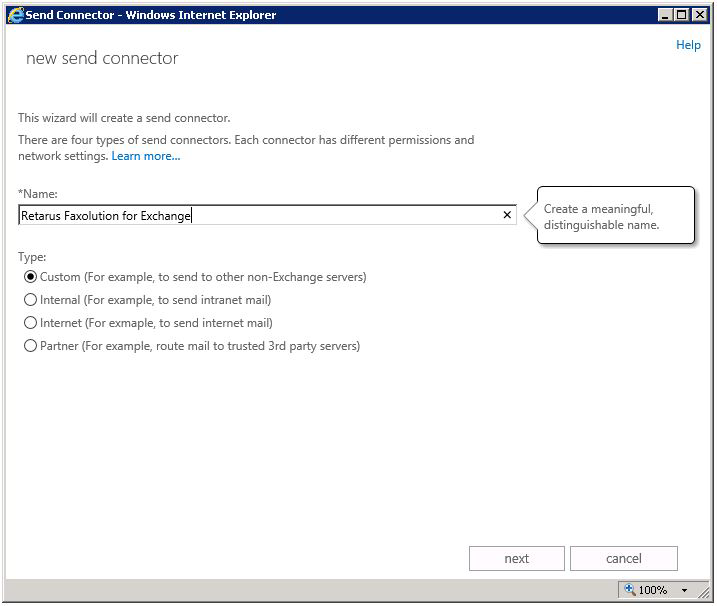
Click Next. The next step is to set the domain for the connector.
Select Accepted domains from the drop-down menu next to the Add button. The destination for emails is configured here.
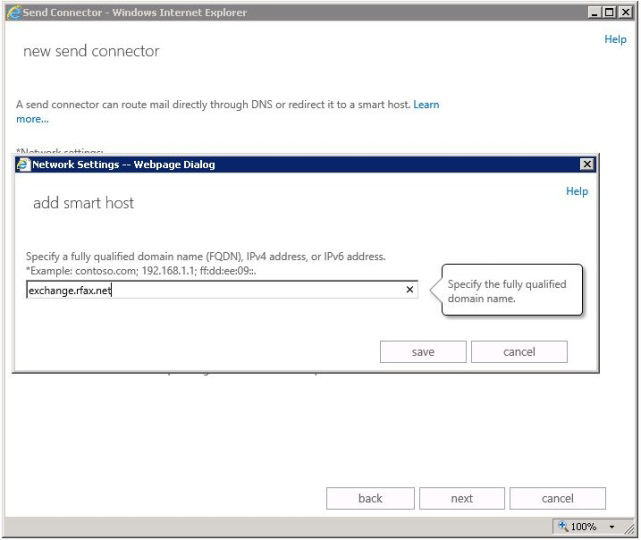
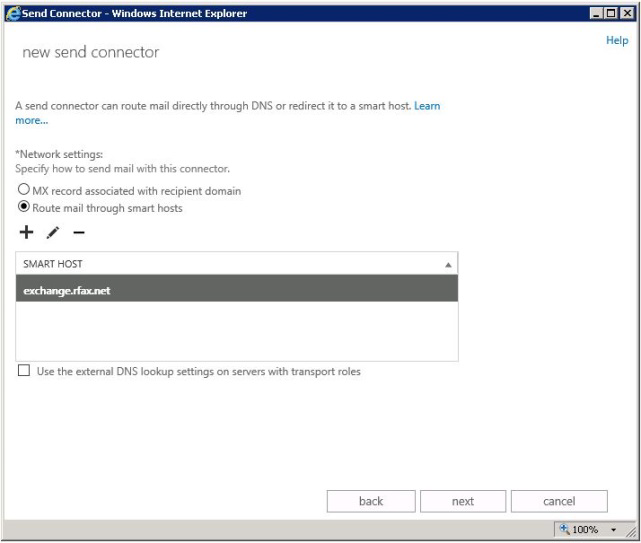
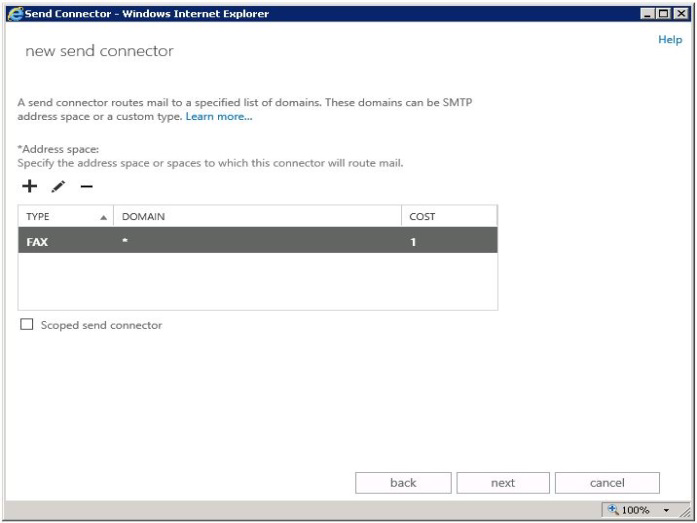
Select Route mail through smart hosts. The next step is to configure the address space for the connector. Select User defined address space from the drop-down menu next to Add interface and configure the destination for the emails. Select Route mail through smart hosts.
The Address area window opens, and you are prompted to complete the fields displayed in the window. Enter the following values:
-
Type: FAX
-
Full Qualified Domain Name: *
-
Cost: 1
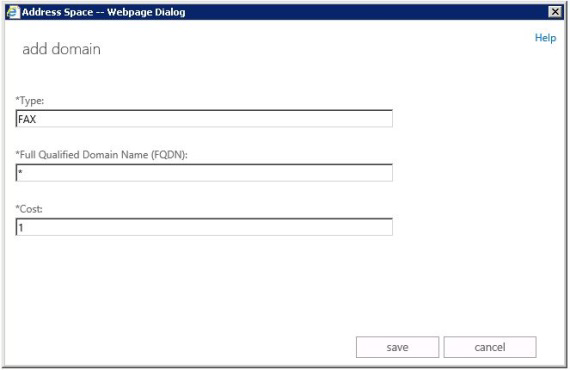
After you click Save, the address space is fully configured. You will be taken to the wizard's overview page. To continue, Click Network settings.
The last step is to save the source server so that the messages can be sent:

The configuration is now complete.
Fax contents and components
To send a fax, first create an email with the content you want to send. Once you send the message, it and any attachments are delivered to the fax recipient. This makes it quick and easy to create a cover page in the body of the message and attach additional documents. Of course, you can also send messages without attachments or attachments without messages.
Addressing format
To send an email to a fax, enter the recipient's number in the following format: [FAX: fax number], for example [FAX: 00498955281919].
📌 Format requirements
The brackets [ ] and the FAX prefix to the fax number are required. Without them, Exchange cannot deliver the email. The exact appearance of your email client depends on the language of your operating system.

After adding the fax number as described above, it will be recognized and underlined as a single number in the address line. This makes it easy to find this fax number in the Notes or Outlook cache for a future transmission.
In addition, you can retrieve contacts from the Outlook address book, Active Directory, or other contacts retrieved from Outlook (e.g., Microsoft Dynamics CRM) to directly address fax contacts. If the address space is named FAX, Outlook automatically configures the correct addressing format when the corresponding fax numbers are stored in the address book.
After a message has been successfully delivered to Retarus, you will receive a confirmation email.