
Sending a fax with Retarus is straightforward. You create a new fax, add recipients and content, configure optional settings, and send it.
Create a new fax
-
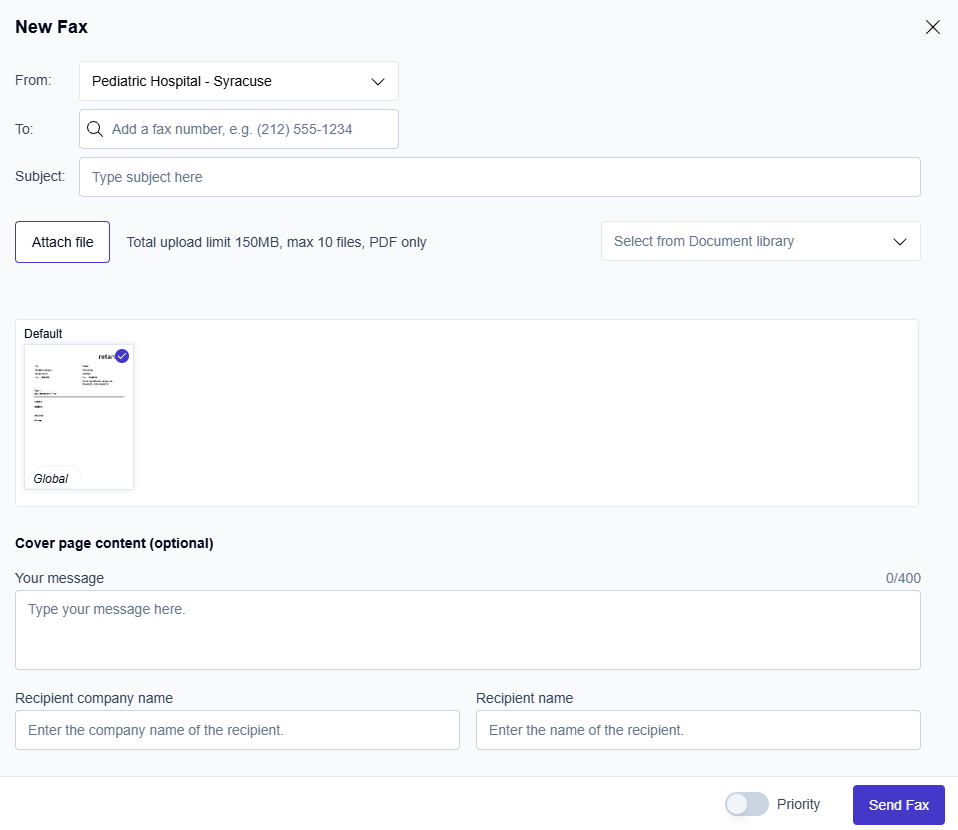
Click New Fax to open the fax composition screen.
-
From the From: drop-down list, select the faxbox you want to use.
Add recipients
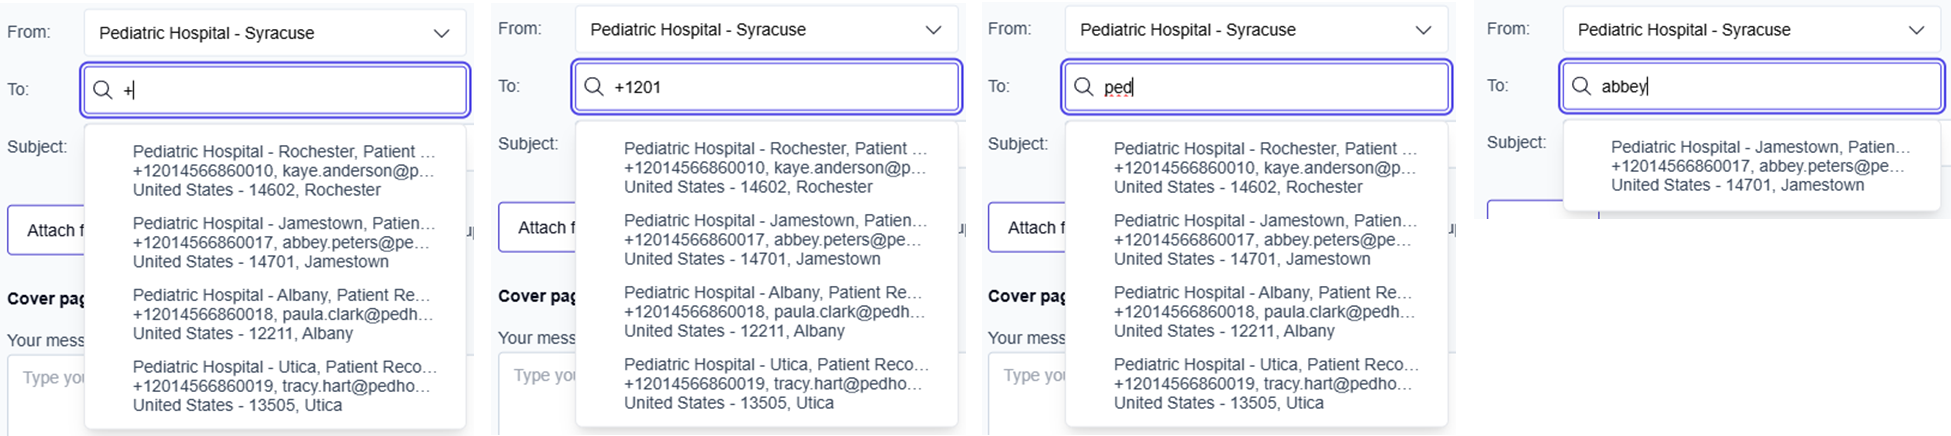
You can add recipients by using the address book or entering a fax number manually.
Use the address book
-
Click in the To field.
-
Type a
+(plus sign) or start typing the recipient’s name, company, or fax number to see suggestions. -
Select the correct contact.
→ The Recipient company name and Recipient name fields fill in automatically.
Enter the fax number manually
-
Click in the To field.
-
Enter the fax number using this format:
+country code and fax number without spaces (for example,+12013770XXX).
When the fax is sent, the system automatically appends your organization’s fax domain (for example, @us.rfax.net or @eu.rfax.net).
Add subject and attachments
-
Enter a subject in the Subject field.
-
Attach up to 10 PDF documents with a combined maximum size of 150 MB.
Attach files from your computer
-
Click Attach file.
-
Select one or more files, and click Open.
→ The selected files are displayed below the Attach file button.
Add files from the Document library
Use this to attach documents that are already stored in your centralized repository:
-
Click the Select from Document library dropdown next to the Attach file button.
-
Select one or more documents from the list.
→ Selected documents are marked with a checkmark and appear below the Attach file button.

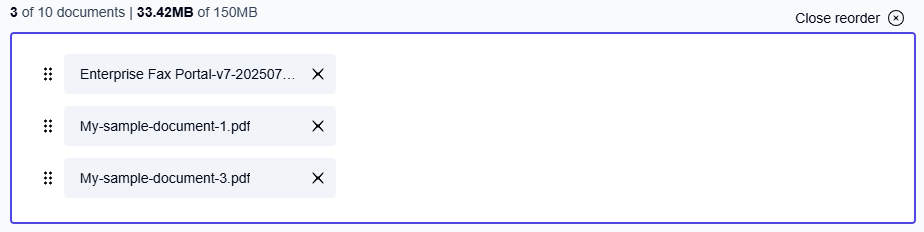
Manage attached documents
You can control the order in which documents are sent. The document order determines how the pages appear in the fax.
-
Click Reorder to activate the reorder mode.
-
Click and drag the handle icon (≡) next to each attached document to reorder them as needed.
-
Click Close reorder to save the order and exit the reorder mode.
Edit attachments before sending
If Document Editing is enabled for your account, a pen icon appears next to each attachment on the Send Fax screen.
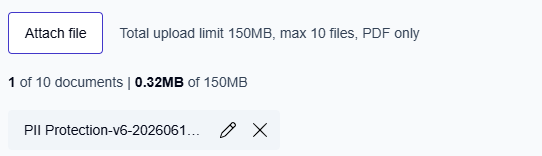
Clicking it opens the PDF Editor with a copy of the attachment. The original file is not modified.
-
Click the pen icon next to the attachment you want to edit.
→ The PDF Editor opens with a copy of the attachment. -
Make your changes.
-
Click Save, then click Save changes to confirm.
→ The editor closes, and you return to the Send Fax screen.
📌 You can reopen an edited attachment and add further edits before sending. Each time you save, the previous edits are locked in and cannot be undone in a subsequent editing session. For details, see Edit faxes.
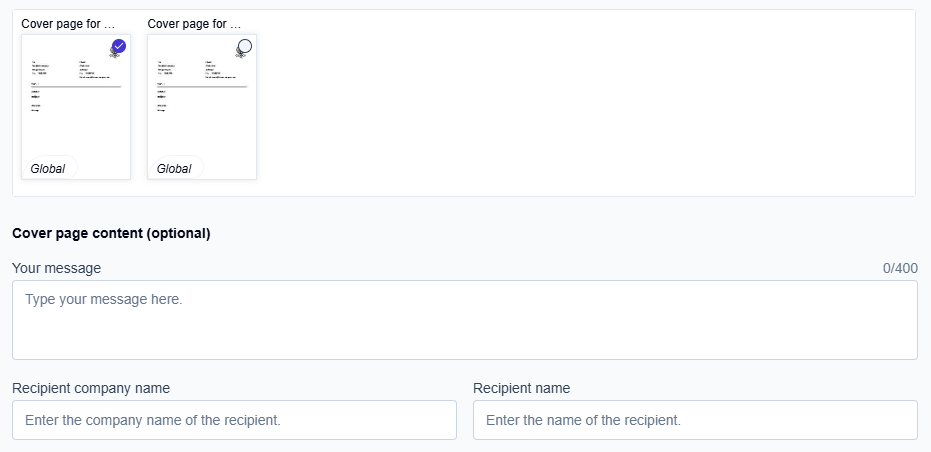
Configure the cover page
You can send the fax with or without a cover page. To include a cover page:
📌 If you don’t see any cover pages, none are configured for your account. Contact your administrator if you need one.
-
Select the desired cover page in the list of available options.
-
Enter a message in the Your message field, if needed.
→ The message appears on the first page of the fax. -
Complete the Recipient company name and Recipient name fields.
Set delivery options
You can enable priority delivery for urgent faxes.
-
Confirm with your administrator that priority delivery is available and approved for your organization.
-
Turn on the Priority switch to send the fax ahead of others.
📌 Priority delivery charges
Additional charges apply to priority delivery.
Send the fax
-
Click the Send Fax button.
→ Your fax is sent and appears in your Outbound folder.