Configuring SAP Connector (BC-SMTP)
This tutorial outlines the configuration of the SAP certified Retarus BC-SMTP Connector for S/HANA.
Retarus also maintains a continuous support contract for this integration via SAP ICC (Integration Certification Center) in order to operate a constant service with consistent quality.
This connector can be used for Retarus Cloud Fax Outbound, Inbound and Enterprise SMS products.
SAPconnect provides a standardized interface for external communication that supports sending via telecommunication services such as fax, text messages (pager/SMS), Internet mail and X.400 as well as sending to printers and between different SAP systems. It enables the connection of external communication components to the SAP system.
SAPconnect offers a direct connection to the Internet via the SMTP plug-in of the SAP Web Application Server. This allows you to send and receive Internet mails, faxes and text messages (pager/SMS) directly without using additional external communication systems. For more information, see the SMTP configuration guide.
It is also possible to transfer text messages (pager/SMS) packaged as URLs to external servers or providers. For more information, see the SAP HTTP configuration guide.
The installation process consists of the following steps:
Configuration of SMTP routing
Optional configuration of a TLS or VPN connection
Configuration of the SAP default domain
Configuration of the SAP SMTP node
SAP address book administration
User management for the service in the EAS portal
Validation of the service
Configuring SMTP routing
Ensure that the mail routing is installed correctly by consulting the following links:
https://help.sap.de/saphelp_me61/helpdata/en/4a/25a31c08a81c67e10000000a42189c/frameset.htm
https://help.sap.com/saphelp_erp60_sp/helpdata/en/af/73563c1e734f0fe10000000a114084/content.htm
In the SAP BC-SMTP interface, faxes and their corresponding status reports are addressed in email address format. These email addresses must be configured so that they can be sent and received directly through the SAP system. For this reason, it is recommended that a subdomain be set up for communication via SAP only to simplify administration and email routing as much as possible.
Sample
Sender address: your_faxnumber@sap.yourdomain.com
Recipient address: recipient_faxnumber@rfax.net
📌 Sample SAP subdomain: @sap.yourdomain.com
This subdomain must later be configured as the default domain in the SAP system (see Configuring the SAP default domain).
Modifying the default sender address
If a single fax number is assigned to multiple users, the number is unsuitable as part of the sender's address because it cannot be uniquely associated with the sender. To accommodate this, you can use the user's email address.
To apply this option, the application’s Parameter Table (SXPARAMS) must be modified in SAPconnect.
Using SAP Easy Access, start the SAPconnect (TC: “SOST”) application.
Use the Utilities - General Parameters menu to access the SAPconnect: Parameter Table: Overview (SXPARAMS).
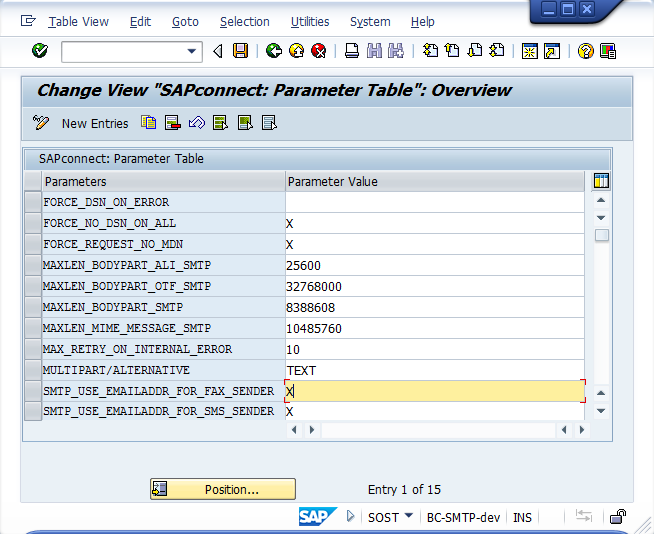
Add the following parameter to the table:
SMTP_USE_EMAILADDR_FOR_FAX_SENDER | X
📌 SAP Note: 1161435
Additional information is available in SAP Note: 1161435.
Configuring the SAP default domain
Use SAP Easy Access to open the SAPconnect application:
Via the SAP menu: Tools - BusinessCommunication - Communication - SAPconnect (TC: “SCOT”).In the Settings menu, select the Default Domain and enter the previously installed domain.

📌 Transmission status in BC-SMTP
Regarding transmission status reports in a BC-SMTP integration if you send emails with
username@regulardomain.com, either SAP or a standard email host can process your emails. This means that you can send your emails from SAP but receive them via the standard mail server. If your SAP host system name is, for example, PRD, and the client number is 100, it would be optimal to set up another subdomain, e.g., "prd_100.regulardomain.com".
The additional subdomain would be added as an MX record to your DNS server so that all emails addressed to "someone@prd_100.regulardomain.com" will be routed through that SAP, and the SAP system will receive the proper FAX status. Otherwise, the green status you see in SAP means that "the email was successfully transferred to Retarus" and not "the fax was successfully sent to the recipient".
Please also remember to update your node with that subdomain as the default domain so that all faxes sent will leave your system with, e.g., "someone@prd_100.regulardomain.com" and not "someone@regulardomain.com".
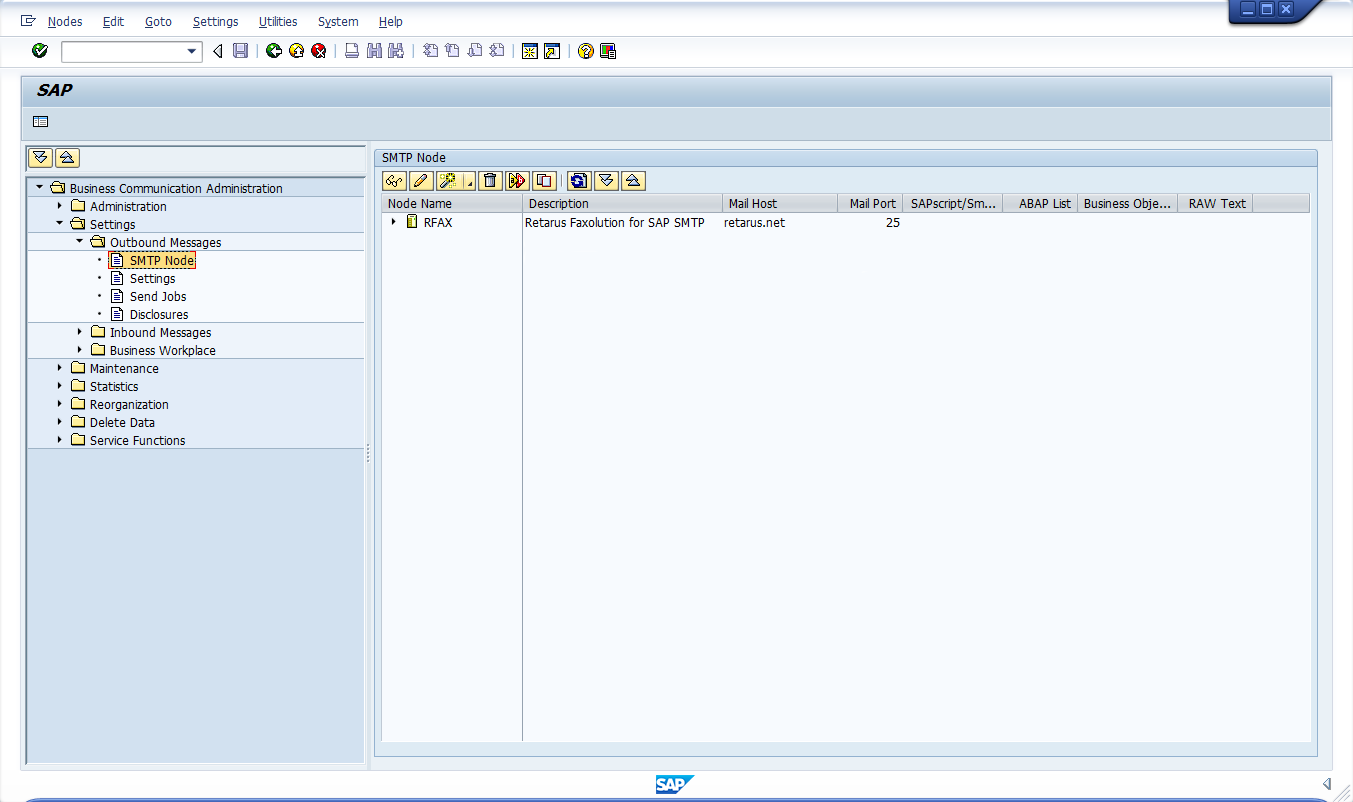
Configuring an SAP SMTP node
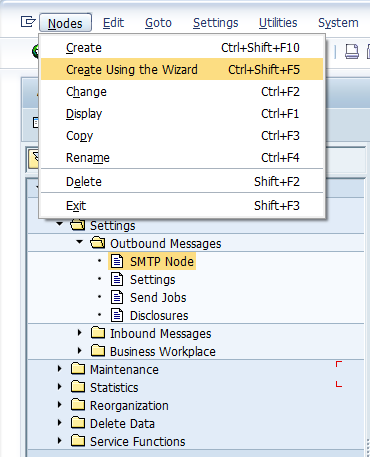
In SAPconnect, at least one SAP SMTP node must be installed for all communication parameters to be configured. The Configuration Wizard provides step-by-step assistance in entering these parameters. To begin the process, click on Create Using the Wizard in the Nodes menu.
Wizard
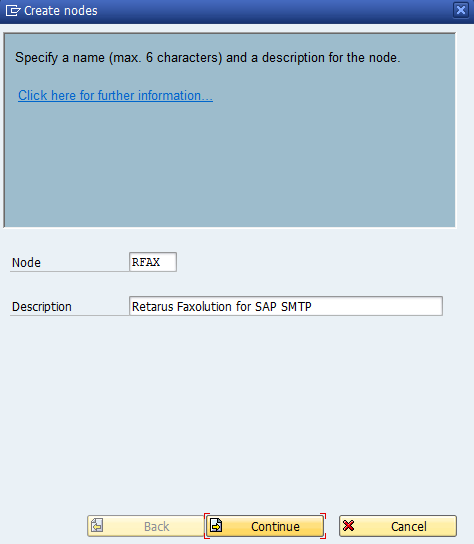
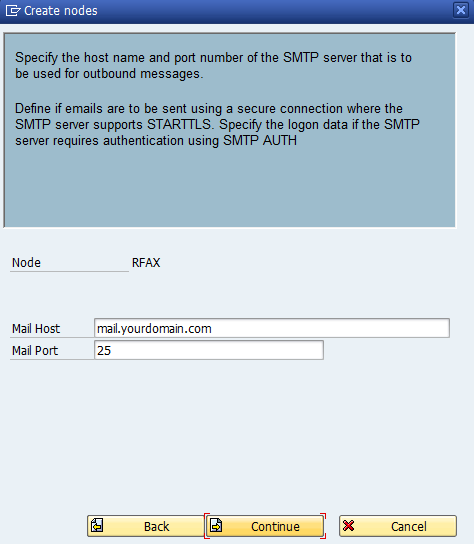
The initial step is to assign a unique name to the SAP SMTP node in the Node field. The name can have a maximum of six characters. In the Description field, you can opt to enter and save a clear description for the node.
Enter your Mail Host for outbound messages (for example, “mail.yourdomain.com ”) and add the mail host‘s corresponding Mail Port (generally, “25”) that was configured for the TLS handshake (http://tools.ietf.org/html/rfc3207).
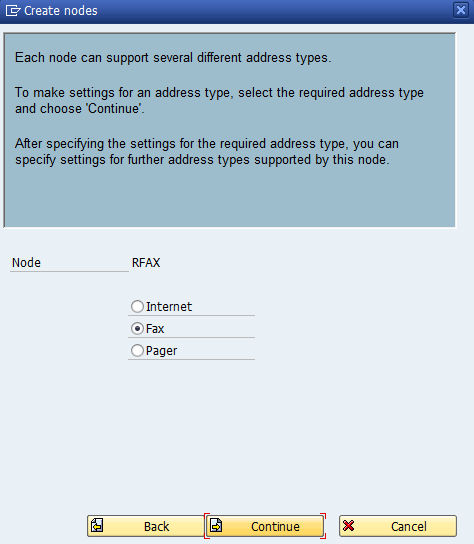
The next step is to select the service that you want to configure (in this case, it is Fax).
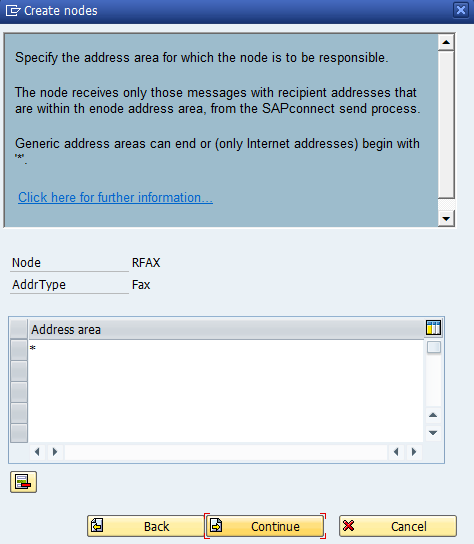
You will now create an address area for this node. If the node will be used for all of the addresses, enter an (*).
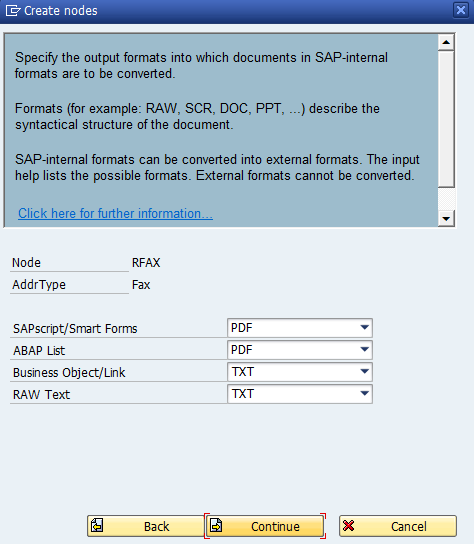
The following menu allows you to select a base format regardless of its source. We recommend selecting PDF format.
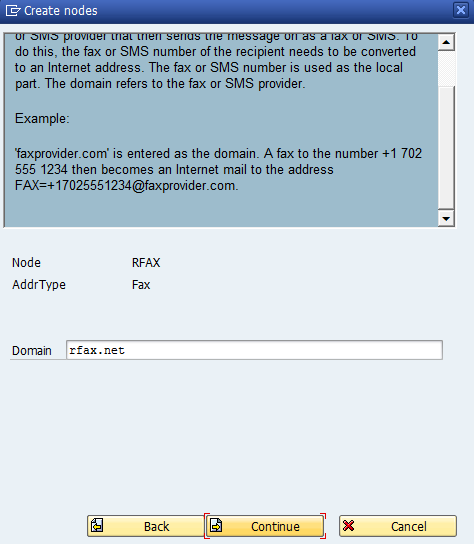
The next step is to specify the domain for Retarus Fax Connector for SAP services: rfax.net. All faxes sent to the Retarus infrastructure via SMTP will be sent to this domain.
Sample: recipient_faxnumber@rfax.net
If you also want to configure Retarus SMS for SAP, select Y instead of N. There is a separate administrator manual for the configuration of Retarus SMS for SAP.

Next, you can configure the length of the period during which attempts to re-send a failed fax transmission will be repeated. We recommend entering two hours.
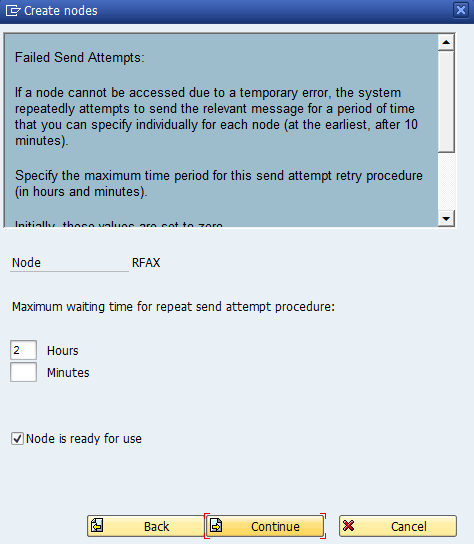
The SAP SMTP node has now successfully been configured and is ready for use.
Managing the SAP address book
In order to send a fax using SAP via BC-SMTP, a user must save a fax number that simultaneously serves as part of the sender address.
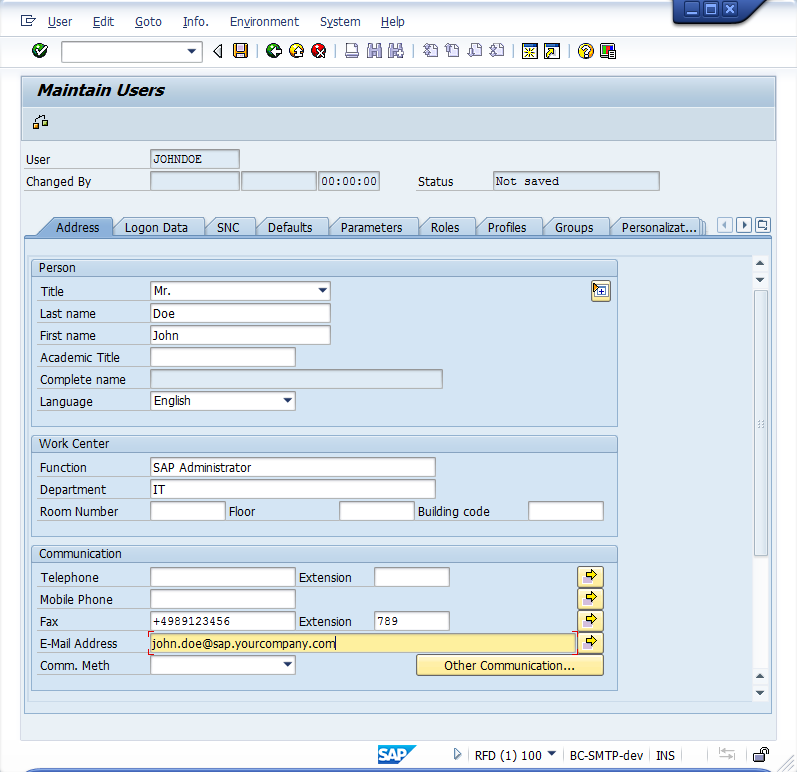
Use SAP Easy Access to open User Maintenance.
Via the SAP menu: Tools - Administration - UserMaintenance - Users.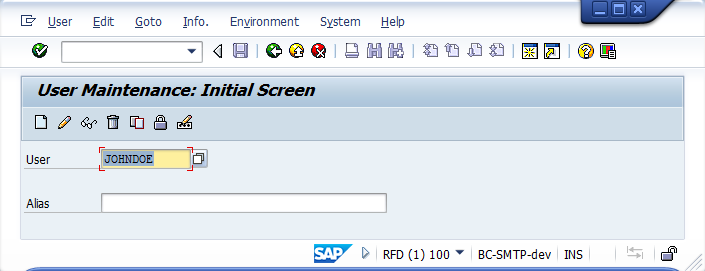
Enter the user’s fax number under the Address tab in the Maintain Users interface. Complete this step for each user that needs to send faxes.
📌 Sender email best practice
When, for example, a fax number is utilized by multiple users, you should avoid using the fax number as part of the sender’s email address because the reports can no longer be allocated to the actual sender. For this reason, the user’s email address should be used. To do this, a parameter in SXPARAMS has to be configured (see Configuring SMTP routing).
Configuring settings in the EAS portal
Administration and configuration for users of the service take place in the EAS portal. The configuration simultaneously doubles as the validation of the transmission. In addition, you can configure additional fax settings. Because Fax Connector for SAP is the base technology for Retarus Email-to-Fax, all configurations are made in the respective section under Adminstration - Fax Services. An SAP client will already have been pre-configured by Retarus.
The next step is to log on to the EAS portal and navigate to the Email-to-Fax menu under Administration - Fax Services. Additional information on the general configuration of Retarus Email-to-Fax is available in Email-to-Fax.
Creating service users in EAS
A new user is created using the Add User button under the User tab. An accurate entry in the User name field is crucial because it corresponds to the SAP system’s exact sender address. Here is the naming format:
fax=your_faxnumber@sap.yourdomain.com (e.g., fax=+4989123456789@sap.yourdomain.com)
In the Client name field, select the SAP client (which has already been created by Retarus, and in the example below would be “http://sap.yourcompany.com”). The Report format field under Status reports has to be explicitly set to SAP in order for status reports from your SAP system to be interpreted.
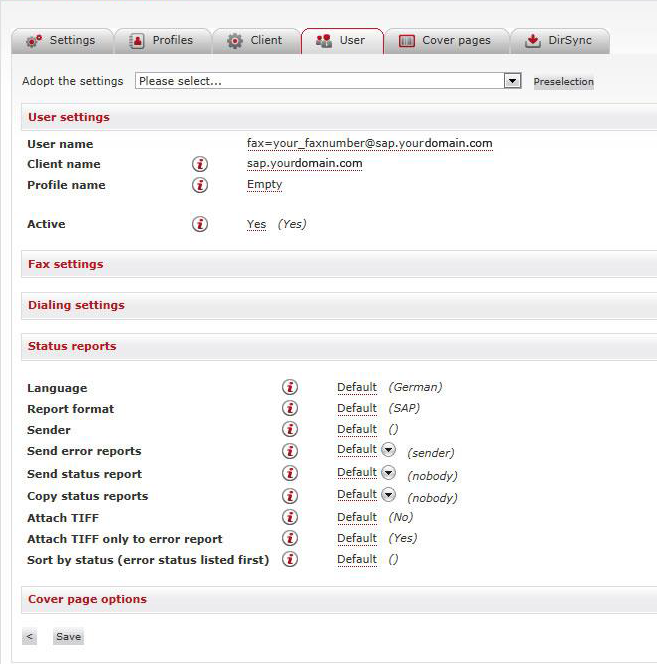
The new service user or any configuration updates are saved by clicking on the Save button.
Validating the service with SAP Workplace
Once all configuration steps are completed, fax transmission can be validated using the SAP Workplace application.
Use SAP Easy Access to reach the SAP Workplace application:
Via the SAP menu: Office - Workplace.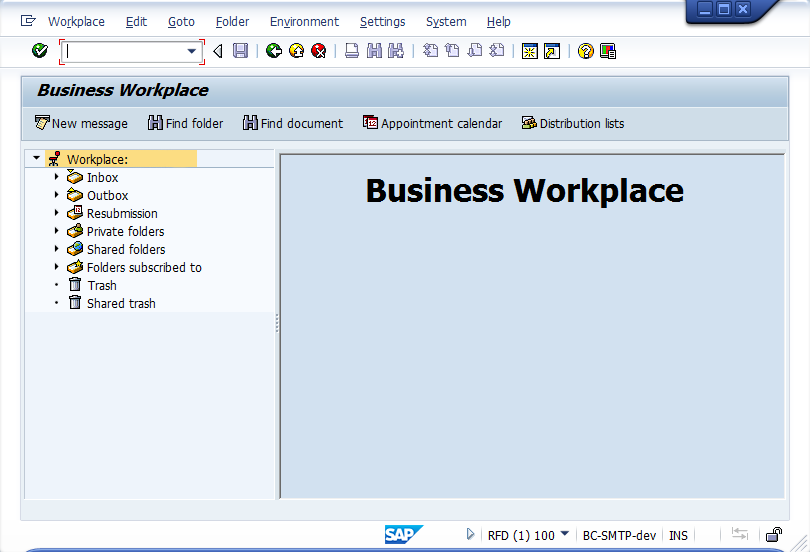
Click on New message to compose a new fax message.
Enter the recipient’s fax number in the Recipient column, while observing the format displayed below.
Fax number must be selected from the Recip. Type drop-down menu.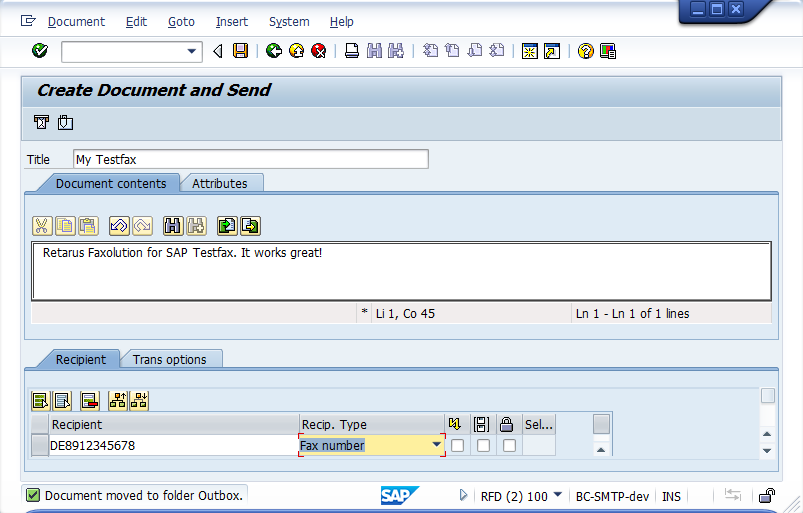
Open the Outbox in SAP Workplace and select a sent fax document by double-clicking on it.
The document’s current status can be monitored under the Recipient list tab. The recipient list is not automatically updated in SAP Workplace, meaning the message must be continually retrieved for updates until the Delivered to status appears.
If you receive the status displayed below along with a green status symbol, the fax was successfully delivered, and the status report was successfully received. The configuration has been completed.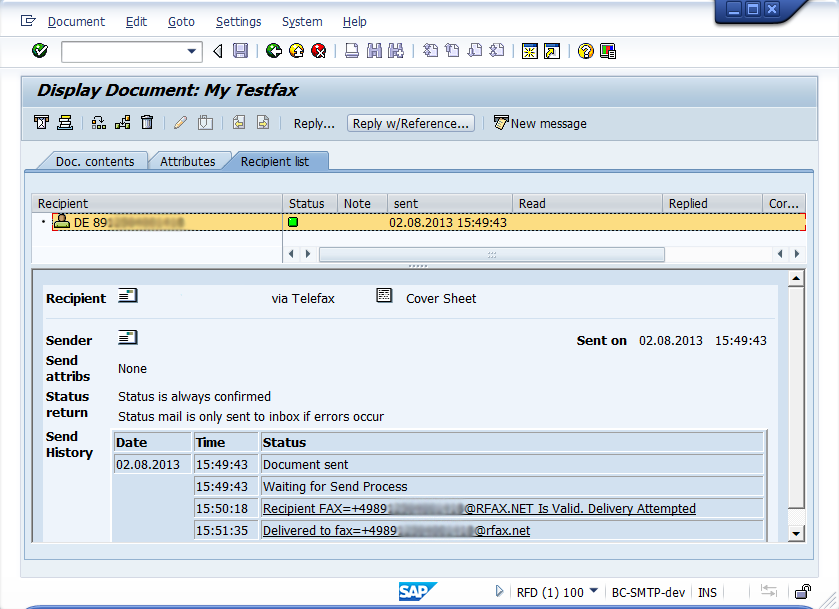
SAP reference documents
SAP Note 455140: Email, fax, paging, SMS configuration using SMTP
SAP Note 1161435: Fax sender address using SMTP
SAP SE Integration Certification of Retarus Cloud Fax