
Setting Up Cloud Fax App for Salesforce
The Retarus Cloud Fax App for Salesforce app lets you manage fax campaigns and individual fax jobs directly in Salesforce. The setup process includes installing the package, activating the Lightning app, configuring authentication and endpoint settings, and assigning user permissions.
Prerequisites
Salesforce administrator rights
API credentials for Retarus Fax-for-Applications (including Reporting WebPush OAuth)
Installing the app
Open the installation link provided by Retarus.
Log in with your Salesforce credentials.
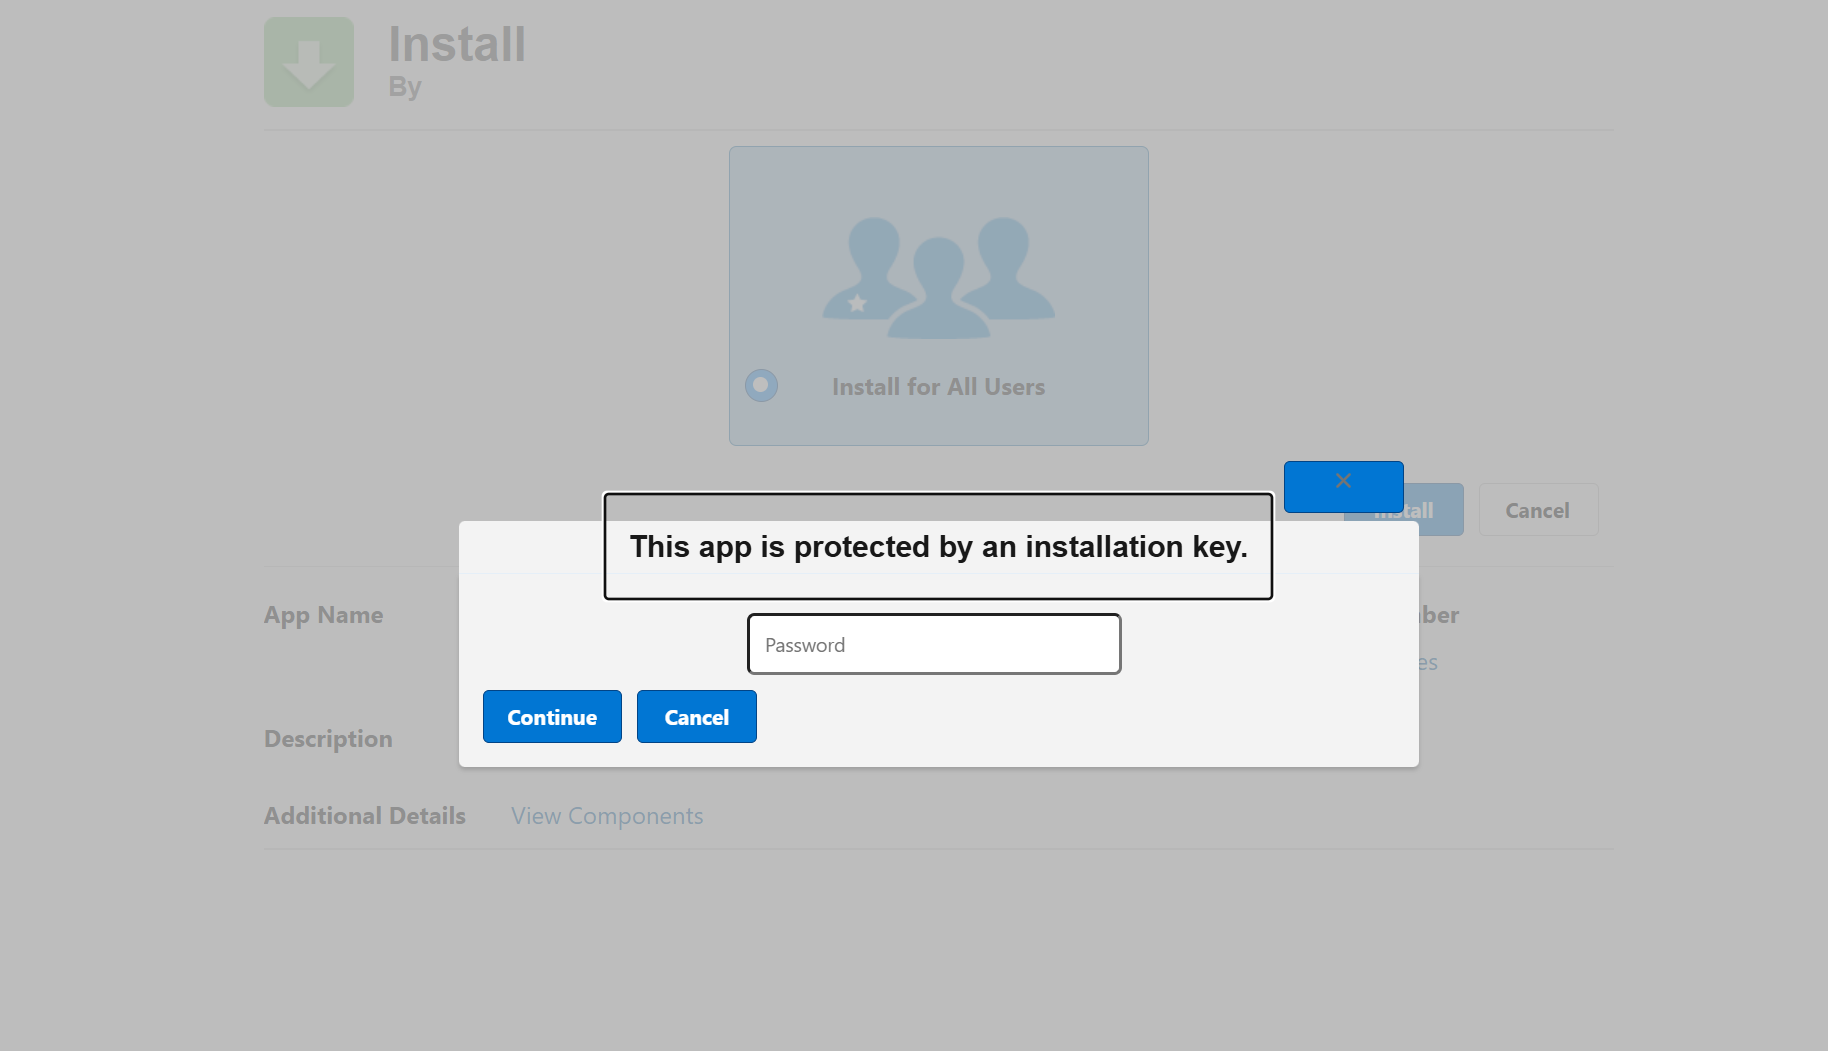
Choose the installation scope (e.g., Install for Admins Only or Install for All Users).
Activate the following option:
I acknowledge that I’m installing a Non-Salesforce Application that is not authorized for distribution as part of Salesforce’s AppExchange Partner Program.
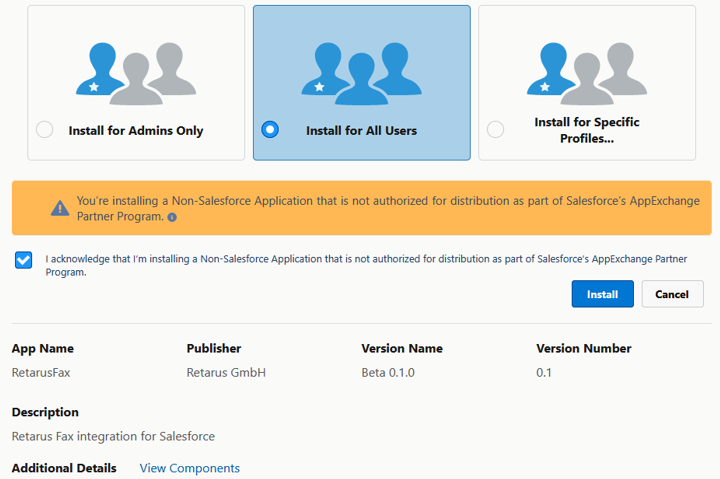
Complete the installation and wait for it to finish.
Activating the app
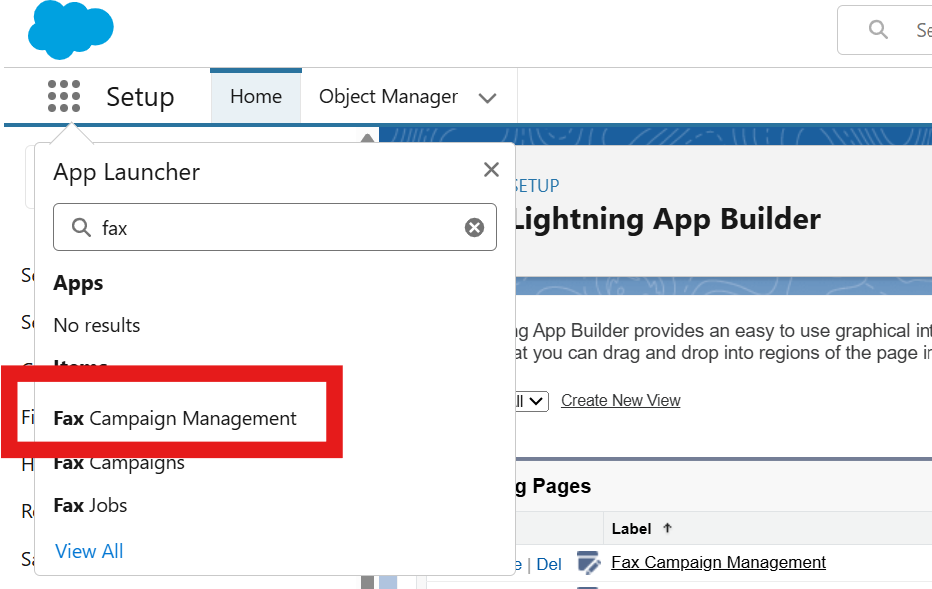
Go to Setup - Lightning App Builder.
Locate Fax Campaign Management and click Edit.
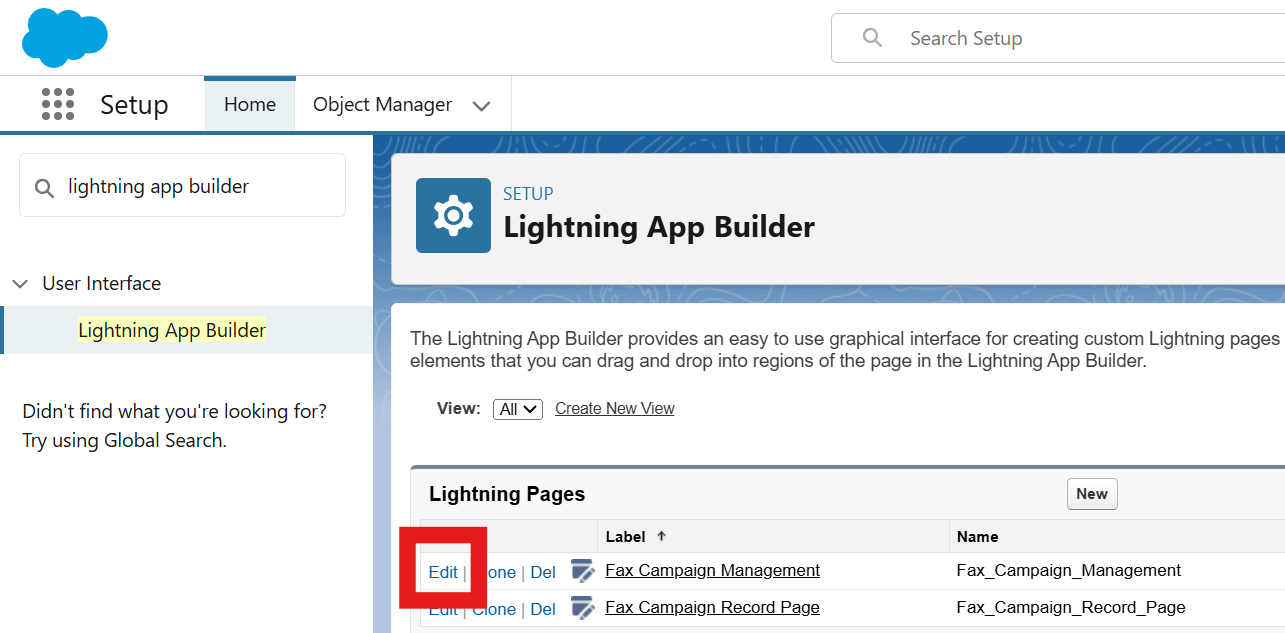
Click Activation.

Choose whether to activate the app for administrators only or for all users, based on your rollout plan, and click Save.
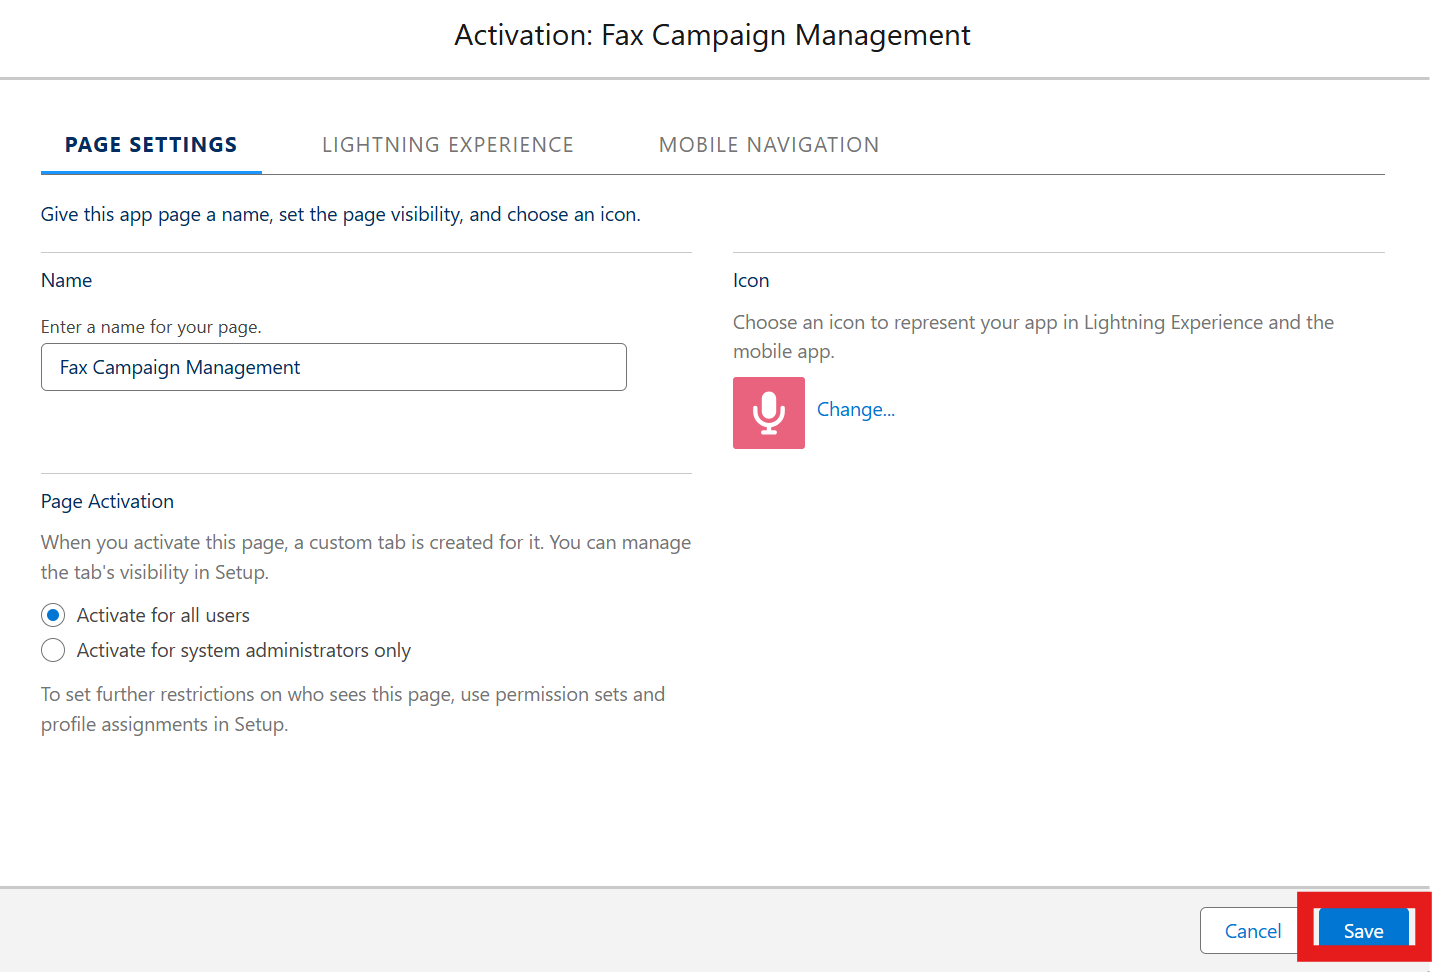
Verify that the app appears in the App Launcher.
Creating the External Client App
Next, you must create an External Client App in Salesforce. This app allows Retarus to send updates for fax jobs back to your Salesforce organization.
During this process, you assign an integration user. This user defines under which identity Retarus updates fax jobs and fax campaigns in Salesforce. All changes coming from Retarus are performed in the name of this user. The integration user must have full access to the following objects:
Cloud Fax Campaign
Fax Job
Creating and Configuring the External Client App
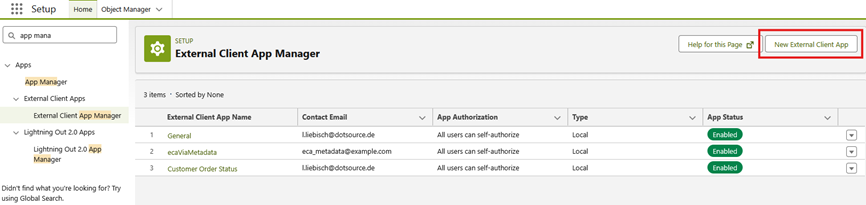
Go to Setup - External Client App Manager, and select New External Client App.
Enter basic app details:
External Client App Name
Enter any name that helps you identify the app.API Name
This field is generated automatically from the name. It cannot contain spaces or special characters.Contact Email
Enter any valid email address. This address is not expected to be used for communication.Distribution State
Select Local.All other fields are optional and can be left as-is or filled in as needed.
Configure API settings (OAuth).
Enable OAuth to display the available options.
Callback URL
Enter any URL starting withhttps://.
This value is not used by the Retarus integration but is required by Salesforce.OAuth Scopes
Select Manage user data via APIs (api).Flow Enablement
Select Enable Client Credentials Flow.
Confirm the popup dialog.
Leave all remaining settings unchanged.
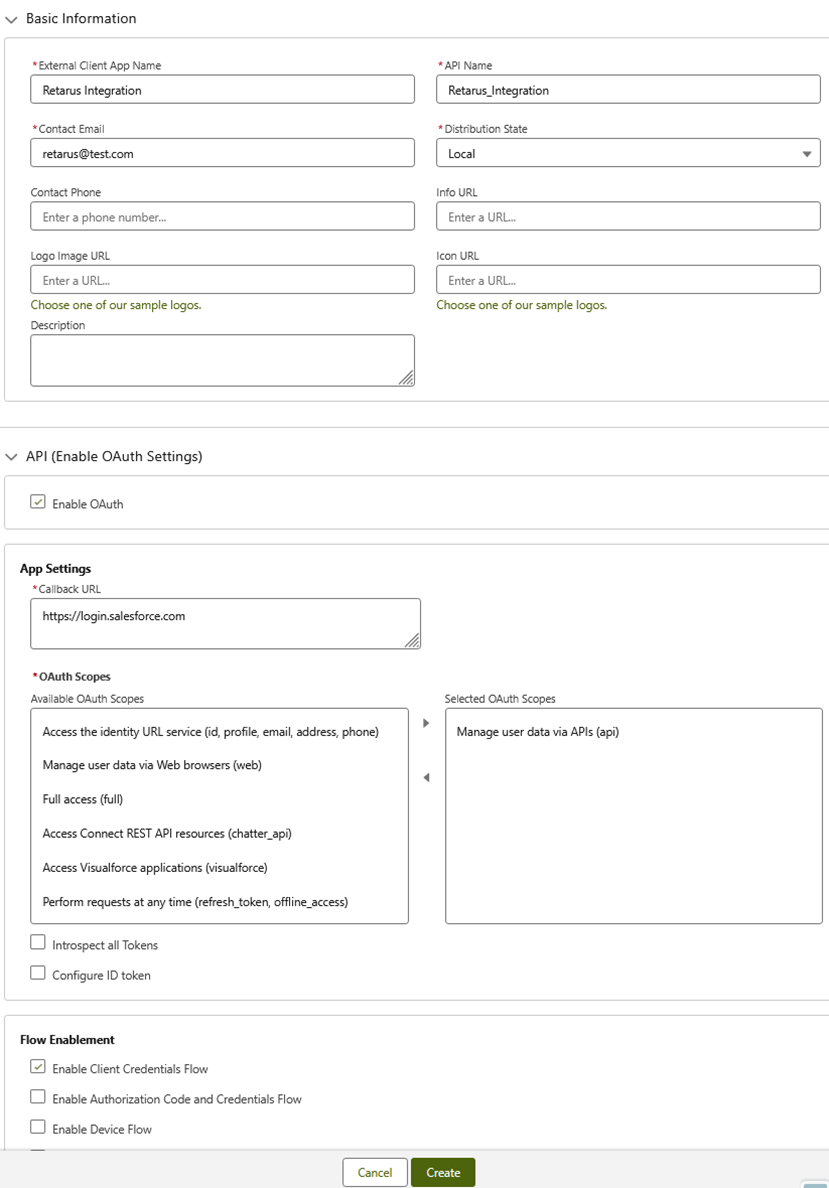
Select Create at the bottom of the page.
Assign the Integration User.
Open the Policies tab of the newly created app.
Click Edit.
Expand OAuth Policies.
Select Enable Client Credentials Flow.
In the Run As field, enter the username of the integration user.
Save your changes.

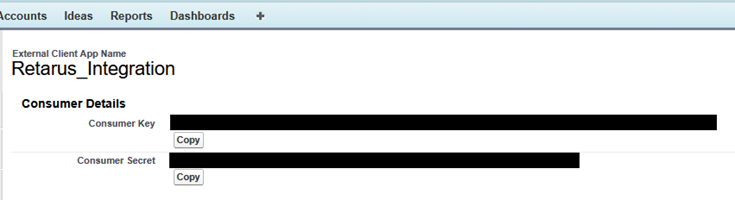
Retrieve the Client ID and Client Secret.
Go to the Settings tab.
Expand OAuth Settings.
Select Consumer Key and Secret.
Confirm your identity when prompted.
If you run into issues, try another browser or use incognito/private mode.
-> Salesforce displays Consumer Key (Client ID) and Consumer Secret (Client Secret).
Information to provide to Retarus
As part of the implementation process, certain information must be exchanged with the Retarus implementation team. These details are required to enable Push Reporting, which allows Retarus to send fax status updates (webhooks) to your Salesforce organization.
Provide the following information during the credential exchange to ensure that Push Reporting can be set up correctly:
Account / username
The account identifier or username for the integration.OAuth server
The OAuth authorization server for authentication.OAuth username
The username to authenticate against the OAuth server.OAuth password
The password to authenticate against the OAuth server.Webhook endpoint
The Salesforce endpoint URL to which Push Reporting webhooks are sent.Optional scope
An OAuth scope, if required by your OAuth configuration.Optional headers
Any additional HTTP headers that must be included in webhook requests.
Configuring Retarus credentials
To allow Salesforce to send data to Retarus, you must store your Retarus Fax API credentials in Salesforce.
Updating the Named Credential
Go to Setup - Named Credentials.
From the list, select the Retarus API Credentials to open it and then click Edit.
In the URL field, replace
CUSTOMERNUMBERwith your actual Retarus customer number.
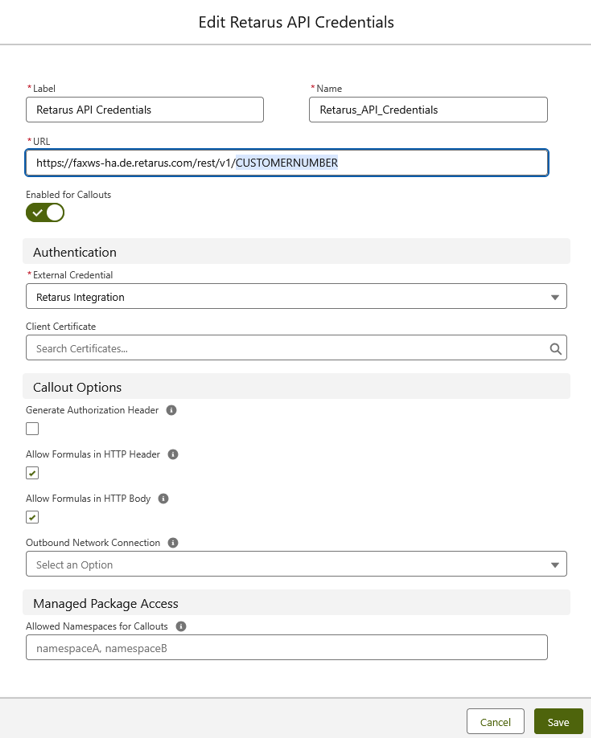
Click Save.
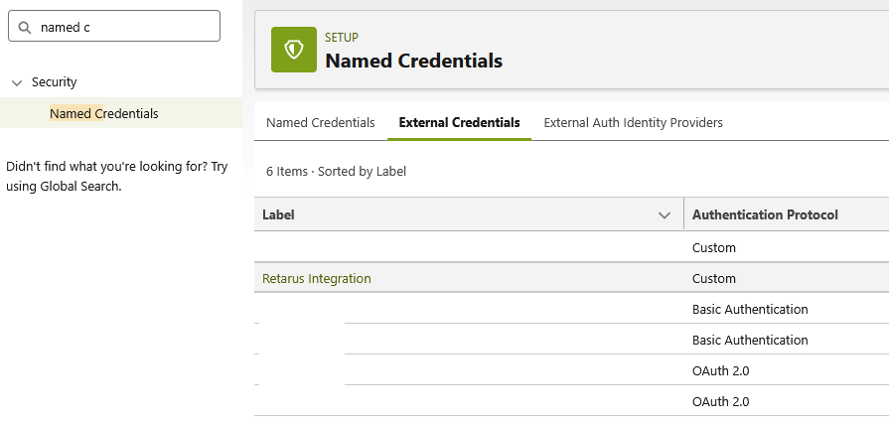
Updating the External Credential
Go to Setup - Named Credentials - External Credentials.
From the list, select Retarus Integration.
In the Principals list, select Auth, and click Edit from the dropdown menu on the right.
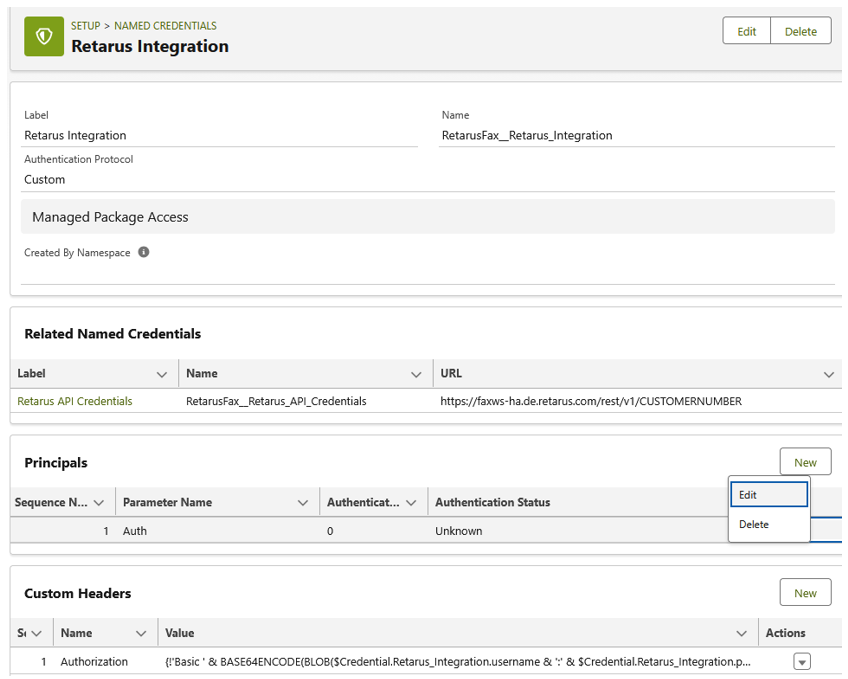
Add the following four parameters exactly as listed below:
username
Your Retarus API username.password
Your Retarus API password.clientID
The Client ID (Consumer Key) from the External Client App setup.clientSecret
The Client Secret (Consumer Secret) from the External Client App setup.
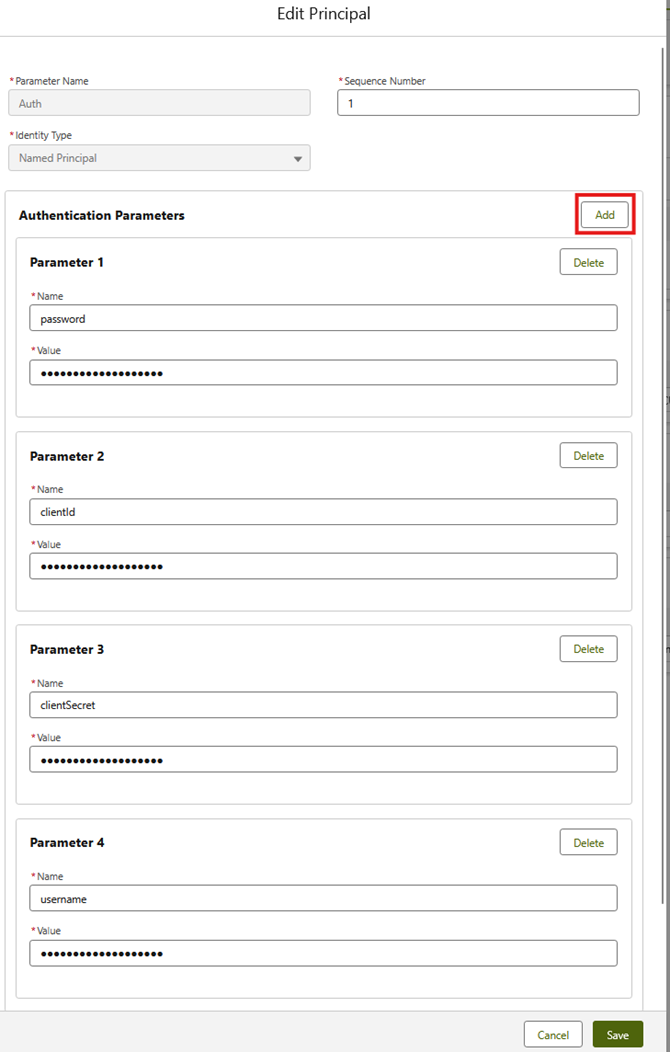
Click Save.
Assigning permissions to users
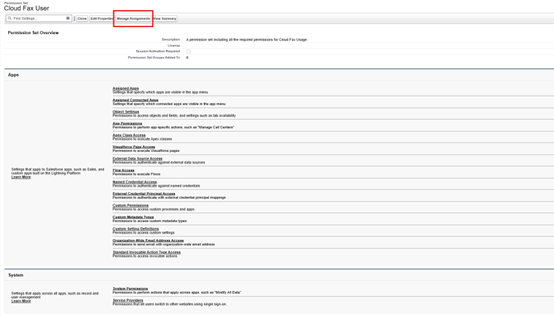
To use fax campaigns or send individual faxes in Salesforce, users must have the correct permissions. These permissions are provided through a predefined permission set named Cloud Fax User. You must assign this permission set to all users who should be allowed to use Cloud Fax features, such as fax campaigns or individual fax sending.
Go to Setup - Permission Sets.
From the list, select the Cloud Fax User permission set.
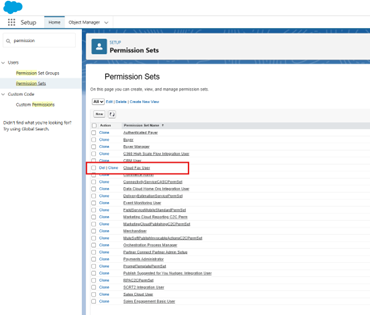
Click Manage Assignments.
Add users who should manage fax campaigns or send single faxes.
Sending through Flows or Apex
If you plan to trigger fax sending through Salesforce Flows or custom Apex code:
Create records for the following objects:
Object name | Description | Required fields |
|---|---|---|
| Used to manage fax jobs, their progress, and larger fax campaigns. |
|
| Represents a single fax sent to one fax number. Each |
|
Upload the file you want to fax as a ContentDocument in Salesforce and associate it with the corresponding
RETA_Fax_Campaign__crecord.
After setup, users can open the Retarus Cloud Fax App for Salesforce app to create and send faxes, monitor delivery, and handle any failed jobs. See Sending Fax Campaigns for details.
Error handling when sending fax campaigns
When sending fax campaigns from the Cloud Fax Campaign detail page, you may encounter a situation where the campaign status remains In Progress for an extended period. This usually indicates that an error occurred while sending data to Retarus.
Common causes
Typical causes include:
The user who clicked Send Fax Jobs does not have the Cloud Fax User permission set assigned.
The credentials configured in the Named Credential or External Credential are not entered correctly.
Once the cause has been identified and corrected, reset the campaign status to Draft before attempting to send the campaign again.
Further troubleshooting
If the issue cannot be resolved using the steps above, you can use Salesforce logs to identify the root cause:
If the affected user has access to the Developer Console, open it. Otherwise, enable debug logs for the corresponding user in the Salesforce Setup.
Reset the fax campaign status to Draft and send the fax campaign again.
Review the generated logs, either in the Developer Console or under Setup - Debug Logs.
Look for a log entry with the FutureHandler operation. The error is very likely to occur in this context.