
Retarus Email Security can be configured as an inbound email gateway, allowing all incoming email traffic for your domains to pass through Retarus before reaching your Microsoft 365 mailboxes. Retarus Email Security filters spam and malware and then forwards emails to the Microsoft 365 servers. To configure this setup, follow the instructions provided in the Inbound Configuration section.
Retarus Email Security can also be configured as the outbound mail gateway, through which all outgoing email from your domain is routed via your Microsoft 365 tenant. In this role, Retarus Email Security processes messages before final delivery to recipients. By following the steps in the Outbound Configuration section, you configure Microsoft 365 to route all outbound email from your domain through Retarus Email Security.
Inbound Configuration
Follow these steps to configure your Inbound connection via Retarus.
MX record lookup
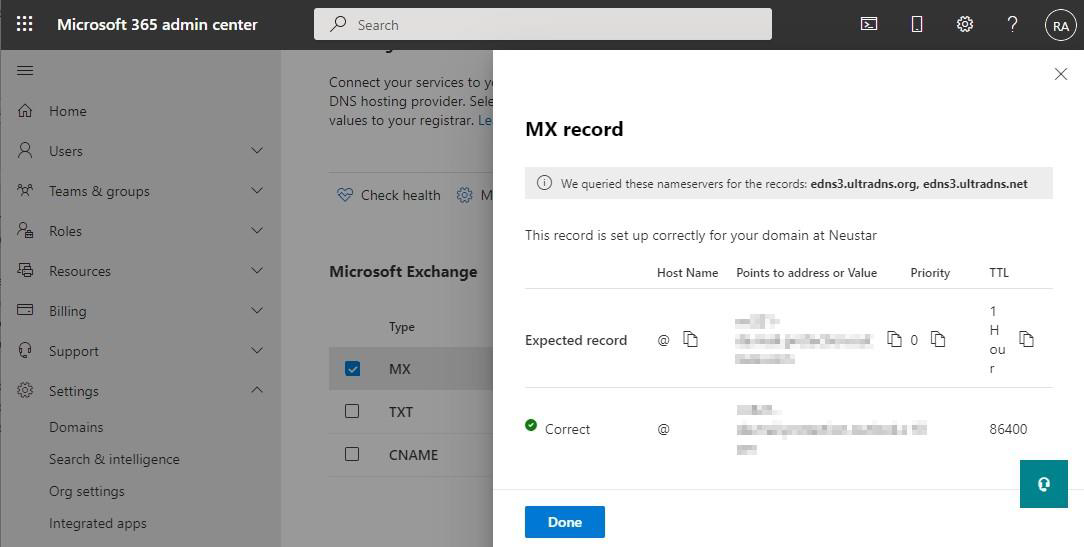
Look up the MX records via DNS lookup – or via your Microsoft 365 portal:
-
Log in to your Microsoft 365 portal (https://admin.microsoft.com).
-
Navigate to Microsoft 365 admin center - Settings - Domains.
-
Click on your domain (or select the domain via the checkbox and click on the Check health button).
-
Navigate to the DNS records tab, click on MX and note down the value from the Points to address or value column.
Domain configuration at Retarus
Add your domain via the Retarus EAS portal:
-
Log into the EAS portal (https://eas.retarus.com).
-
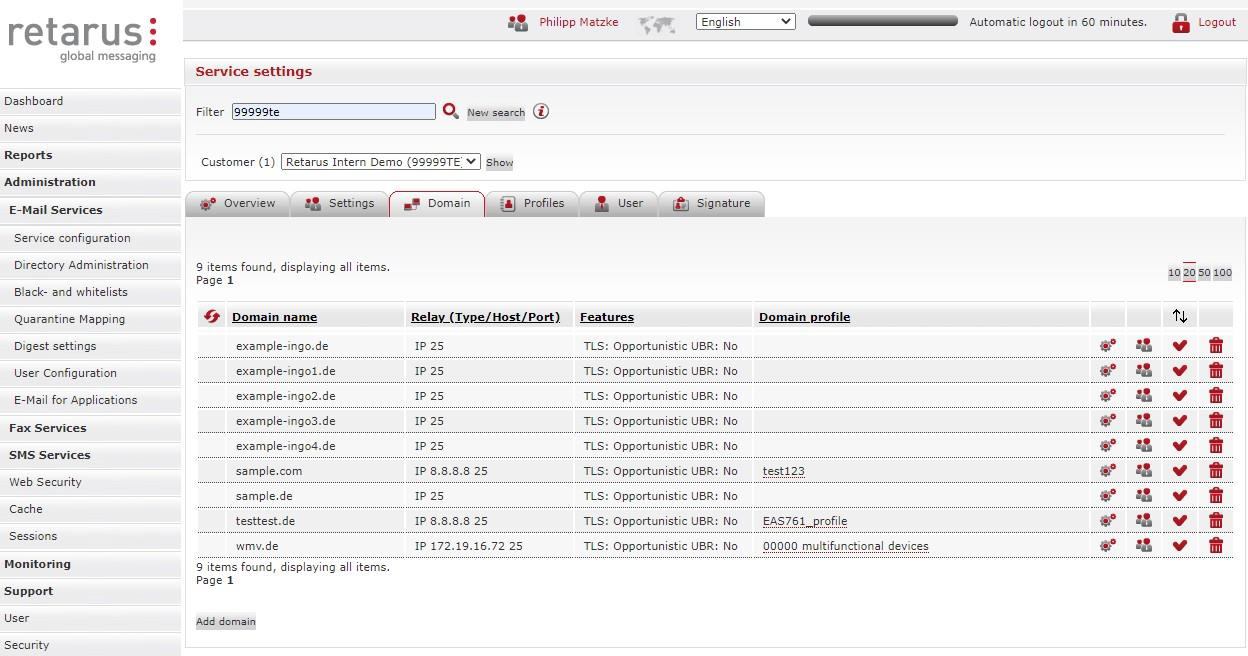
Go to Administration - Email Services - Service Configuration.
-
Navigate to the Domain tab.
-
Click on the Add domain button below the list.
-
Enter your domain and select a profile (if any).
-
Under the Connection settings tab, go to Type of destination address and select A-Record from the drop-down list.
-
As Destination server, enter the value that you noted down before in the Microsoft 365 portal.
-
Select all other options as desired.
Microsoft 365 rule to bypass spam filtering
When the steps above are completed, you should be able to receive inbound emails in your Microsoft 365 environment via Retarus.
If you intend to use Retarus only for spam filtering, you must ensure that Retarus is configured as a trusted relay and that Microsoft 365 spam filtering is bypassed. This prevents emails from being unnecessarily blocked by Microsoft 365. To do so, follow the guidance provided in the relevant Microsoft documentation.
To complete the configuration of this rule, you need the IP addresses of the Retarus hosts, which are currently as follows:
-
185.236.172.47
-
185.236.172.48
-
185.93.140.7
-
185.93.140.8
Additionally needed for customers using Advanced Threat Protection (ATP):
-
94.199.89.34
-
94.199.92.185
Additionally needed for customers using Advanced Routing & Rewriting:
-
94.199.92.188 / ubr01.de1.retarus.com
-
94.199.92.189 / ubr02.de1.retarus.com
📌 The IP addresses listed here should also be added to any allowlist or firewall rules used within your organization to ensure that email traffic is delivered successfully under all circumstances.
📌 The use of Transport Rules and setting the SCL value to
-1was deprecated by Microsoft in October 2023.
Optional Microsoft 365 Inbound Connector
An “Inbound Connector” is not required for receiving Inbound emails via Retarus. Only if you would like to make sure that emails must reach your Microsoft 365 servers from Retarus and from nowhere else, you may configure a dedicated connector. If you would like to do this, please make sure to follow the steps described below:
-
Log in to the Exchange admin center at https://admin.exchange.microsoft.com
(or log in to https://admin.microsoft.com and navigate to Admin centers - Exchange). -
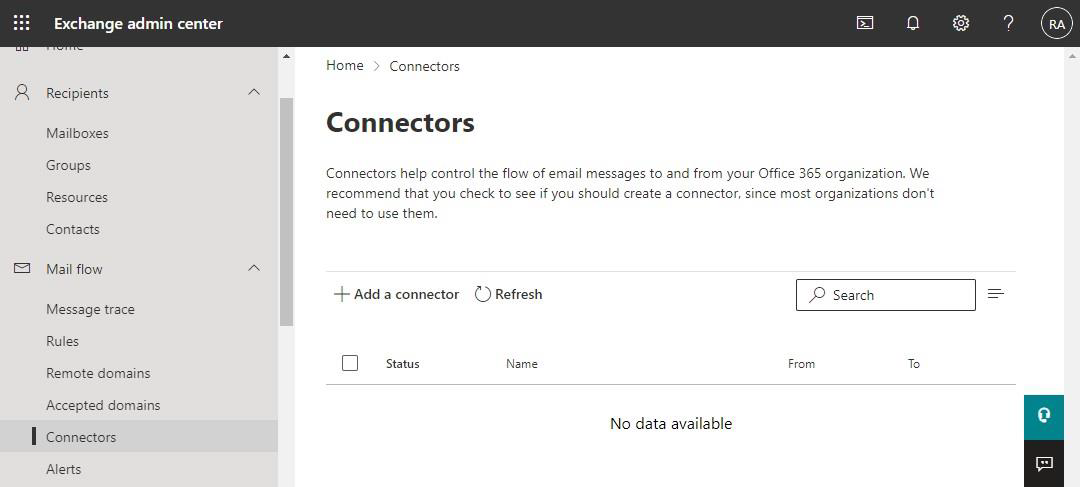
In the menu on the left side, click on Mail flow - Connectors.
-
Click on + Add a connector.
-
In the New connector dialogue, choose Connection from: Partner organization.

-
On the next page (Connector name), enter a descriptive name, e.g. “Inbound via Retarus”.
-
On the next page (Authenticating sent email), choose the first option (By verifying that the sender domain matches one of the following domains) and add the asterisk wildcard (*):
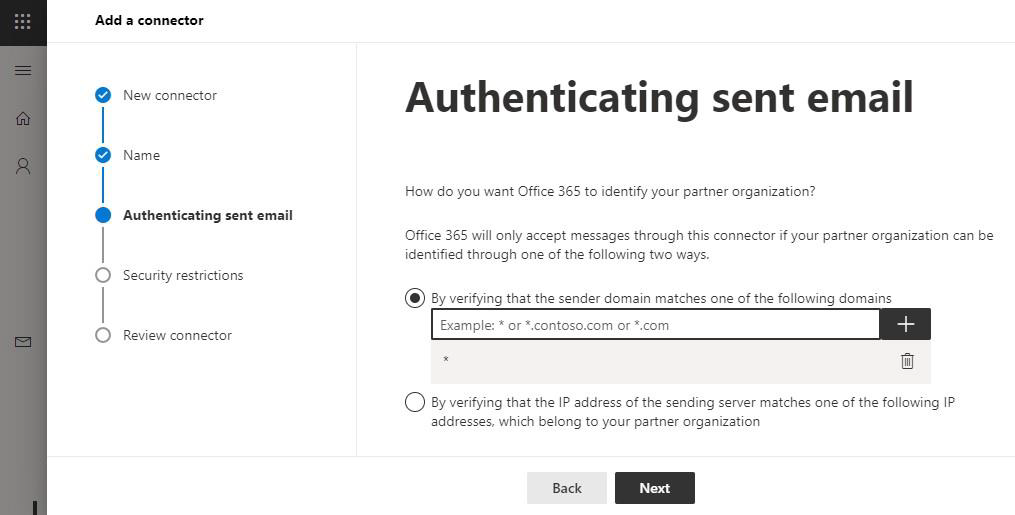
-
On the following page (Security restrictions), the first option (Reject email messages if they aren’t sent over TLS) may be left activated, without the sub-option concerning certificates.
-
Activate the second checkbox (Reject email messages if they aren’t sent from within this IP range) and add the following IP addresses:
-
185.236.172.47
-
185.236.172.48
-
185.93.140.7
-
185.93.140.8
Additionally needed for customers using Advanced Threat Protection (ATP): -
94.199.89.34
-
94.199.92.185
Additionally needed for customers using Advanced Routing & Rewriting: -
94.199.92.188 / ubr01.de1.retarus.com
-
94.199.92.189 / ubr02.de1.retarus.com
-
On the following Review connector page, you may check your settings again and click on Create connector.
Outbound Connector Configuration
Before following the steps described below, please contact Retarus Customer Support to enable Retarus Email Security to accept emails from your Microsoft Office 365.
Do not continue until Retarus has advised you to continue with the configuration.
Other than for Inbound traffic, for Outbound, a Microsoft 365 “Outbound Connector” is mandatory. Therefore, create a new Outbound Connector by following these steps:
-
Log in to the Exchange admin center at https://admin.exchange.microsoft.com
(or log in to https://admin.microsoft.com and navigate to Admin centers - Exchange). -
In the menu on the left side, click on Mail flow - Connectors.

-
Click on + Add a connector.
-
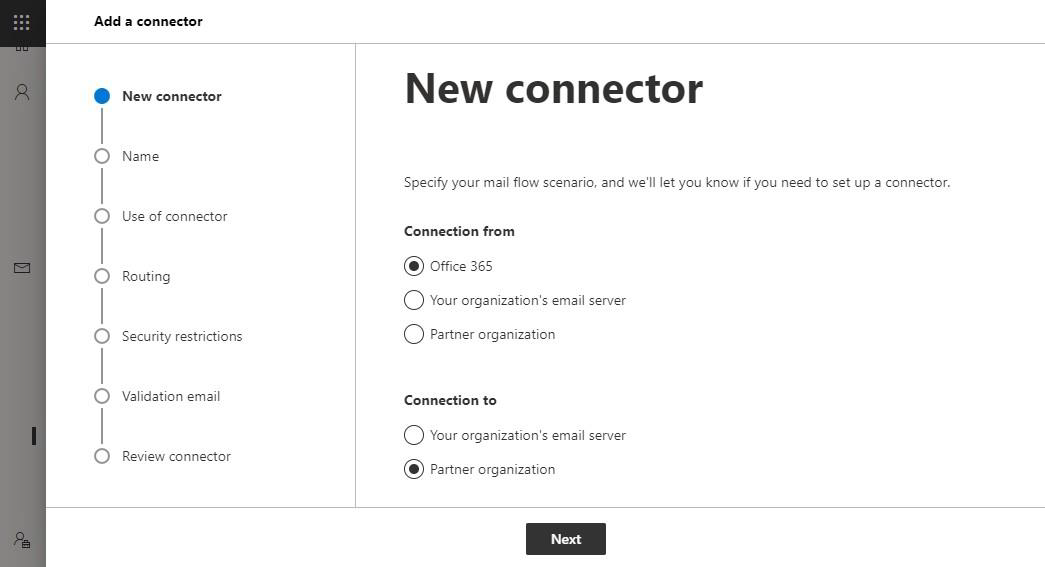
In the New connector dialogue, choose Connection from: Office 365 and Connection to: Partner organization and click on Next.
-
On the next page (Connector name), enter a descriptive name, e.g., “Outbound via Retarus”.
-
On the following page (Use of connector), choose the Only when email messages are sent to these domains option, enter the asterisk wildcard (*), and click on the + and then on Next.
(You could also choose the first option, but in this case, you need to create an additional transport rule afterward.)

-
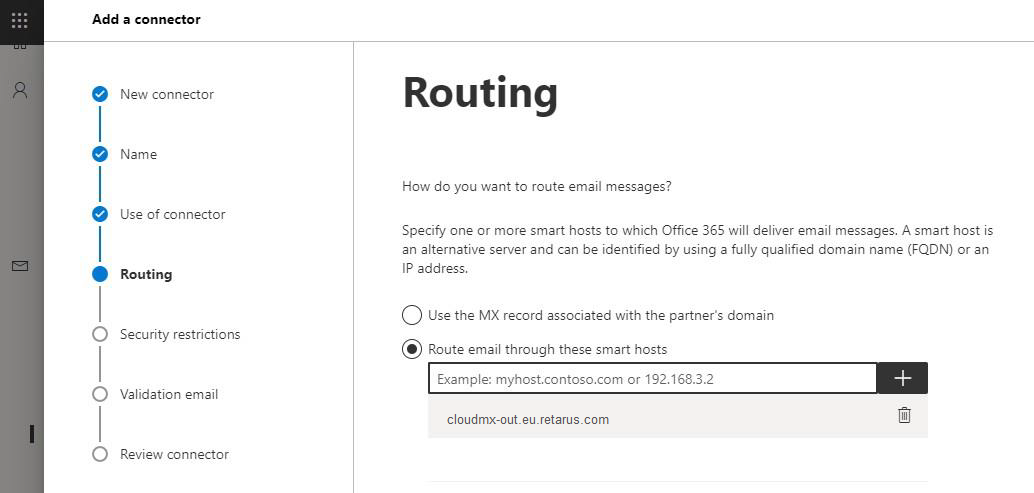
On the following page (Routing), choose Route email through these smart hosts, click on the +, and enter cloudmx-out.eu.retarus.com (balanced HA endpoint between DE1/Frankfurt and DE2/Munich ) as the smart host and then click on Next:
-
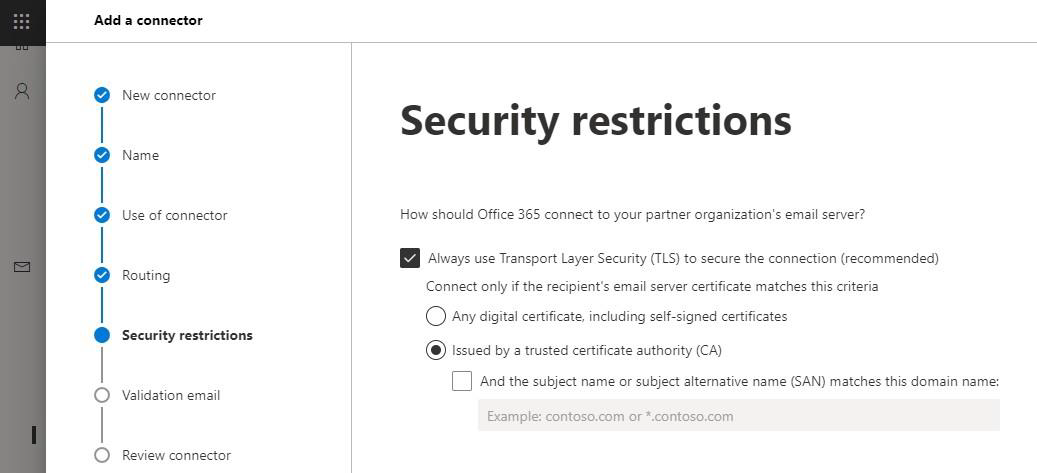
On the next page (Security restrictions), choose TLS settings as desired. We recommend choosing Always use Transport Layer Security (TLS) to secure the connection (recommended). Connect only if the recipient’s email server certificate matches this criteria: Issued by a trusted certificate authority (CA).
-
On the next screen (Validation email), specify an email address to which a test email is sent in order to validate the connector settings.
-
After a successful test, you may click on Next, verify your settings a last time, and finally create the new connector.