
You can configure Email-to-SMS in the Enterprise Administration Services Portal (EAS). Various settings are available to you that help customize the services’ functions to your needs.
You can reach the Email-to-SMS configuration menu through the EAS navigation menu by clicking on Administration - SMS Services - Mail2SMS in the EAS navigation menu.
Automatic transfer of settings
Settings for both Email-to-SMS and SMS for Exchange can be configured on multiple levels, which makes it possible for you, and, if necessary, your users, to utilize all available options to customize your settings. There are customer-, profile-, user- and domain-level settings, which means that generally valid settings, as well as exceptions, can be configured.
A brief explanation of the way configuration works at each level and affects settings at other levels follows.
When Email-to-SMS and SMS for Exchange are installed, Retarus creates, based on previous experience, a profile with default values in order to ensure smooth SMS transmissions. Although this profile can be modified, it cannot be deleted and is located, along with other configured profiles, in the profile overview under the Profiles menu. If you do not configure any settings of your own, the default values which are in italics in parentheses on the right-hand side of each field, will remain valid throughout all configuration levels. Modifications to the configurations generally take effect within 10 minutes.
Inheritance of settings is not limited to the default profile; it can mean, for example, that settings at the user level reflect settings made at the mapped customer or domain levels.
Profile options make it possible to configure common settings at the profile level for a group of users whose usage patterns and requirements are generally the same; e.g., employees in a particular department. If an individual user has unique requirements, settings can be customized for that user at the user level.
The default settings shown in the screenshots are for the demo account only. Your own account will have a default profile.
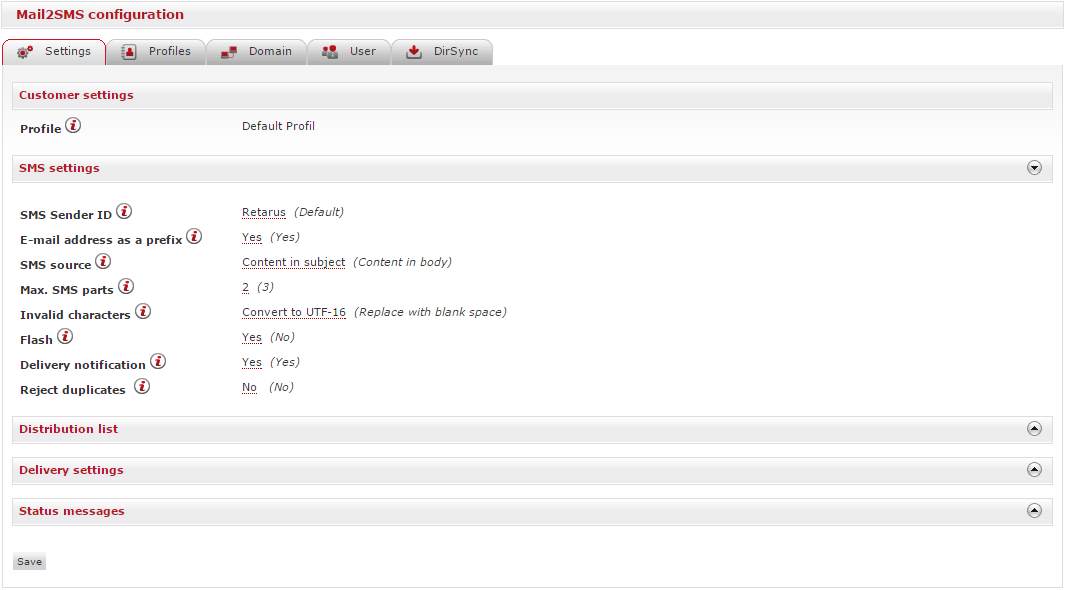
SMS settings menu
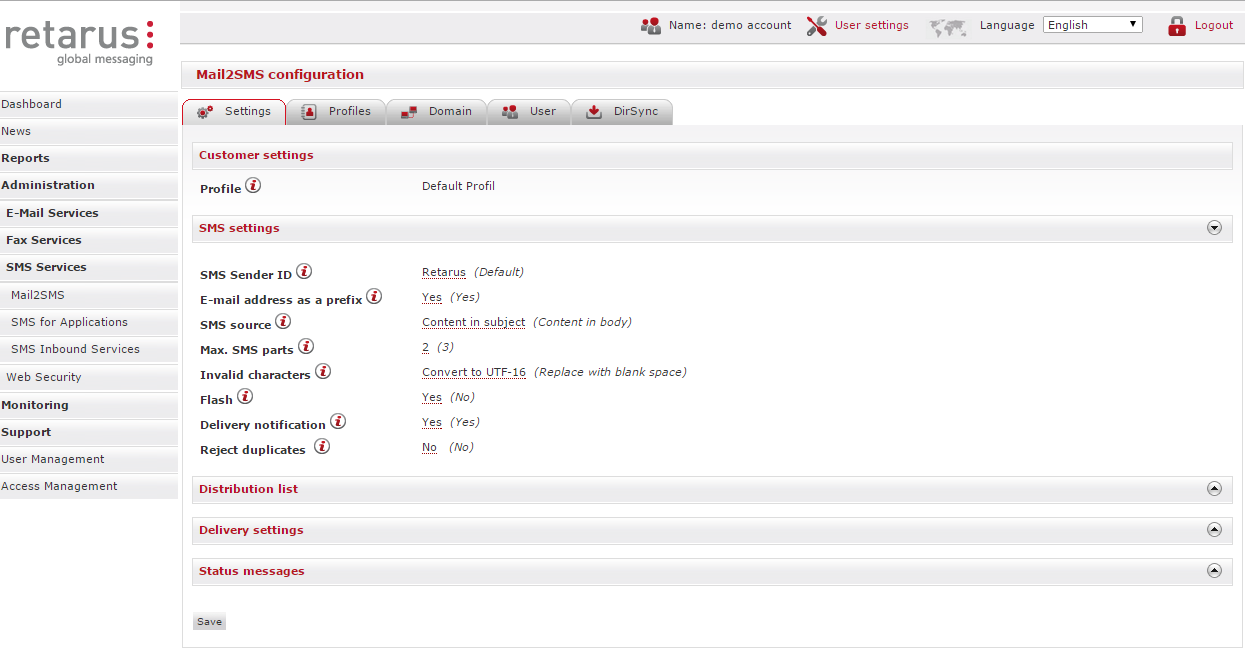
Configurations made under the Settings tab are customer-level settings. Under the Settings tab are the Customer settings, SMS settings, Rules for distribution lists, Delivery settings, and Status messages menus.
The Customer settings show which profile is currently serving as the default and the settings applied for the utilization of individual functions. To configure individual settings, click on the respective field and then make changes using the drop-down menus or free text fields (e.g., SMS Sender ID).
These settings apply to the default profile and thus to users that are not assigned to a profile. They may also apply to others depending on the settings configured in other menus (for additional information on this inheritance principle, see Automatic transfer of settings).
The SMS Sender ID field is inapplicable to countries where short or long codes are required (e.g., the US, Canada, France, and India), including situations where the destination country requires short or long codes although the country the message originates from does not. Contact your sales engineer for the latest information, as the list of affected countries changes frequently.
The following table explains the options found in the Profile- and SMS settings menus:
|
Menu function |
Description |
|---|---|
|
Profile |
The default profile pre-set by Retarus or the selected profile. |
|
SMS Sender ID |
The Sender ID that is displayed to the recipient of the SMS. Can be a mobile telephone number or an alphanumeric ID (e.g., a company name). |
|
Email address as a prefix |
Determines whether the sender’s email address is attached to the front of the SMS, as long as the address does not cause a multi-part message to exceed 67 characters per part if the encoding is UTF-16 or 157 if GSM-7 is used, and a single-part message to exceed 70 (UTF-16) or 160 (GSM-7). |
|
SMS source |
Determines whether the email subject, the body, or both should contain the text to be sent as an SMS. |
|
Max. SMS parts |
Determines the number of individual SMS parts a concatenated message will consist of in cases of messages longer than 67 characters if UTF-16 is used or 157 with GSM-7. |
|
Invalid characters |
Determines whether invalid characters will be replaced with a blank space or converted to UTF-16 encoding. With UTF-16, there is a limit of 70 characters per single-part SMS and 67 per part in a multi-part SMS. The conversion may result in one or more additional parts, i.e., higher costs. |
|
Flash |
Messages labeled Flash are sent directly to the recipient’s phone display instead of their inbox. If the carrier does not support flash, a normal SMS will be sent. Use of this feature will result in an additional fee. |
|
Delivery notification |
Ensures that a second email will be sent which contains details about the job. Use of this feature will result in an additional fee. |
|
Reject duplicates |
When activated, it ensures that identical jobs are detected and then rejected. Applies only for the initial 10 minutes after activation. After 10 minutes have elapsed, duplicates are possible. |
Distribution list menu
Personalized mailing campaigns can be sent via SMS. Instead of sending your messages to individual recipients, you send them to a distribution list. To do this, you save placeholders for the personalized data.
Three files are required: the distribution list, the body attachment and the command attachment. The distribution list stores the roster of addresses and the body attachment defines the contents of the message. The information saved in the command attachment is used to generate report emails.
The names of the command attachment and the distribution list can be saved in the Command file name and Distribution list name fields under the Distribution list menu. Additional information on sending campaigns via Email-to-SMS can be found in SMS Transmission to a Distribution List.

The following table explains how to configure the fields in the Distribution list menu:
|
Menu function |
Description |
|---|---|
|
Command file name |
Enter a name for the command file. You can use the () symbol as a placeholder for any number of characters, e.g., command.txt. |
|
Distribution list name |
Enter the name of the distribution list. You can use the symbol as a placeholder for any number of characters, e.g., list.csv. |
Delivery settings menu
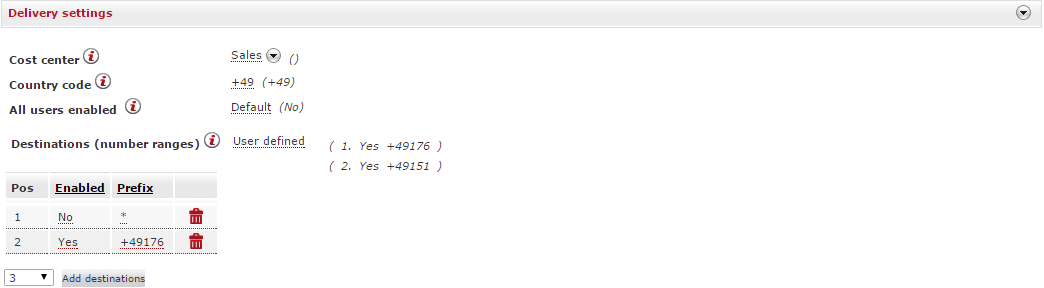
The functions in the Delivery settings menu are related to the transmission of SMS messages.
In order to either block or allow numbers or ranges, first select the User defined option in the Destinations (number ranges) field. The next step is to click on Add destinations, then enter the specific destination number(s) or range(s). You can also decide where each new entry will appear in the list. The list is reviewed from top to bottom before messages are delivered.
The following table describes the functions of the menu options in the Delivery settings menu:
|
Menu function |
Description |
|---|---|
|
Cost center |
Optional; customer can assign an SMS job to a specific cost center as desired |
|
Country code |
The country code is automatically added to all sent messages as a prefix in order to ensure accurate transmission. |
|
All users enabled |
Allows you to configure whether all users under a profile can send messages- if Yes is configured, all of them can. If Default is the selected option, the settings from the higher level default profile are applied. |
|
Destinations (number ranges) |
This function is used to allow or block certain destination numbers company-wide or for the selected profile to which the user is assigned. If no rules are specified, then all destinations are allowed. To add a number, click on the field and then select User defined from the drop-down menu. A table then appears in which you can allow or block specific numbers or ranges (see the above screenshot for additional information). |
Status messages menu
The functions in the Status messages menu assist you in defining the appearance of status update emails to the sender or any other recipient designated to receive the message.

The following table describes the functions of the menu options in the Status messages menu:
|
Menu function |
Description |
|---|---|
|
Language |
When you click on this field, a drop-down menu appears which allows you to select the language of the status message from English, French, German, Italian, and Spanish. |
|
Sender address |
Enter the email address that appears as the sender’s address in status messages. |
|
Recipient address |
Enter the email address(es) you want to receive status messages. Central mailboxes can be used for some or all Email-to-SMS users. If you do not want to receive any status messages, click on the text in the field and delete any value it contains. An Empty value is displayed. Save the setting by clicking on the Save button at the bottom of the screen. |
|
Report email format |
Select the format in which the delivery notification email will be sent. Choose either Text or HTML. The SAP option is only available with the SMS for SAP service, not with Email-to-SMS. For additional information on the installation of the SMS for SAP service, please consult the SMS for SAP Administrator Manual. |
|
Deactivate first message |
If Delivery notification is enabled, two emails are sent. The first email contains a processing status update from Retarus’ data centers. To suppress this first email, select Deactivate first message.
|
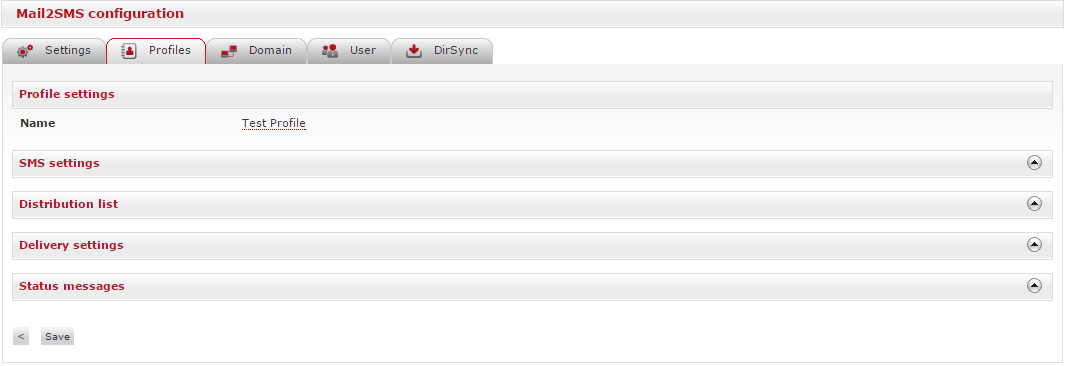
Profiles menu
The settings found in the Profile settings and SMS settings menus under the Profiles tab (see Figure 7) are related to the sender and recipient of SMS messages, as well as the structure of the messages. Profiles are used to configure settings for user groups. Multiple profiles can be created and users assigned to them. When you click on the Profiles tab, the following screen appears:
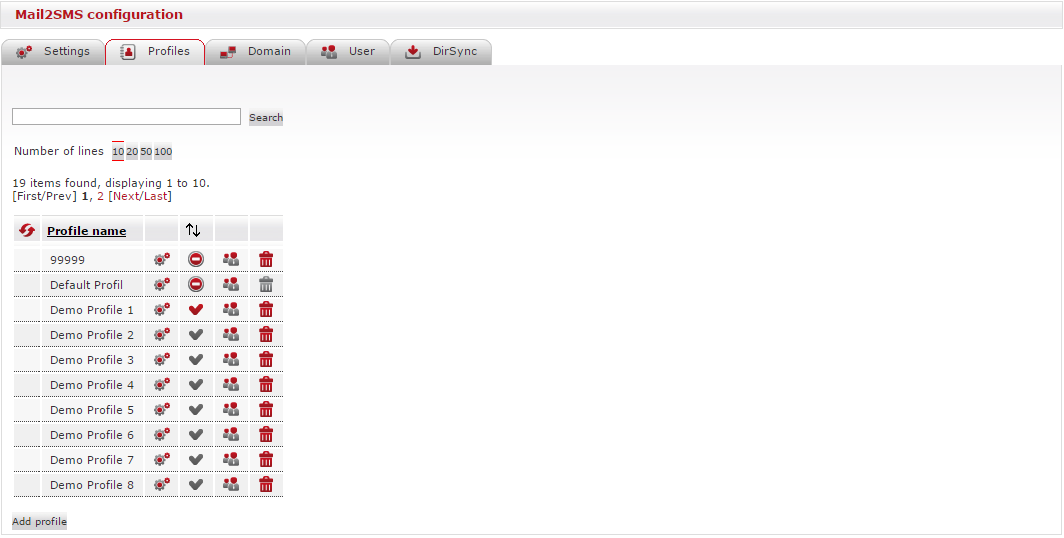
The following table describes the functions of the icons found in the Profiles menu:
|
Menu Icon |
Description |
|---|---|
|
|
Indicates that the profile cannot be deleted because it is the default profile for that customer number that has been preconfigured by Retarus (every customer number has one). Is only displayed for the default profile. |
|
|
When clicked on, the profile is deleted after you confirm that you want to remove it. Appears for all profiles except the default. |
|
|
Click on this icon to customize the settings for the profile. The screenshot below shows the screen that appears when this icon is clicked on. |
|
|
Indicates that the profile’s users are not activated to use Email-to-SMS |
|
|
Indicates that the profile’s users are activated to use Email-to-SMS |
|
|
Indicates that no settings have been manually configured for the profile, so all settings contain their default values |
|
|
When clicked, displays the users assigned to a profile |
To add a new profile, click on Add profile. The Profile settings and SMS settings menus, where each new profile is configured, will appear (these menus’ functions are identical to their counterparts under the Settings tab). Default settings for each field are displayed in parentheses. The first step is to enter the profile name in the Name field under Profile settings (which will be utilized later for user groups), then the settings under SMS settings, which are identical to those described above in the SMS settings menu, are configured.
The settings under the Distribution list, Delivery settings and Status messages menus are also identical to those in the Settings menu in the Distribution list menu, Delivery settings menu, and Status messages menu. Once you have made any changes to the default settings click on Save.
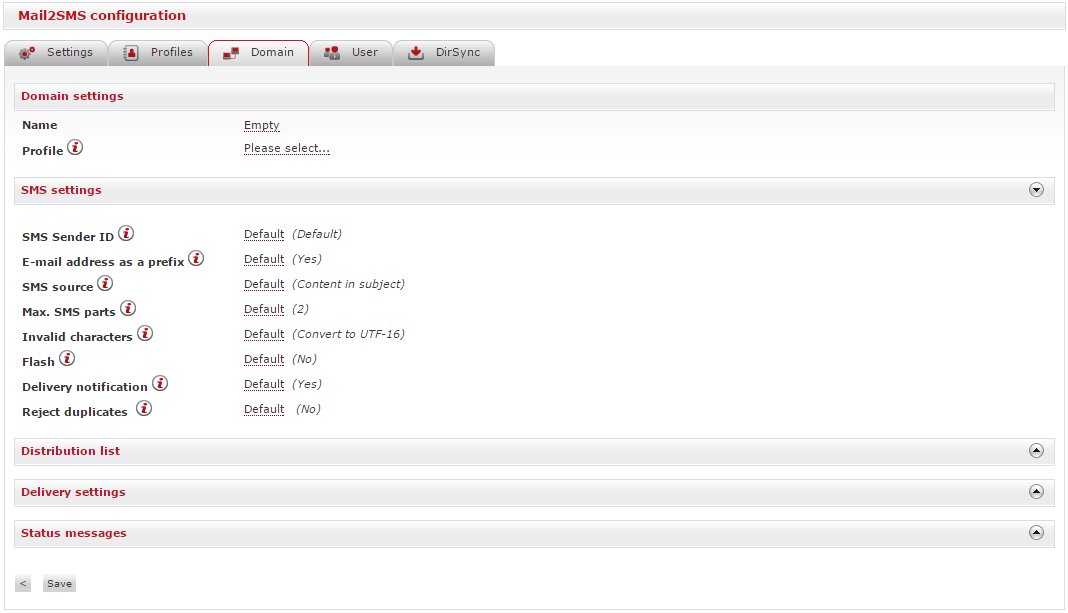
Domain menu
Individual domains as well as the profiles assigned to them are listed in the Domain menu overview. Settings configured in this menu are valid for all users that are assigned to one of the domains but do not have their own profile.
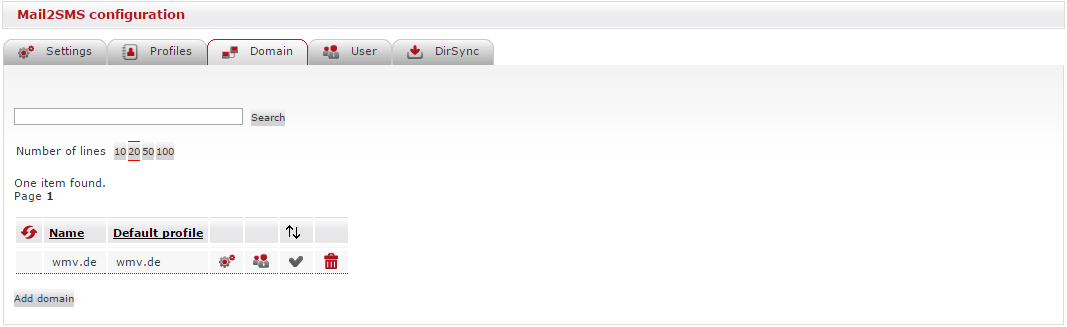
To add a domain, click on Add domain. The standard configuration menu appears, and the menu options available under the Domain menu are identical to those found in the Customer and Profiles menus with the exception of the Domain settings menu, where you can, select an existing profile from the Profile drop-down menu:
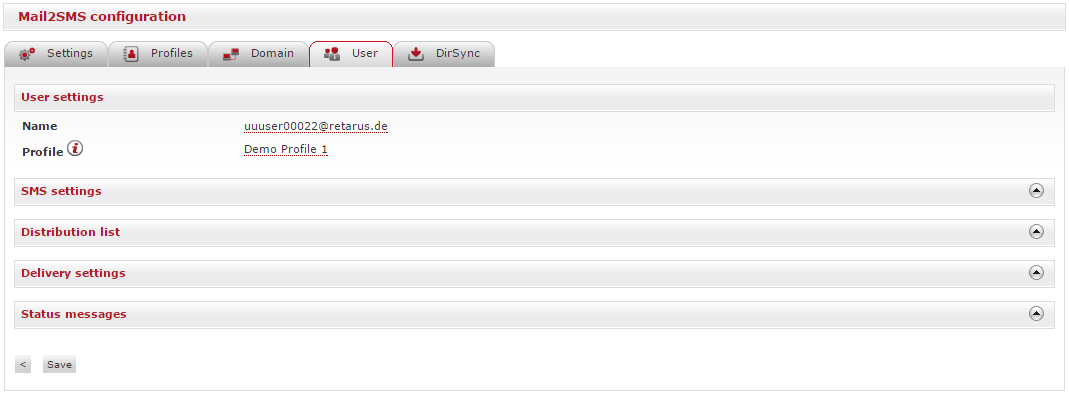
User menu
When you click on the User tab, an overview of all users assigned to your customer number is displayed. The overview shows the profile to which each user is assigned and provides a list of authorized users for Email-to-SMS. In the User menu, you can explicitly allow or block individual users for Email-to-SMS, regardless of any specific profile settings.
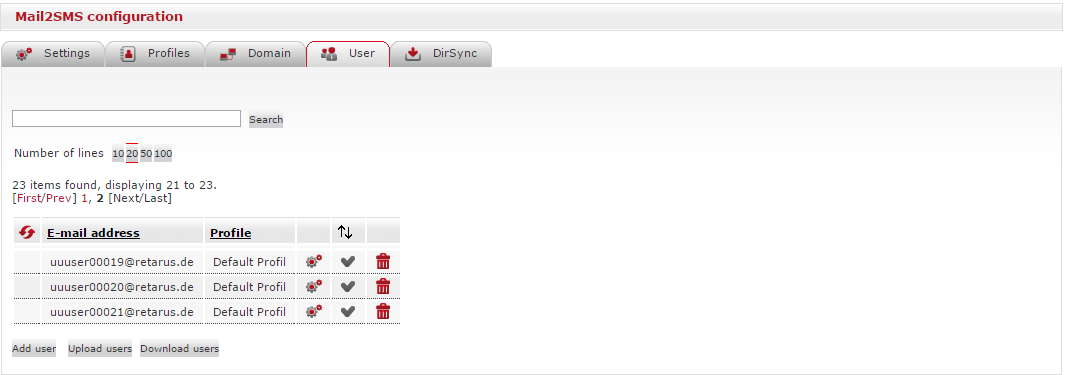
You can create new users by entering them manually. To start the process, click on Add user. You can then enter the relevant data in the menus that appear (the settings are identical to those in the Domain menu).
All user names must be a valid email address.
Once you have made any necessary changes to the default settings in all submenus, click on Save.
To add a large number of users, click on Upload users. When you click on this button, the screen for selecting the upload file appears:
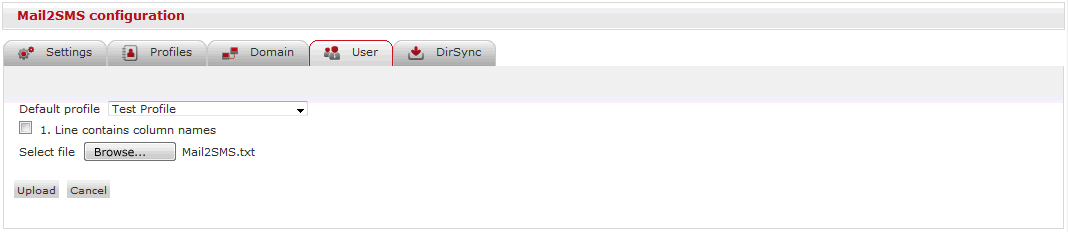
Here, you can select the default profile that will apply to all users without an individual profile in the upload file. You can also specify whether the first line in the file will contain column headings, which are recommended because they simplify the inclusion of column data for the subsequent file upload.
Click on Upload once you have made your choices. The following table appears:

After the file has been uploaded, the contents of each column can be selected from the drop-down menu located under each column heading. Columns that have not been assigned values automatically receive the settings from the previously selected default profile. Click on Confirm when finished.
You can also opt to delete any users not contained in the file. To activate this option, click on the Delete missing users checkbox at the bottom of the screen:

User upload file structure
The upload file must be in CSV format and conform to certain criteria.
The following table describes the upload file’s column headings, parameters, and contents:
|
Column heading |
Contents |
Format |
If undefined, replace with |
|
Email address |
The relevant user’s email address. |
Mandatory. |
|
|
Profile |
The profile to be used. |
If you want to use the default profile, set to Default. For all other profiles, enter the relevant profile name. |
If no profile is selected, the default profile is automatically applied for this user. |
|
SMS Sender ID |
The relevant sender ID, which is displayed to the recipient as the sender. It can be an SMS number or name. |
If you specify an alphanumeric ID, you can use up to eleven characters that must follow the following format: You can also use a numeric ID- enter + followed by up to 20 numbers. |
If no value is set here, the settings specified in the profile selected are used. |
|
Email prefix |
Specifies whether you want to include the sender’s email address at the start of the message. |
Yes or No. |
If no value is set here, the settings specified in the profile selected are used. |
|
SMS source |
Defines whether you want the email subject or email body or both to contain the sent message part. |
Content in the subject, in the body, or in both the subject and body. |
If no value is set here, the settings specified in the profile selected are used. |
|
Max. SMS count |
The maximum number of message parts that may be sent per message. |
1 to 64 |
If no value is set here, the settings specified in the profile selected are used. |
|
Invalid characters |
Specifies what you want to do with the invalid characters in the message. |
Delete invalid characters Convert to UTF-16 |
If no value is set here, the settings specified in the profile selected are used. |
|
Flash |
You can use this option to send messages directly to the recipient’s phone display as long as this option is supported by the network operator. |
Yes or true No or false |
If no value is set here, the settings specified in the profile selected are used. |
|
Delivery notification |
Defines whether you want to receive messages about the delivery status. |
Yes or true No or false |
If no value is set here, the settings specified in the profile selected are used. |
|
Language |
The language in which each individual user is to receive notifications. |
German, English, French, Italian, Spanish |
If no value is set here, the settings specified in the profile selected are used. |
|
Sender address |
The standardized sender for the sender of the status email. |
If no value is set here, the settings specified in the profile selected are used. |
|
|
Recipient address |
The recipient of the status emails. |
Sender or any desired email addresses in line with the following format: recipient@example.com |
If no value is set here, the settings specified in the profile selected are used. |
|
Deactivate first message |
Disables the initial email which is sent when the Delivery notification option is activated (see Table 2.4 for additional information). |
Yes or true No or false |
If no value is set here, the settings specified in the profile selected are used. |
|
Reply format |
Select the format in which the delivery notification email will be sent: choose from among Text, HTML and SAP. Please note: the SAP option is only available with SMS for SAP. |
|
If no value is set here, the settings specified in the profile selected are used. |
|
User is enabled |
Defines whether each individual user is authorized to use the service. |
Yes or true No or false |
If no value is set here, the settings specified in the profile selected are used. |
|
Cost center |
The relevant cost center. You can specify a cost center for each individual user. |
A maximum of 70 characters are permitted (US-ASCII without control characters). |
If no value is set here, the settings specified in the profile selected are used. |
DirSync
The Communication Directory Synchronization function for Retarus Email-to-SMS matches Email-to-SMS user data with information in your active directory.
User details for Email-to-SMS are imported, and existing data is either retained or overwritten (if no longer needed or accurate). The structure of the import file can be set or modified using the options in the Dir Sync menu, e.g., you can decide whether the first line has column headings and which character is used for column delimiters. The settings are configured so that the system can recognize upon import that the file corresponds to the specified parameters or reject the import if there are discrepancies.
Automatic import can only take place if all settings have been made AND DirSync has been activated by selecting Yes in the Activated field in the General settings menu.
It is important to always import complete user details for Email-to-SMS. If incomplete files are imported, existing user data missing from the latest import file would be at least partially overwritten or set for deactivation. The Max. tolerable deletion rate in the General settings menu functions as a security feature which prevents a complete overwrite. You can set the threshold for the maximum percentage of deletions in the file which can be reached before the import is rejected. When this amount of deletions is exceeded, the import is halted and rejected and it is as if the import never occurred. There can be only two results when importing a file- either it is accepted or rejected in its entirety.
The end marker that you specify on the Import file end marker field must be identical to the end marker in the import file, otherwise the system will not be able to accurately identify the end of the file you are uploading, meaning that the data import will fail.
At least one recipient must always be designated to receive an error report. This can, however, also be a function mailbox, and in such a case it is recommended that you attach the relevant import file. Furthermore, it is recommended that you send a success message when using DirSync for the first time and that separate recipients or function mailboxes are used for success and error reports. Please be sure to use commas to separate entries in the input field.
Once you have made all the relevant settings and activated the function, the system will automatically update your user data for Email-to-SMS at regular intervals, which you can coordinate with Retarus.
After you finish setting the parameters for the Auto Import file, transfer it to Retarus using FTP (Retarus Support will provide you with the address of the FTP server and access details).
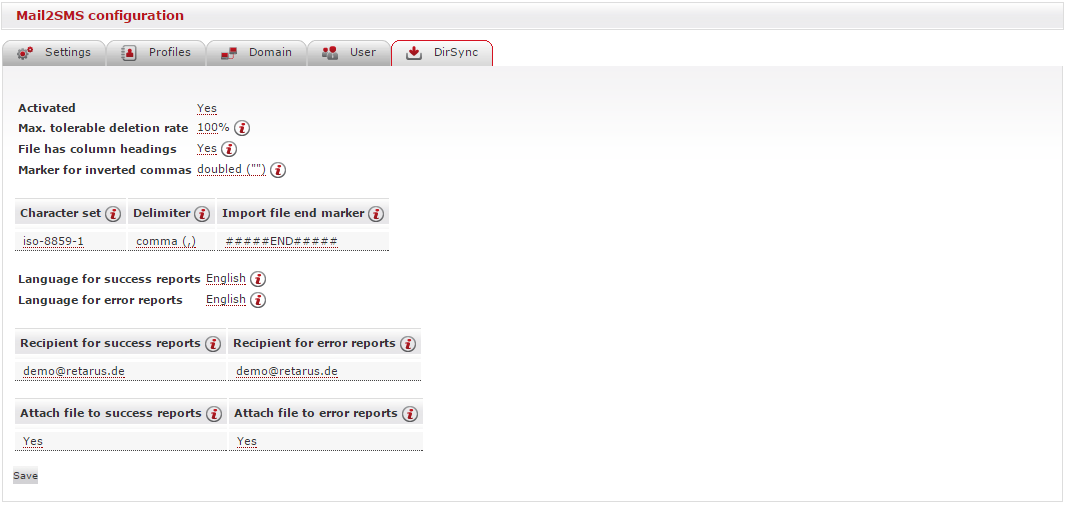
The following table describes the functions of the settings in the DirSync menu:
|
Menu function |
Description |
|---|---|
|
Activated |
Select whether DirSync should be enabled. |
|
Max. tolerable deletion rate |
If the number of deleted entries exceeds this percentage, the import file will be rejected. |
|
File has column headings |
Determines whether the first column in the import file will have column headers. |
|
Marker for inverted commas |
Defines how quotation marks inside values will be recognized- either using doubled quotation marks or with a backslash placed before the inverted commas inside a single set of quotation marks. Examples
|
|
Character set |
The import file’s character set is defined here. |
|
Delimiter |
The column delimiter is the separator between two columns. The cell values must be placed within inverted commas when they include a column delimiter. |
|
Import file end marker |
The purpose of the end marker is to ensure that the import file (which is transmitted via FTP) can be checked for completeness. The end marker is placed at the end of the file so that complete import data, which would be rejected without it, are accepted. A missing end marker makes it possible to detect a failed FTP transmission. |
|
Language for success reports |
Set the language in which the DirSync import file acceptance confirmation emails are sent. You can choose from English, French, German, Italian, and Spanish |
|
Language for error reports |
Set the language in which the DirSync import file rejection message emails are sent. You can choose from among English, French, German, Italian, and Spanish. |
|
Recipient for success reports |
Enter the destination email address(es), separated by commas, for DirSync confirmation that the import file was accepted. |
|
Recipient for error reports |
Enter the destination email address(es), separated by commas, for DirSync confirmation that the import file was rejected. |
|
Attach file to success reports |
Enter whether you want a successfully sent import file attached to the message confirming its delivery. |
|
Attach a file to error reports |
Enter whether you want to attach a rejected import file to a DirSync rejection message. |
Import file layout and properties
The import file must be saved in CSV format. The file name is generally m2s.csv, but must at least contain m2s. The number of columns must be uniform for each row. 14 columns are required for an automatic import.
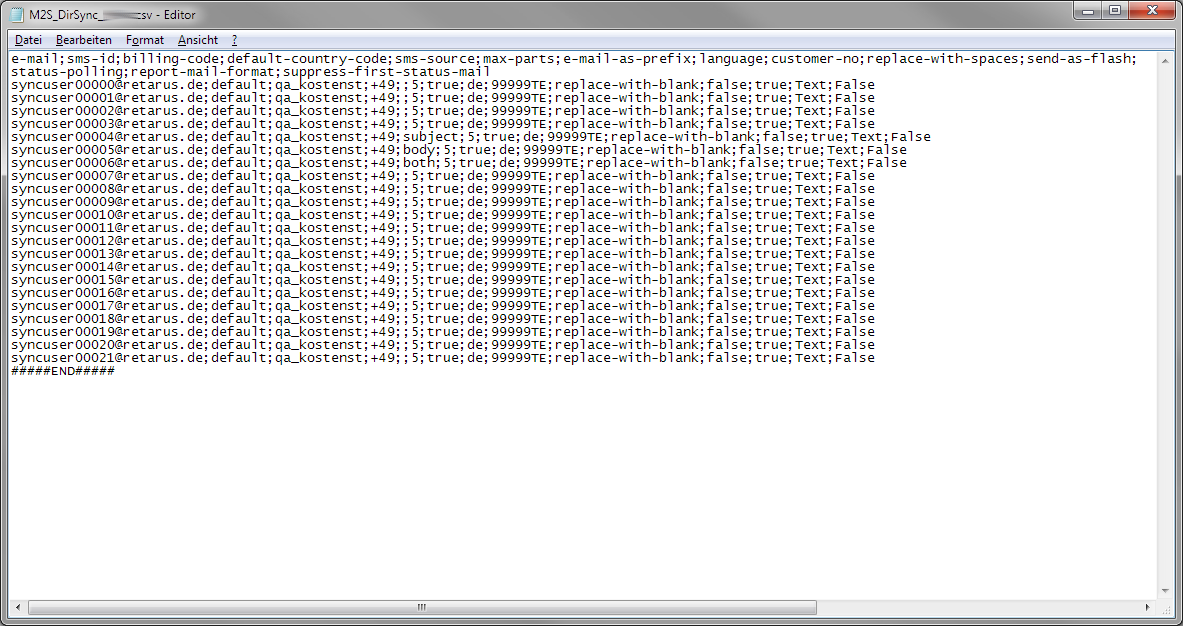
The following table provides an overview of the relevant columns in the import file and the information that each individual column must include. You do not have to make an entry in each column; instead they can be filled automatically with the data from your Email-to-SMS profile. Mandatory columns are marked with an asterisk (*).
|
Column heading |
Contents |
|---|---|
|
email (*) |
The RFC-compatible email address of the user. |
|
sms-id |
The sender ID. This can be an SMS number, a name or similar. |
|
billing-code |
The relevant cost center for each individual user (max. 80 characters). |
|
default-country-code |
The country code for each individual user. The relevant string must start with + and subsequently contain numbers from 0 to 9, whereby 0 may not be used as the first number in the string. |
|
sms-source |
Defines whether you want the email subject or email body or both to contain the message part that is to be sent. To this end, enter subject, body or both in this column. |
|
max-parts |
The maximum number of SMS message parts that the message may comprise for the user in question. Possible values: 1 to 64. 1 GSM-7 message = 160 characters; per message part = 153 characters. 1 UTF-16 message = 70 characters; per message part = 67 characters. |
|
email-as-prefix |
Specifies whether you want to include the sender’s email address at the start of the message. If this is the case, set the value in this column to true; otherwise, set it to false. |
|
language |
The language in which each individual user is to receive notifications. The options available are: German (enter de), English (en), Italian (it), French (fr) and Spanish (es). |
|
customer-no |
This column remains blank. It is reserved for a function currently in the planning stage. |
|
replace-with-spaces |
You can replace invalid characters. Specify here how you want to do this. You can choose to replace invalid characters with spaces (enter replace-with-blank) or with a different character set (UTF-16). |
|
send-as-flash |
This option enables you to send messages as flash messages, provided this option is supported by the recipient’s network operator. If you want to do this, set the value to true; otherwise, set it to false. |
|
status-polling |
Defines whether you want to receive a message about the delivery status, provided this option is supported by the network operator in question. Here too, select true or false to indicate whether you want to use this option. |
|
report-mail-format |
Defines the format for the email notification on the delivery status of the import file. Select from HTML, Text, or SAP. The SAP option is only available to users of the Retarus SMS for SAP service. |
|
Suppress-first-status-mail |
Defines whether the initial of two emails on the status of the import file is sent to the designated recipient. False means that the email is not suppressed, i.e, it is sent, and true means that it is suppressed and will not be sent. |