
To send mailings by fax, email, or SMS, you have to upload a distribution list which contains address data for the various transmission media as well as personalization fields, maximum of 13. The optimal content and structure for a distribution list vary in accordance with firm- and transmission-specific requirements. The options range from a simple transmission distribution list with just a single address type (i.e., a fax number, email address or mobile telephone number) to the integration of different columns, possibly containing personalization and contact data; company names, titles, recipients’ first names and family names, addresses, customer numbers, and dates of birth. The more personal contact data you include in the distribution list, the more precisely you can target the recipients of the mailing.
Expiration of dstribution lists
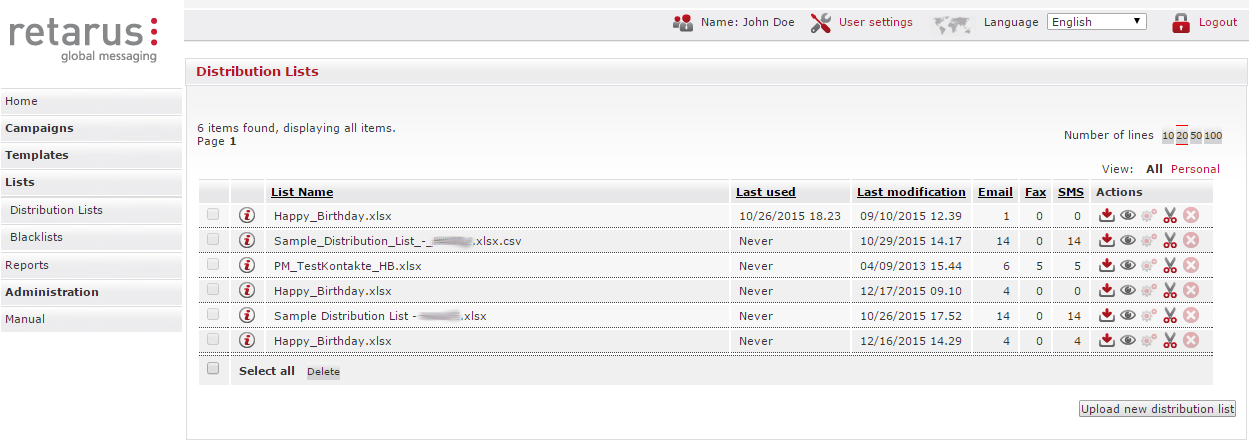
All distribution lists uploaded to WebExpress, are automatically deleted after one year if they are neither utilized in a transmission nor modified/updated. You will receive an email informing you that the expiration date for the affected distribution list(s) is approaching. To keep the list active for another year, you can either modify it for up to 28 days after this message is sent or use them in a transmission. Alternatively, you can download the distribution list and save it offline. If you do not react to the email notification, after 28 days you will receive a reminder that your distribution list is about to be deleted. The deletion, which is irrevocable, will occur three days later if you do not take one of the aforementioned actions to prevent it.
The date you last used or modified a distribution list can be viewed in the Last used and Last modified columns to the right of the column names.
Uploading a distribution list manually
To upload a distribution list, you click on Lists and then Distribution Lists in the navigation menu on the left-hand side of the page and then on the Upload new distribution list button. Retarus WebExpress supports distribution lists compiled in TXT, CSV, and XLS(X) formats. Excel 2003 file (XLS) lists are restricted to a maximum of 65,000 data records, whereas lists compiled in TXT, CSV, and XLS(X) offer unlimited capacity as far as data records are concerned. Regardless of the format(s) you opt to use, multiple distribution lists can be uploaded to Retarus WebExpress.
When you click on Browse, a window opens in which you can select the distribution list file(s) by double-clicking on it (them).
Retarus WebExpress displays the destination file when you double click on it. You can then upload it by clicking on Upload file. The name of the distribution list is displayed once again and additional settings can be configured before the distribution list is saved.

In the New List section, you can indicate in the Structure field whether the first line of your distribution list contains column headers. These headers are read automatically and are later made available to you as personalization fields used for processing your mailings. If you are transferring several distribution lists with the same or similar column content to the system, please ensure that the column names use uniform spelling conventions (e.g., email), so that these fields are also available for personalization in the event that multiple distribution lists are used. You can also modify the headers after the distribution list has been uploaded.
The Delimiter field is only relevant for TXT or CSV file uploads. The automatic recognition function supports the separators, i.e., tab, semicolon, space, and comma. In this field, you can also manually select a separator. Retarus WebExpress accepts the structure of XLS(X) files without requiring any additional settings.
All the information required to configure your distribution lists is available in the online Help area. To access it, simply move your mouse over the red information symbol next to the function in question.
Once you have transferred the distribution list by clicking on Upload new distribution list. Retarus WebExpress displays the list name, description and visibility. These fields can be modified during the session and customized afterwards. The List name field always denotes the original file name during the upload, but it can subsequently be changed.
The Auto completion option automatically adds the country code to all numbers in your distribution list which do not have one.
The Description of the distribution list is related to the actual description of the application, e.g., “Happy Birthday Retarus! It is displayed after you click on the red information symbol next to the distribution list name in the overview table which contains the names of distribution lists uploaded to WebExpress. This function helps you maintain an overview of multiple distribution lists with diverse intended uses that have been uploaded to WebExpress.

With the Visibility function you can specify whether the distribution list can be viewed only with your own login (Personal), or by every user in your company (Company-wide) with their own WebExpress account. As the administrator for your company, you can view all distribution lists. You can also assign the right to view distribution lists to other users. Defining the individual distribution lists as Personal makes sense if multiple employees in different departments use Retarus WebExpress. Set visibility to Company-wide if you want to make the distribution lists available to all WebExpress users within the company. The Visibility setting can be altered as needed.
Assigning column names
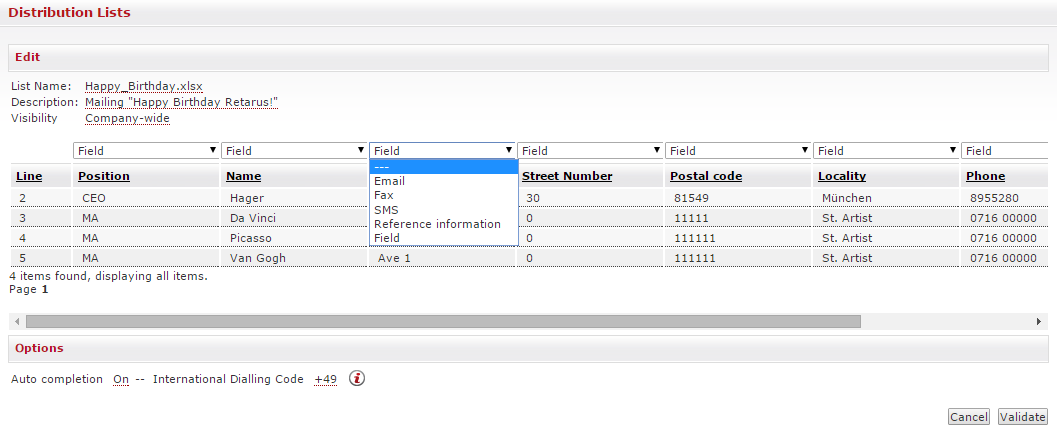
You assign categories to the columns in the distribution list(s), thus creating corresponding personalization fields that are used when you compile your distributions. The following options are available:
-
Email: Enter the recipient's email address, which is required in order to send the distribution by email. You can also use it to personalize distributions.
-
Fax: This field contains the recipient's fax number. It is required in order to send distributions by fax. The fax number can also be used to personalize the mailshot.
-
SMS: Enter the recipient's mobile phone number here. It is required in order to send mailshots via SMS. The mobile phone number can likewise be personalized.
-
Reference information: Using the (optional) Reference information column, you can assign a unique text (e.g., name, company, or customer number). This information is found in the transmission report along with the address and the status. In addition, the Reference information field is also a source of data for the command %K, which is used to personalize the fax header.
-
Field: The Field option is available to you for further columns. You can use columns designated Field for personalization purposes in all distributions.
When you transfer a distribution list that has column names in the initial line, Retarus WebExpress proposes assignments for the Email, Fax, and SMS columns after you have transferred the data. Retarus WebExpress automatically recognizes the standard designations for these columns in the five portal languages. All of the remaining personalization fields are automatically recognized as a field and can therefore be utilized for the personalization. If, later, specific fields are no longer needed for the personalization, you can simply deactivate the assignment by selecting Line ---. In the below example, an unrecognized column is visible in the highlighted area as well as a normal personalization field and a transmission medium, which in this case is the Email field.
After all field names have been assigned, verify the distribution list by clicking on Validate.
Before the data records are imported, Retarus WebExpress checks the distribution list. The test report highlights, in color, potential errors and sorts them by line so that you can quickly correct them. If you do not correct an error, Retarus WebExpress automatically deletes the erroneous data records.
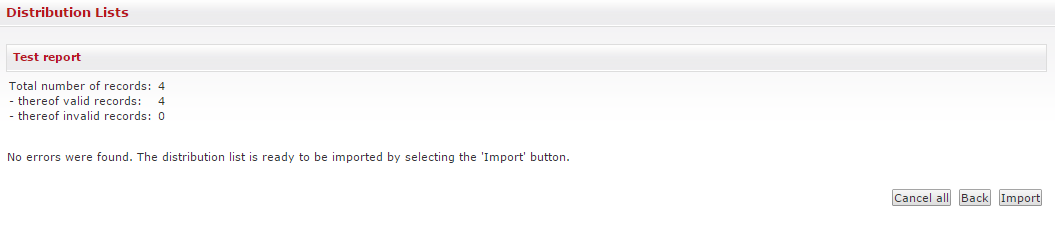
Following Import, Retarus WebExpress lays out your address list under the Distribution Lists tab. You can import and use any number of distribution lists.
You can make changes in any of the distribution lists which you have compiled; for example, you can add additional contact addresses, alter individual data, or delete the contents of complete cells/lines from the distribution list.
Importing distribution lists automatically
You can, alternatively, have distribution lists automatically imported to Retarus WebExpress from your applications, e.g., CRM systems. Retarus provides the interface required for this.
The distribution lists which you enter in WebExpress using this method are visually identical to the distribution lists that are manually imported. All of the parameters that are requested when a distribution list is created or uploaded are also entered in the list when it is imported automatically.
Additional information on this topic is available in a separate document. Your point of contact at Retarus can assist you in obtaining this documentation.
Editing a distribution list
Modifying column names
The column names can be modified at any time; for example, in order to standardize the column names in multiple distribution lists. Standardized column names are required when you send a distribution to multiple distribution lists and want to personalize it because the number of personalization fields available depends on the congruity of the distribution lists selected.
For example, if Company name is entered as reference information in Distribution List (A) and Company designation in Distribution List (B), Retarus WebExpress cannot offer these two columns as personalization fields. By giving the column names standardized titles, e.g., Company, you are making the content of this field available as personalization information.
In order to modify the column names in a distribution list, select Lists in the main menu, and then Distribution Lists. The next step is to click on the third symbol Edit ( ![]()
Modifying cell contents
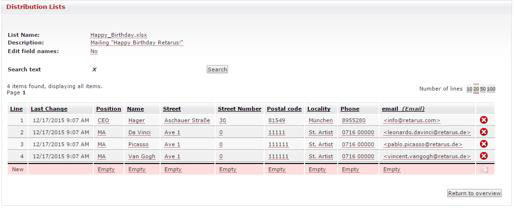
Editing or deleting the contents of individual cells, or adding new information, follows the same procedures as editing field names. Click on Lists and then Distribution Lists in the navigation menu, then on Edit field names ( ![]()
-
Adding or modifying the name of the distribution list
-
Adding or modifying the description of the distribution list
-
Adding, modifying, or deleting the cell content of the distribution list
-
Deleting complete lines by clicking on the red X in the far right-hand column)
-
Adding new data records (lines)
-
A targeted search for specific cell contents (click on the black x next to the Search text option, and enter the desired search term and clicking on Search)
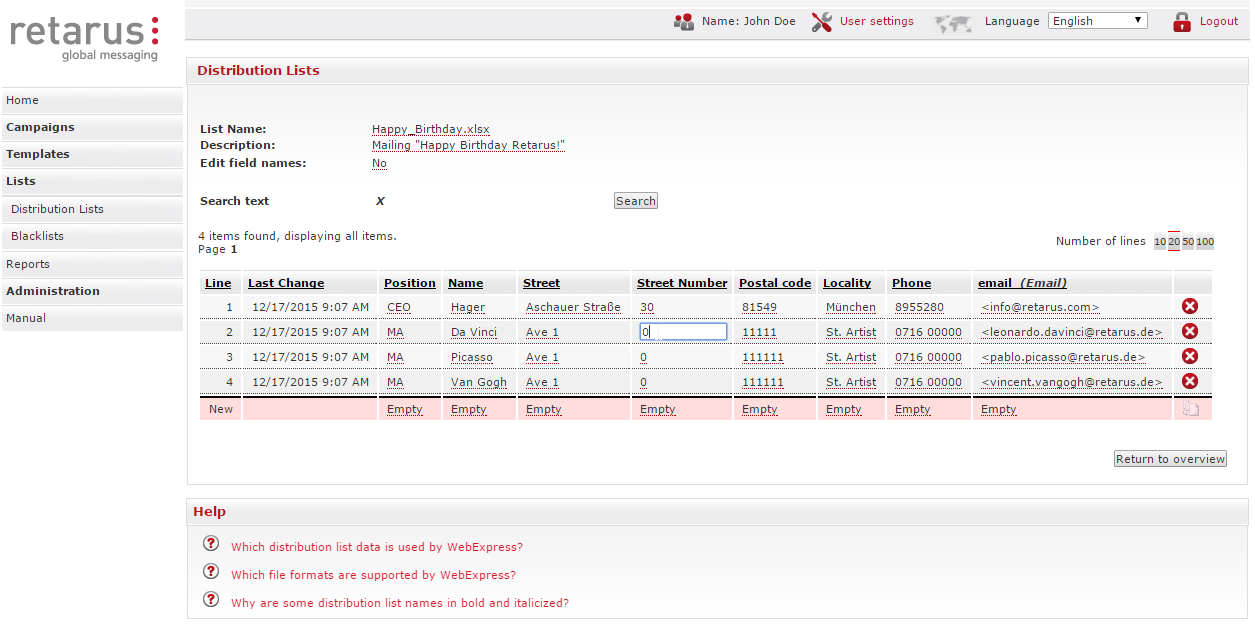
Retarus WebExpress has a function that alerts you if erroneous fax numbers, mobile phone numbers or email addresses are being entered. After you make the desired changes or additions, they are saved automatically.
The Search text function can be used for targeted searches of individual cell contents, which is particularly useful if you want to search through large, comprehensive distribution lists. Simply enter the desired search term and click on the Search button.
Dynamic distribution lists
Dynamic distribution lists give you the option of creating new dynamic distribution lists out of existing distribution lists with the assistance of filters that you can define yourself. This feature is particularly useful if you only want to maintain several large distribution lists and contact selected addressees from these lists. If you modify the base distribution list, including adding to or deleting part of it, after creating a dynamic one, the dynamic list is correspondingly updated.
The Dynamic Distribution Lists function is located in the distribution lists overview table. To reach it, click on Lists and then Distribution Lists in the navigation menu, then on the Dynamic Lists ( ![]()
In order to filter distribution lists, you have to define at least one rule. The attributes are selected via a drop-down menu and correspond to the base distribution list’s column names. After the attributes are selected, create the rule, select a condition, and enter a value. You can select a condition from any of the following expressions: is, is not, contains, does not contain, starts with, ends with, is greater than, is less than, is blank, is not blank.
It’s possible to create as many rules as you want. Groups are composed of associated rules that are linked in different ways than the main rules. For example, when “Salutation equals Mr./Ms. AND a zip code that begins with 1 OR a zip code that begins with 2”, zip codes must form a group pairing in order for the search function in order to deliver the desired result.
You can determine whether the filter is set correctly by clicking on the Update preview button. All entries found by the filter are then displayed. If no/no valid entries are found, you can reconfigure the filter. Once all desired filters are configured, click on Create a dynamic distribution list. The newly-generated distribution list is now displayed in cursive in your distribution list overview so that you can differentiate the original and dynamic lists.
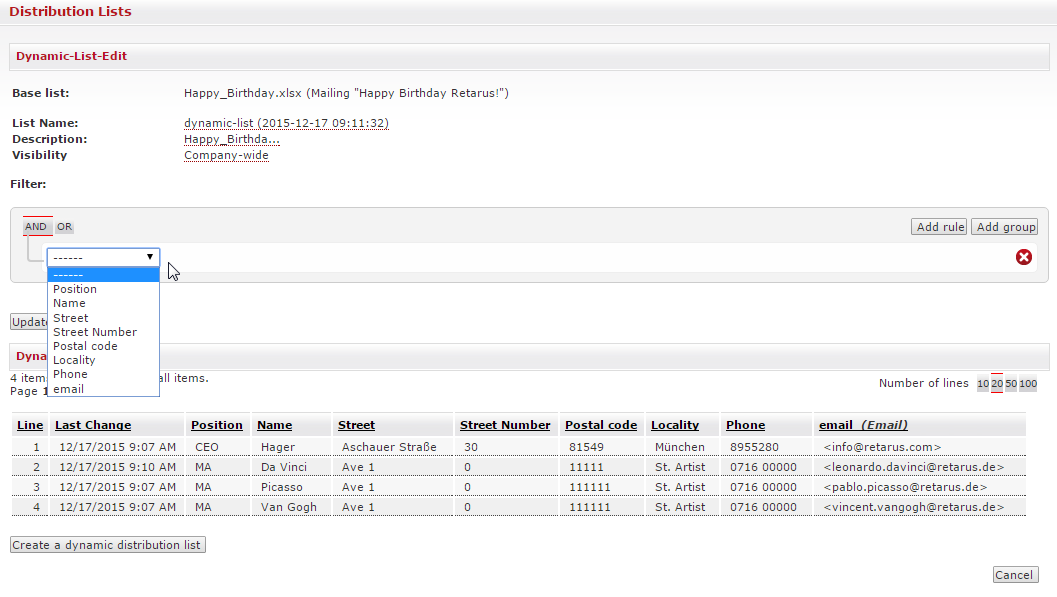
Enter the name of the dynamic list in the List Name field. The standard WebExpress format for it is as follows dynamic list 01-01-2015 12:00:00 (with the current date and time). The Description and Visibility fields are identical to those in the original distribution lists.