Sending jobs via fax/fax transmission
Faxes can be sent quickly and conveniently using Retarus WebExpress. Click on the Fax tab in the navigation menu to bring up the Fax menu, where numerous settings and transmission options are available to you. These options are explained in the following pages.
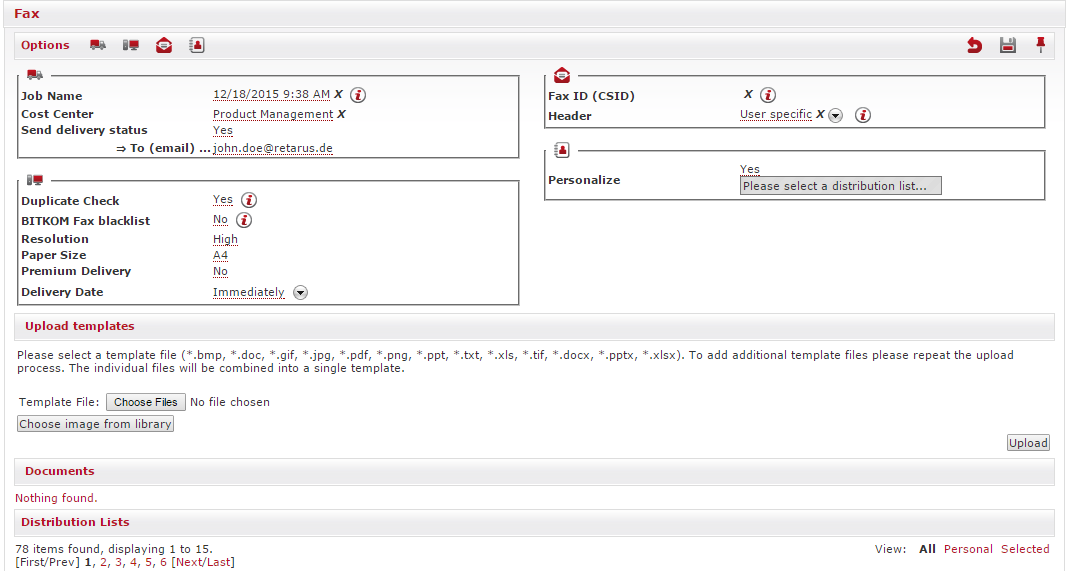
Explanation of the individual options
At the top of the Fax menu are four blocks where the transmission control options are defined. Information on a specific area of the fax transmission process is consolidated in each block. You can either hide or display an entire block as needed by clicking on the corresponding symbol. If you want to permanently save settings that have been made in one or multiple areas, click on the ![]() symbol in the upper-right corner of the menu. You can secure your distribution and transmission control options at any time during the processing of a transmission job by clicking on the
symbol in the upper-right corner of the menu. You can secure your distribution and transmission control options at any time during the processing of a transmission job by clicking on the ![]() symbol. In order to discard all changes that have been made up to that point, click on
symbol. In order to discard all changes that have been made up to that point, click on ![]() .
.
Transmission job

Each transmission job is named individually in the Job Name field, which enables you to track an individual transmission in reporting and on your invoice by name and cost center. You can also opt to use the standard name, which consists of the date and time of the transmission.
The Cost Center is optional and can be assigned permanently for each user in the customer settings or edited depending on the user. The permanent assignment of users to cost center makes sense if several departments in your company or organization, such as Marketing, Controlling, etc., use Retarus WebExpress. You can then allocate the monthly amounts in full detail to the individual cost centers’ invoices. If you do not permanently assign the cost center, it will be entered individually for each transmission job.
With the Send delivery status option, you can have a detailed report of the job sent to one or multiple email addresses that shows which SMS messages have been rejected and for what reason. The destination numbers can then be removed from your distribution list and thus not included in future transmissions. You will receive the report after all faxes have been sent and/or the error is known. You can also configure the amount of time after the transmission the report should be sent (at least 24-48 hours is recommended).
Transmission parameters

The Duplicate Check reviews your distribution list for duplicate numbers. Individual contacts may have been addressed more than once if no check for duplication is completed, particularly if you select multiple distribution lists for transmission. The Duplicate Check option makes it possible for you to avoid multiple transmissions of faxes, emails or SMS messages to the same recipient. You can send information to several employees at the same company by using the Extended option in the Duplicate Check field, where, in addition to the contact data for fax, email or SMS, Retarus WebExpress takes the reference column into account. Your transmission is then delivered to all addresses within the company, even if they have to be contacted under the same email address.
By comparing your distribution list with the BITKOM Fax blacklist, you can block fax transmissions to recipients who do not want to receive unsolicited advertising material (this option only applies to addresses in Germany). Additional information is available at: http://www.retarus.de/robinsonliste.
In the Resolution field, you can select the resolution of the fax documents. The low setting means that faxes will be transmitted with a resolution of 100x200 dpi, while the high setting results in a resolution of 200x200 dpi. We recommend that you use monochrome fax documents- since faxes are transmitted in black and white, the receiving fax machine displays any colored images and scripts in shades of gray, with the end result often being a low-quality document.
Using the Premium Delivery option makes it possible to deliver a single fax distribution almost simultaneously to each fax job with 5,000 or more recipients by setting a transmission time frame and segmenting it. This means that even very large jobs are always sent at a high transmission rate, which ensures that you can concurrently send multiple fax messages to several thousand recipients quickly and securely. The Premium Delivery function assigns your fax a higher priority and it is given preference as far as transmission is concerned, meaning that your urgent fax distributions are delivered very quickly.
With the Delivery Date function, you can specify the exact minute the fax transmission should start. This enables you to edit jobs, transfer them to Retarus Fax Cloud and send them securely and reliably at the required time, which can certainly be overnight or very early in the morning.
Sender information

The Fax ID, also known as the Called Subscriber Identification (CSID), can be assigned individually for each new job. It is usually displayed on the recipient's fax machine and identifies the sender of the fax message. The CSID is used, for example, to have requested replies to a transmission routed to a special number, e.g., the number used for order acceptance or for the marketing department. Alternatively, a Retarus fax service number can be indicated. The fax header can be personalized for each new transmission in order to meet your specific requirements. You can also create a header template in User Management that can be applied to all of your faxes. In the Header field, any additional settings you want for the header can be configured, e.g., the name of your company and a specific department. Additional individual settings include the date, the time, and the number of pages.
Sample input
%d.%m.%Y %H:%M:%S page: %P / %T Sender: Retarus GmbH
Sample output
07.07.2015 18:03:17 page: 1 / 12 Sender: Retarus GmbH
Personalization
As soon as you activate the Personalize field, you are prompted to select a distribution list. It is required because the personalization fields are derived from the column designations in the distribution list.

Content-related design elements
Template uploads
After you have configured the individual options click on Search under Upload templates. A window then appears that allows you to select the desired template file from your data medium and import it by clicking on Upload. Multiple files can be uploaded one after the other. The following file formats can be transferred to the system: BMP, DOC(X), GIF, JPG, PDF, PNG, PPT(X), TXT, XLS(X), TIF.
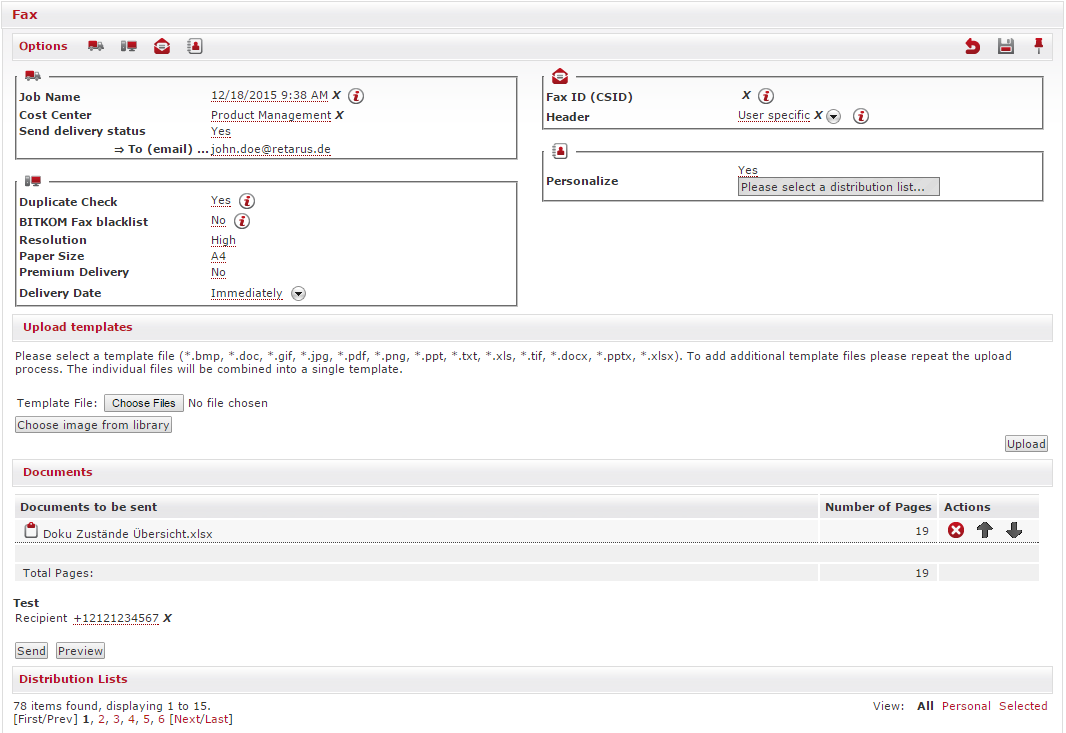
Retarus WebExpress displays the uploaded files under Documents. In this section, you can remove the documents, modify their sequence, or upload them again without foregoing any processing steps that have already been taken.
When the options have been configured and the documents to be sent have been imported, you can send a test fax to as many recipients as you want or preview the document. WebExpress uses the test fax number assigned in the User settings for the test transmission. This number can be changed at any time.
If you are not utilizing personalization, you can now select a distribution list and send the job by clicking on the Send Job button. Multiple distribution lists can be used for a transmission. As previously mentioned, the Duplicate Check function ensures that you avoid sending a fax distribution to the same recipient more than once.
Fax personalization
The personalization function in Retarus WebExpress provides a unique option for personalizing fax documents in any position. Activate the Personalize function in the Options menu.
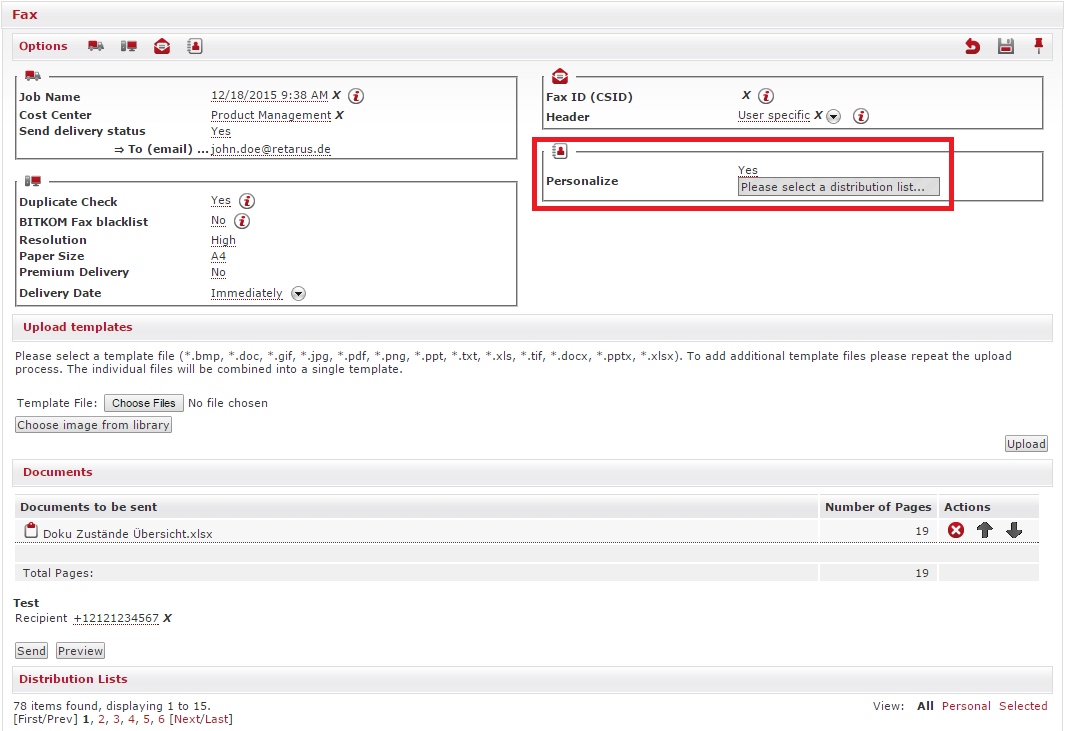
After selecting a distribution list, click on Personalize to access the next processing level.

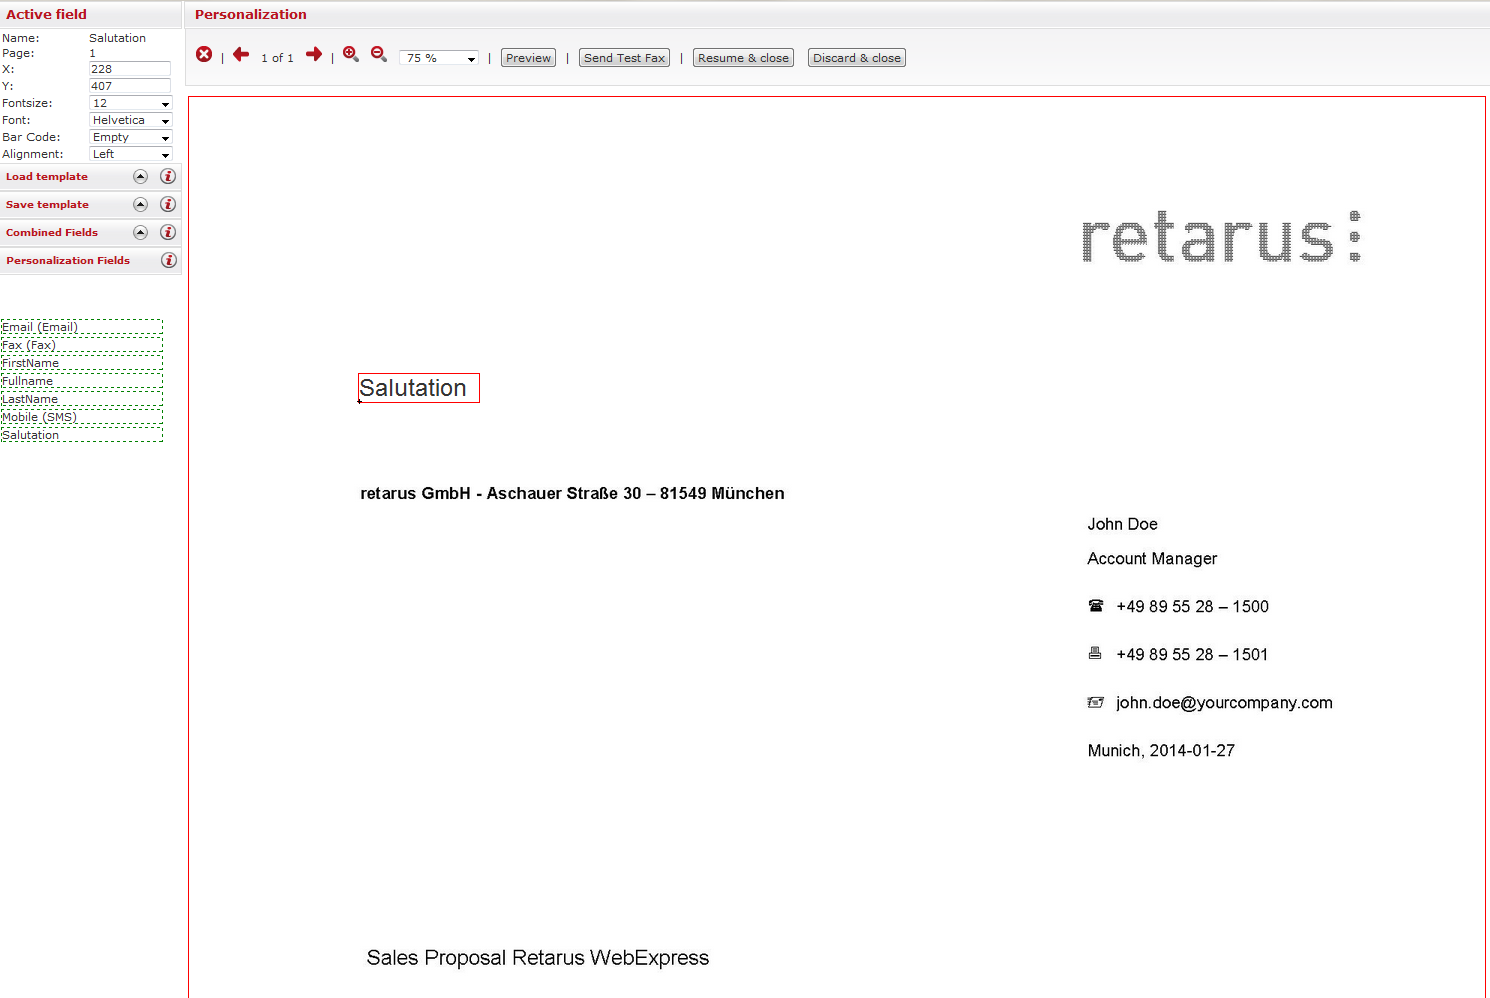
A new window opens in which you can personalize your imported fax template. The choice of personalization fields corresponds to the column names in the selected distribution list. You can also activate several distribution lists with different personalization fields- Retarus WebExpress generates the personalization fields from the overlap among the selected distribution lists. If the column headers of the distribution lists are not identical (for example, the column header is written as email in the first distribution list, but as email in the second), you can edit the data under the Distribution Lists menu option. After the editing process is complete, you can return to the personalization mode without losing data or any of the settings you configured.
In personalization mode, you can add the personalization fields highlighted in green at the bottom of the toolbar on the left-hand side to the appropriate spot in your template. There are several ways to do this: you can drag & drop them, configure precise X and Y coordinates in the toolbar, with the height and length accurate to the exact pixel, or you can insert them into the desired position in your template. There are additional settings that can be configured, including font size, font type and justification. You can remove fields that have inaccuracies using the red Delete button (![]() ).
).
14 font sizes (8pt to 36pt) and 5 font types are available.
Fax personalization using combined fields
If there are a number of personalization fields next to or above one another; for example, for an address block or for an address in this format: Title First name Family name, it is recommended that you make personalization entries using the Combined fields function. It makes it possible to align the text to the exact pixel, which ensures that there is a standard amount of space between the individual field contents. An example would be titles or first names that vary in length (Dear Ms. Phyllis Wheatley / Dear Mr. Samuel Coleridge Porter).
You can easily create a combined field by using the drop-down menu in the Field field. Simply select the relevant field from the menu and add it by clicking the plus sign next to the menu. You can also enter your own text and special characters, such as a comma after the form of address. You save the combined field after naming it under Name at the top of the toolbar.
Example of a combined address field
${Company}${Department}${Title} ${First name} ${Family name}${Street}${Post code} ${Town/city}
Example of a combined salutation field
${Title} ${First name} ${Family name},
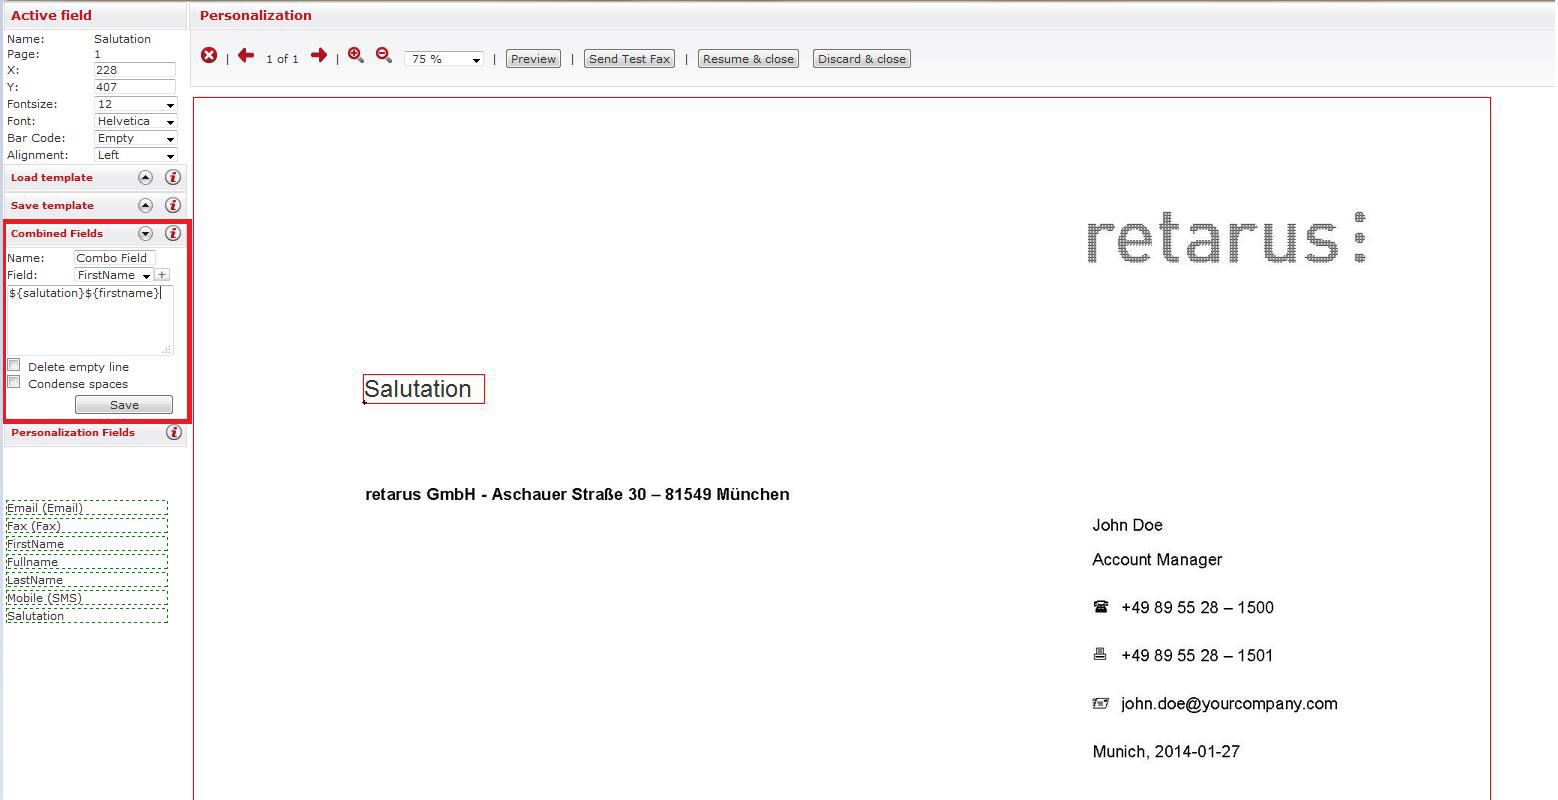
After it is saved, the newly created field appears, marked in blue with the name listed under the Fields for personalization tab. Combined fields are used exactly like the other personalization fields.
If one of the defined fields is empty (e.g., first name), you can hide it with the Delete empty line function, which puts Retarus WebExpress in compliance with DIN standard 5008. In order to avoid having a surplus of empty defined fields (e.g., academic degree or title), you can also activate the Condense spaces option by checking the corresponding box.
Fax personalization templates
In Retarus WebExpress, personalization fields which have been configured can be saved in template form and automatically used for future transmissions. If, for example, you use a standard template for your fax transmissions and a distribution list with a standard structure, you can personalize them simply by clicking on Load template. You can view and modify all saved personalization templates by clicking on Templates in the navigation function.
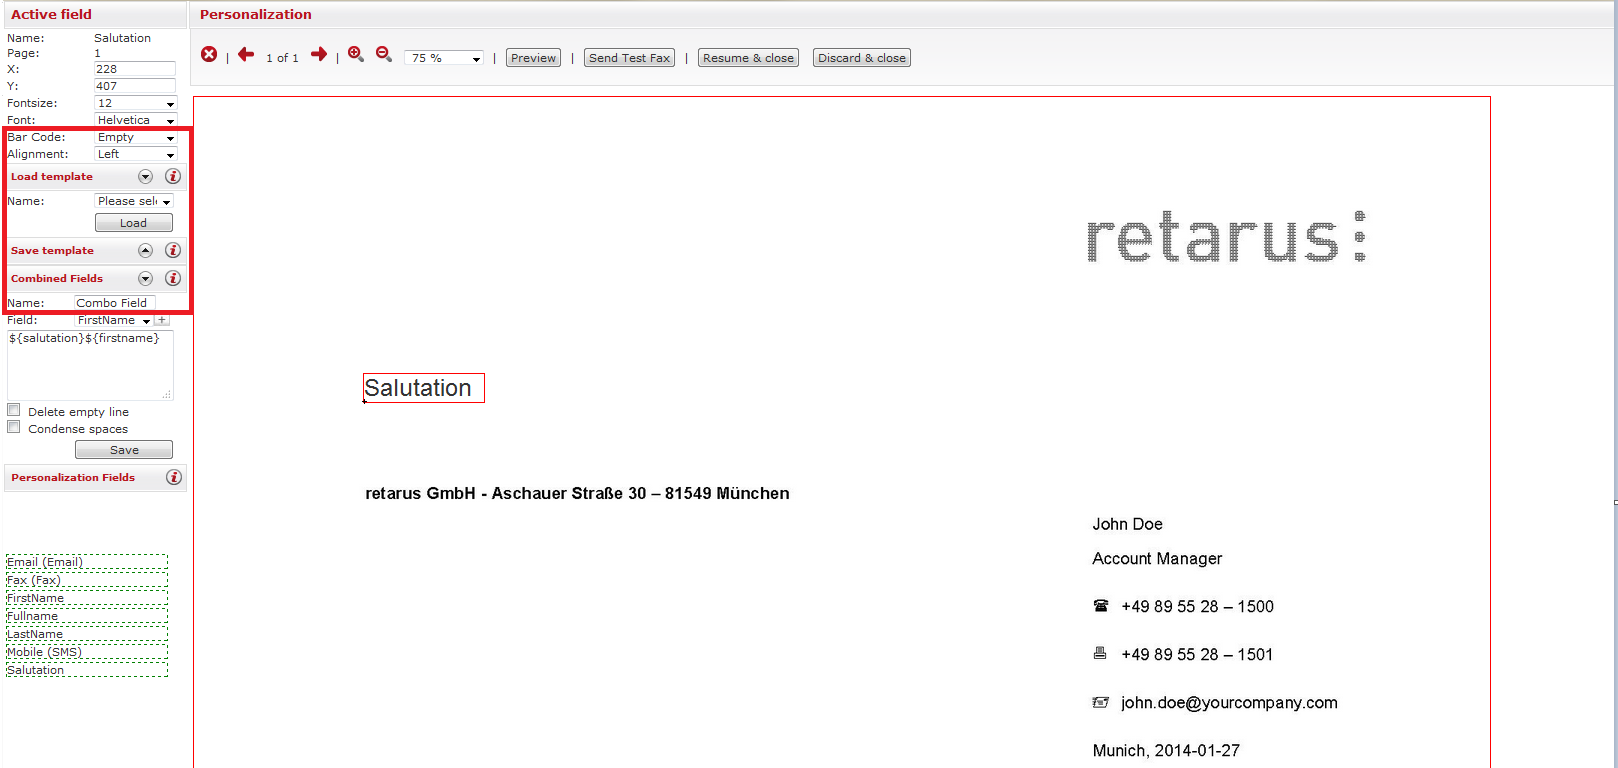
When you have integrated all necessary fields, the document can be displayed from the personalization level in personalized form in Preview and you can also send a personalized test fax to the test fax number. In the preview you can use the blue arrow buttons to review all personalized data for accuracy, each individual fax page for errors, and the final layout of the documents.
If you are satisfied with the modifications and the document is ready to be sent, click on Resume & close and then on Send job on the first level.
