
Create a faxbox to set up a shared place for sending, receiving, and organizing faxes. Before you create a faxbox, keep in mind the main setup and access requirements.
What to know before you create a faxbox
You need to be a Tenant Administrator to create faxboxes. When you create a faxbox, you must assign a faxbox owner and at least one fax number (inbound or outbound). Users must be assigned to a faxbox before they can send and receive faxes, and a user can be assigned to more than one faxbox.
A new faxbox includes Inbound, Outbound, and Trash folders by default. Administrators and faxbox owners can also create additional folders and subfolders.
📌 Administrator faxbox access
To work with faxes in a faxbox and send or receive faxes, an administrator must also be added to the faxbox as a user.
Create a new faxbox
-
On the main Enterprise Fax Portal page, click Settings.
-
Click the Faxboxes tab.
→ The Faxboxes screen is displayed and shows your available faxboxes. -
Click Create faxbox.
→ The Create faxbox screen is displayed and takes you through the required faxbox creation steps.
General
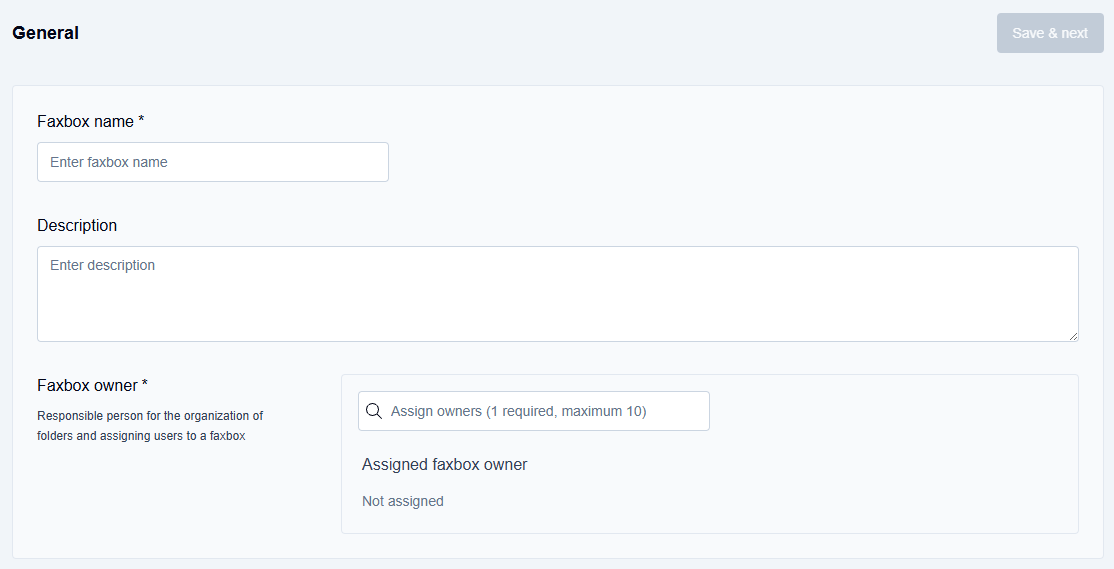
In General, enter the basic faxbox information.
-
In the Faxbox name field, type the name of the faxbox.
-
In the Description field, type a helpful description.
As a best practice, include information about the team or department that will use the faxbox, or the process or application associated with the faxbox. -
In the Faxbox owner field, type a few letters of the faxbox owner’s name to display the autocomplete list, then select the faxbox owner from the list.
-
Repeat this step to add additional owners. You can assign up to 10 faxbox owners. All assigned owners have the same permissions and share equal responsibility for managing the faxbox.
-
At least one owner must always be assigned. If you attempt to save without an owner, a validation error is displayed.
-
The faxbox owner is the primary person responsible for the faxbox. The owner can manage the faxbox and is also one of the users who can delete it when the faxbox is no longer needed.
-
-
Click Save & next.
→ The Fax numbers screen is displayed.
📌 Completing faxbox setup
At this point, the faxbox is created, but there is still additional information to add and configuration to complete.
You can leave the Faxbox configuration screen and return later to complete the remaining steps, or continue with the setup now.
Fax numbers
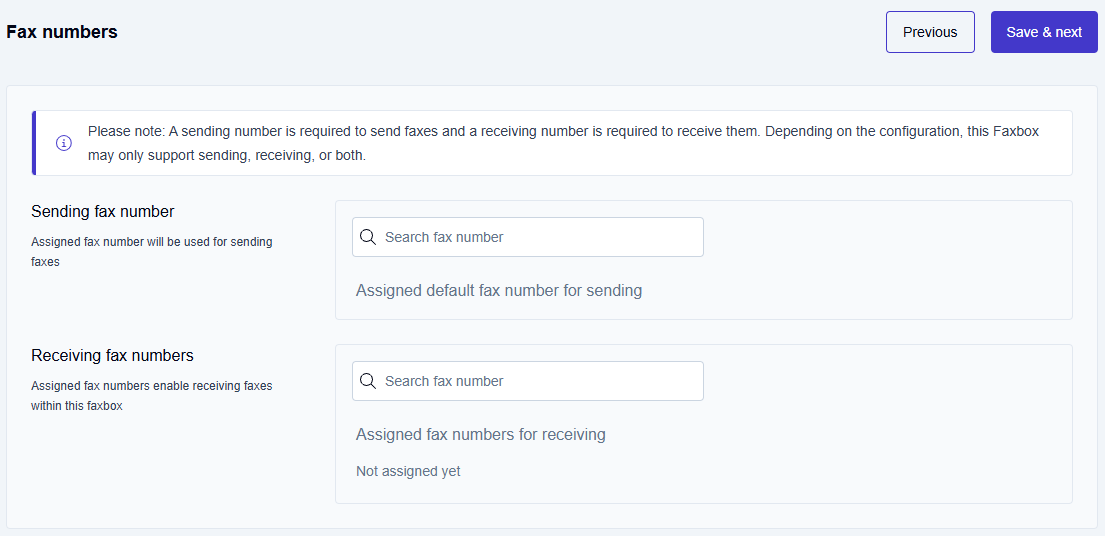
In Fax numbers, assign the numbers the faxbox will use for sending and receiving faxes. You can enter a sending fax number manually or select available sending and receiving numbers from the list.
-
Click inside the Sending fax number search field.
-
Do one of the following:
-
Enter a fax number manually by typing a plus sign (+), the country code, and the fax number.
-
Type a plus sign (+) or the first few digits of the country code and area code, then select the fax number from the autocomplete list of available fax numbers.
-
-
Click Save & next.
→ The Organize screen is displayed.
Organize
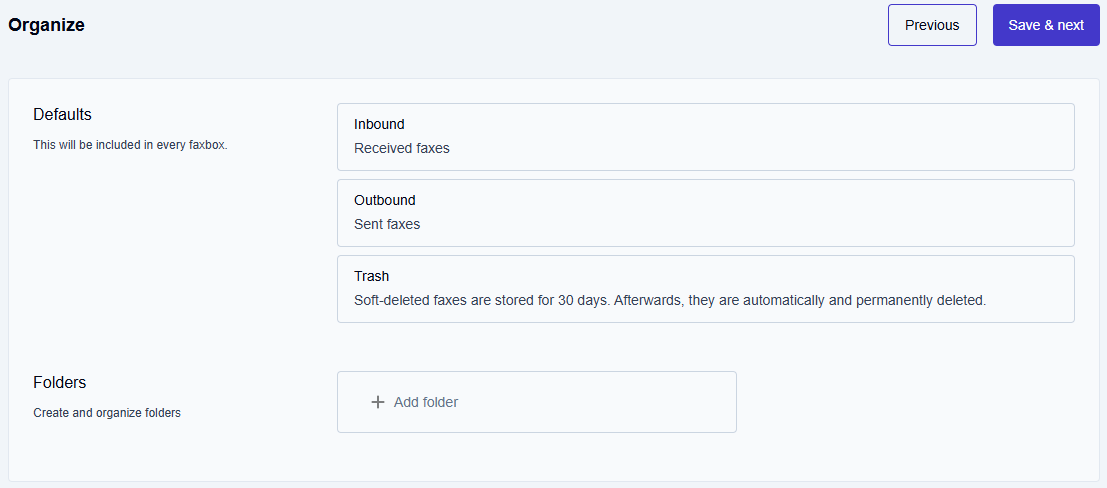
In Organize, create folders and subfolders to organize faxes in the faxbox. A new faxbox already includes default folders, but you can add more as needed.
-
Click inside the + Add folder field, type the new folder name, and press Enter.
-
Click inside the + Add subfolder field, type the new subfolder’s name, and press Enter.
-
Click the Save & next button.
→ The Faxbox cost centers screen is displayed.
Faxbox billing codes

In Faxbox billing codes, add billing codes for inbound and outbound fax traffic for billing purposes. Use separate values for inbound and outbound traffic if needed.
-
In the Inbound billing code field, enter the billing code to use for inbound fax traffic.
-
In the Outbound billing code field, enter the billing code to use for outbound fax traffic.
-
Click Save & next.
→ The Cover pages screen is displayed.
📌 The billing codes will appear on your consumption reports. To have them included on your next invoice as well, please contact your Retarus administrator.
Cover pages
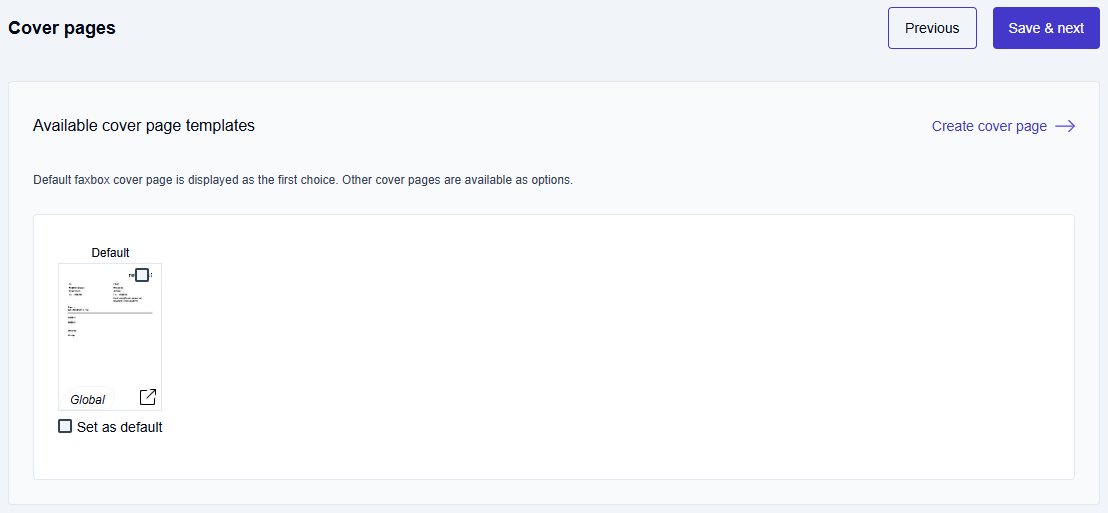
In Cover pages, you can assign an existing cover page template to the faxbox and define how it is used for outgoing faxes. Choose from prebuilt templates or create a custom cover page.
-
Browse the available cover page templates in the template gallery.
-
To preview a template, click the preview icon

-
Activate the Set as default option to set a template as the default.
-
If none of the available templates meets your requirements, click the Create cover page button to design a new template.
-
Click the Save & next button.
→ The Members screen is displayed.
Assign members
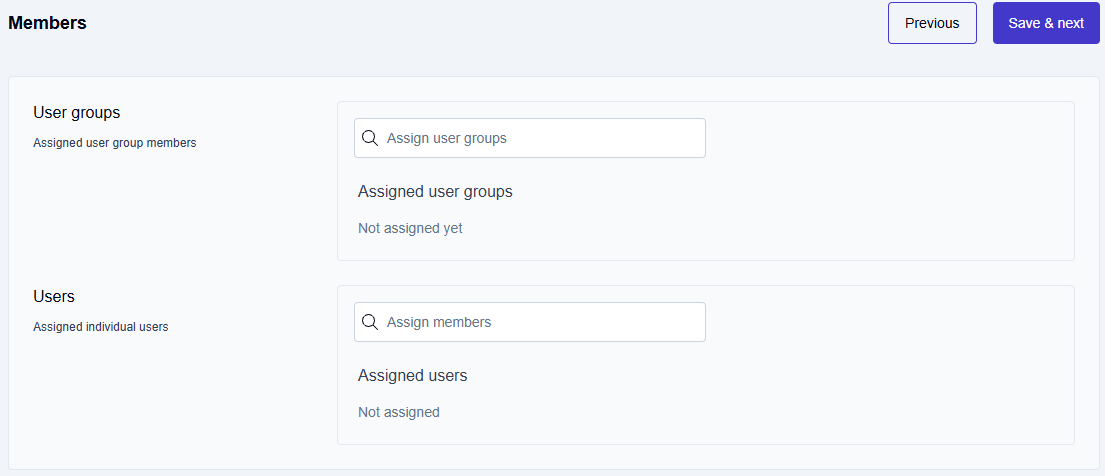
In Members, add the user groups and users who need access to the faxbox. You can assign both user groups and individual users.
-
Click inside the Select user group field.
-
Type a few letters of the user group name to display the autocomplete list, then select the user group from the list of available user groups.
-
Click inside the Select user field.
-
Type a few letters of the user’s name to display the autocomplete list, then select the user from the list of available users.
-
Click Save & next.
→ The Complete screen is displayed and confirms that the faxbox was created successfully.
→ The screen includes a link to the faxbox.
📌 Faxbox creation notification
Once the Complete step is reached, all assigned faxbox owners receive an email notification confirming that the faxbox has been created. The notification includes the faxbox name, who created it, and the timestamp.
If you no longer wish to receive these notifications, you can turn them off in the My Profile section. For details, see Email notifications.