Sending Fax Campaigns With Cloud Fax App for Salesforce
This guide shows you how to create, send, and monitor single faxes and fax campaigns using the Retarus Cloud Fax for Salesforce app directly within Salesforce Service, Sales, and Healthcare Cloud applications. In the Cloud Fax for Salesforce app, a “campaign” simply lets you send the same fax to multiple recipients and track delivery in one place.
Prerequisites
The Retarus Cloud Fax for Salesforce app is installed and activated.
You have permissions to open the app and send faxes.
Sending faxes to multiple recipients
Open the Salesforce App Launcher.
Search for and launch Cloud Fax Campaign Management.
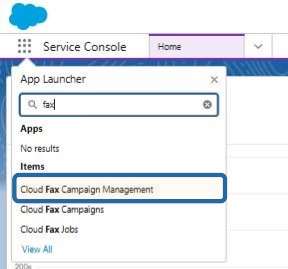
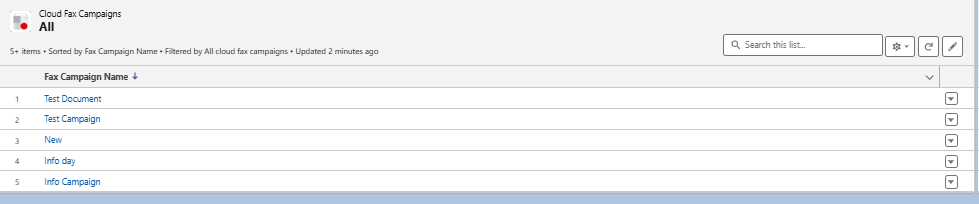
→ You’ll be taken to the Cloud Fax Campaign Overview page, where you can create a new fax campaign.
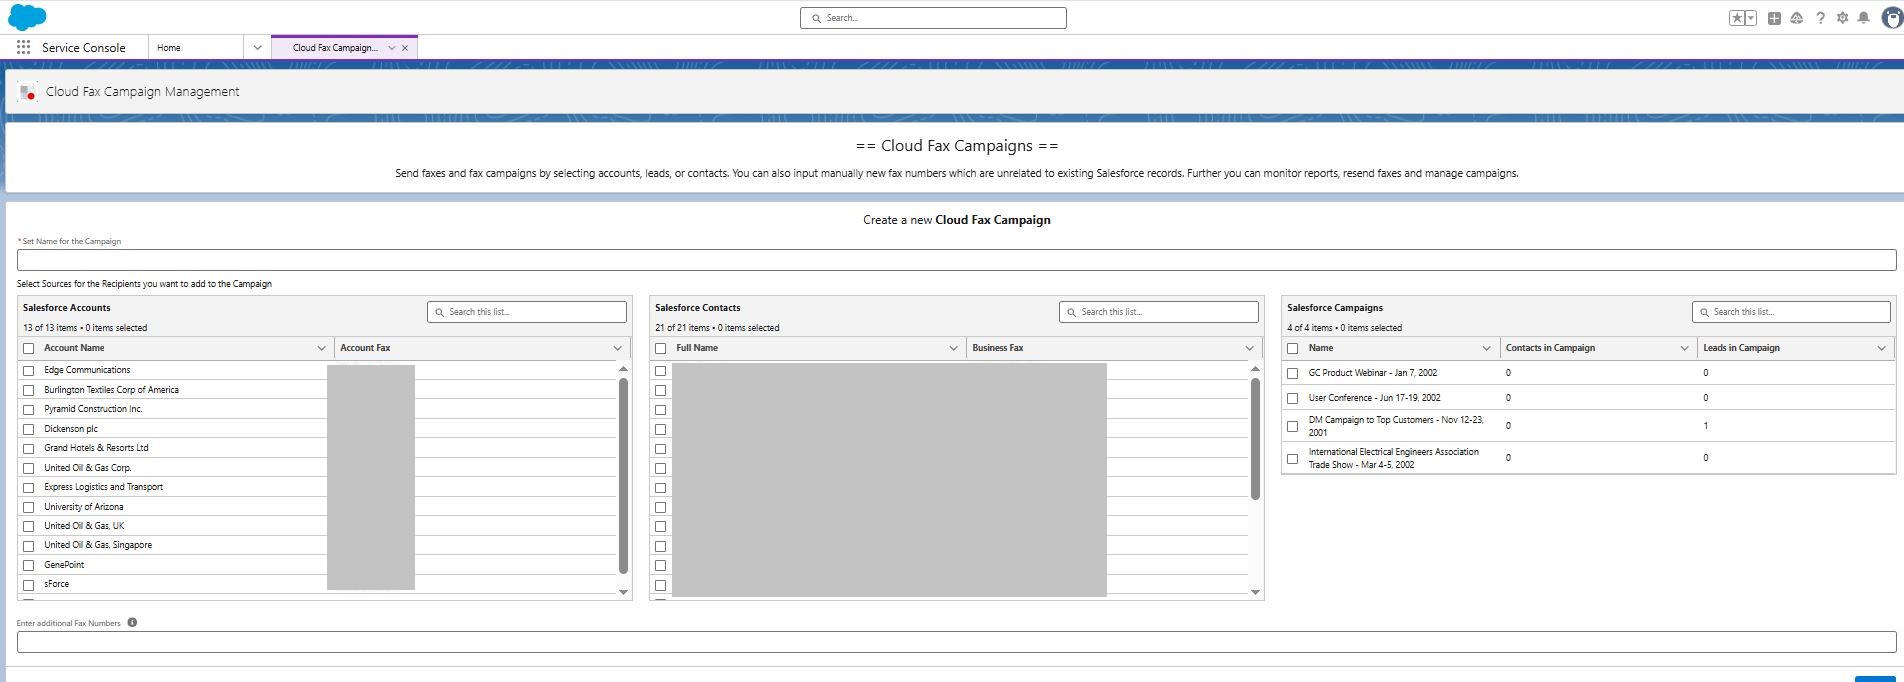
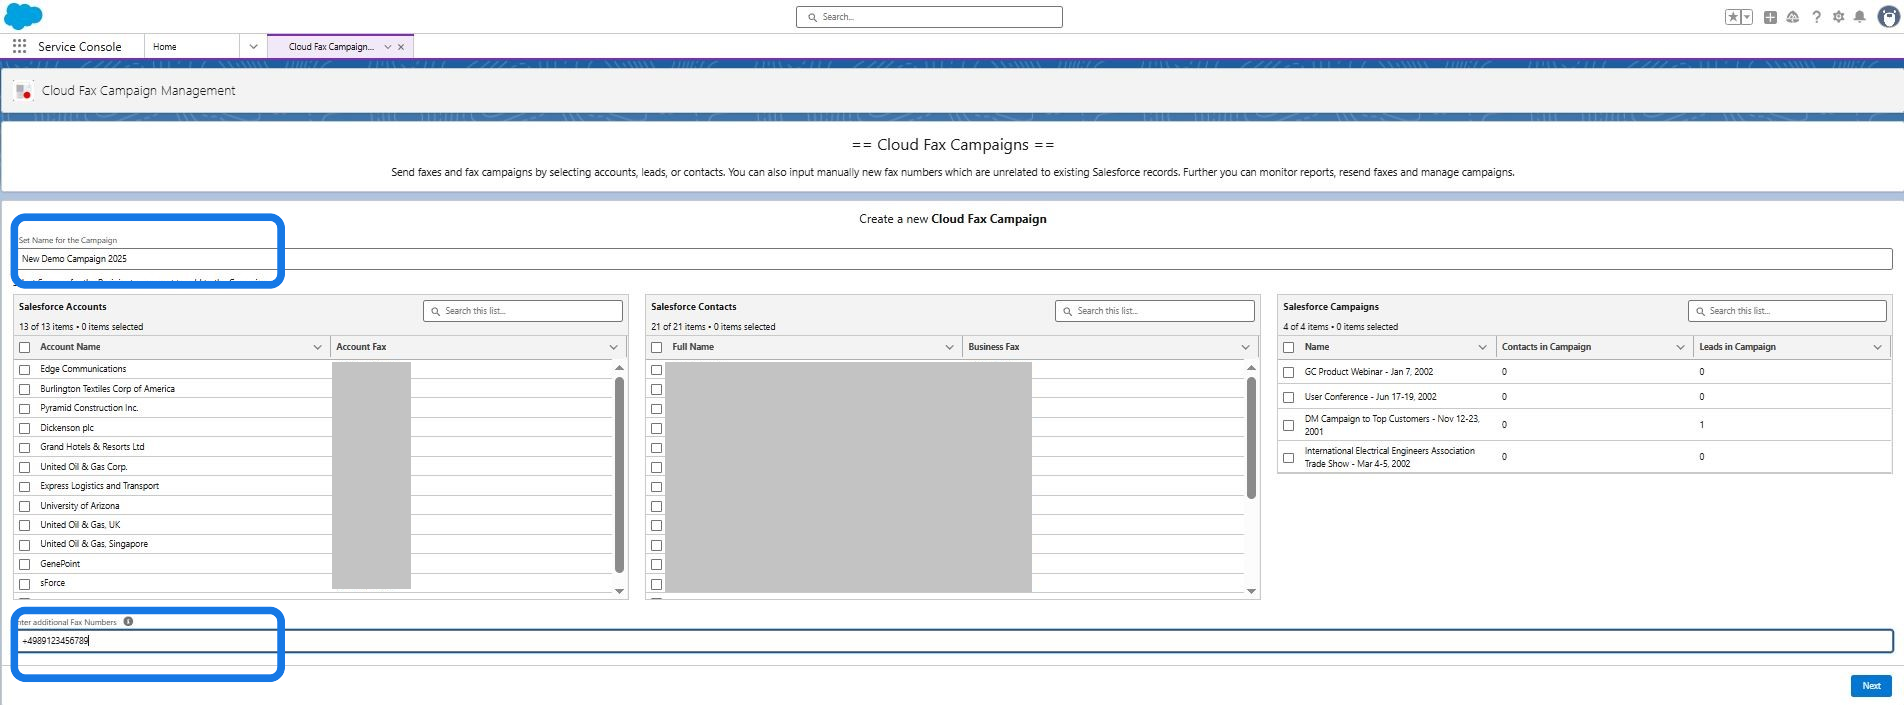
Enter a name for your campaign.
Select recipients:
You can choose and combine from various sources: Salesforce Accounts, Salesforce Contacts, and Salesforce Campaigns.
Optionally, you can add individual numbers in the Additional Fax Numbers field. Separate multiple numbers with semicolons.
Click Next, then upload the file you want to fax. Supported file formats:
PDF
DOCX
XLSX
TXT
HTML
Image formats
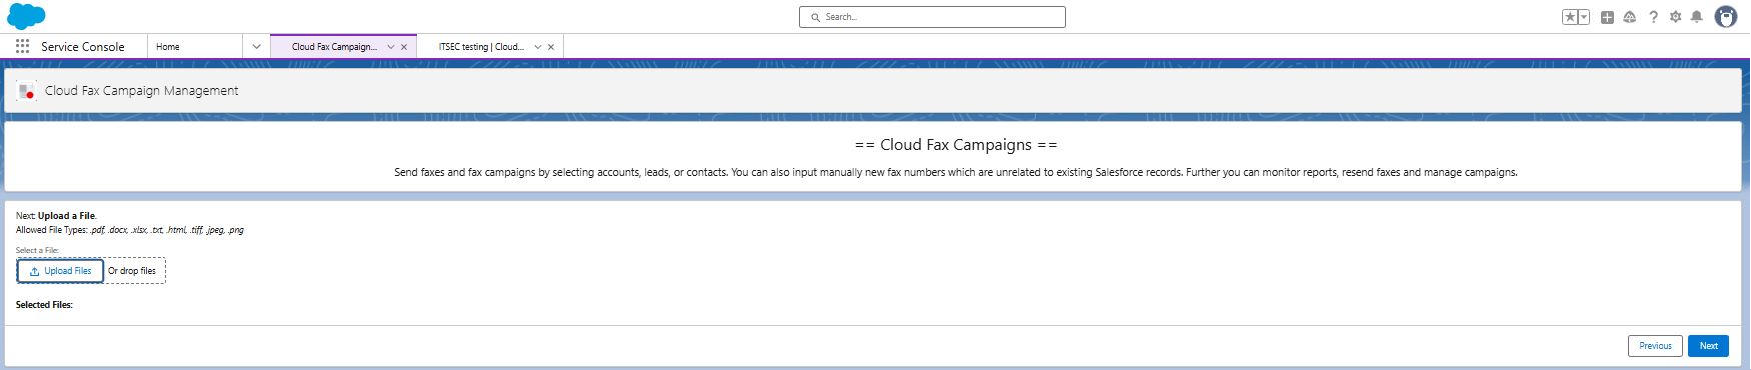
Click Next.
→ Salesforce creates the campaign and displays the overview page with key details
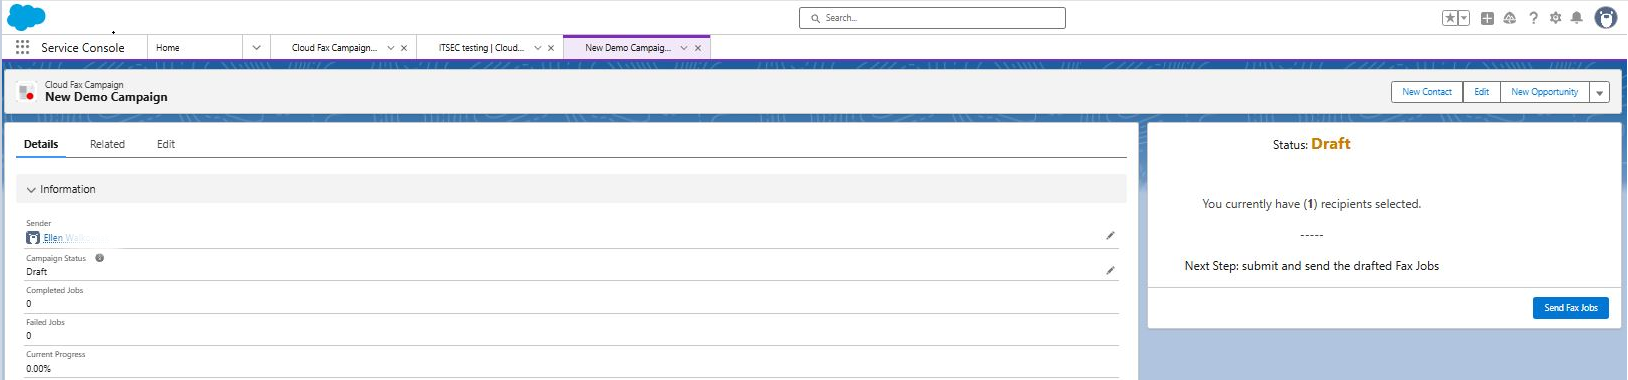
Click Send Fax Jobs to send all fax jobs in the campaign.
Monitor the progress.
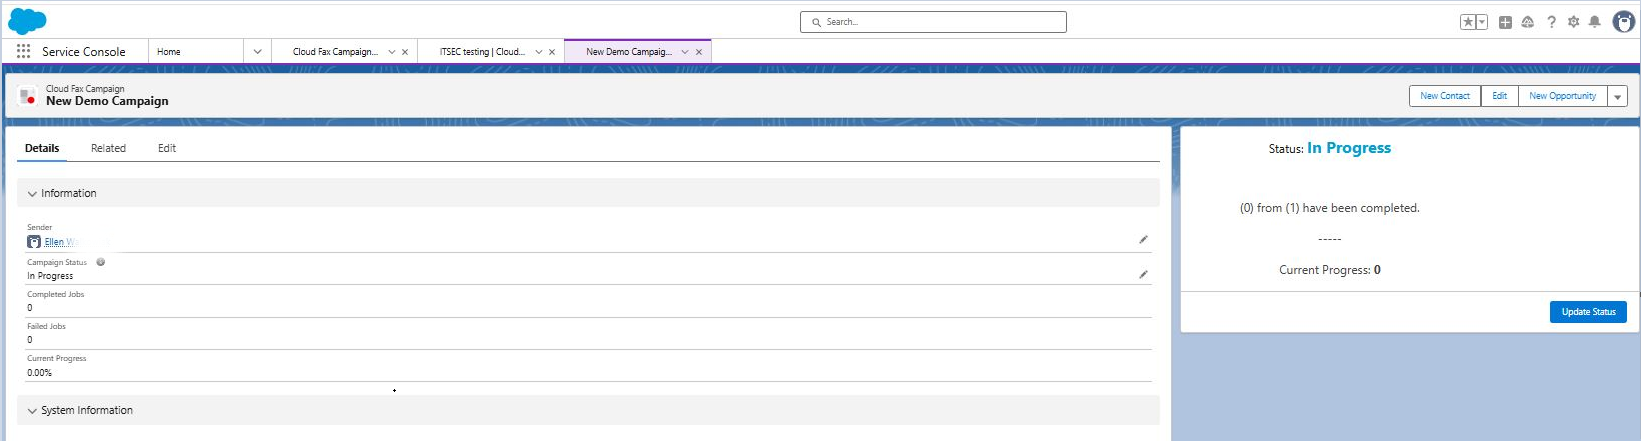
After a few minutes, click Update Status to check the progress.
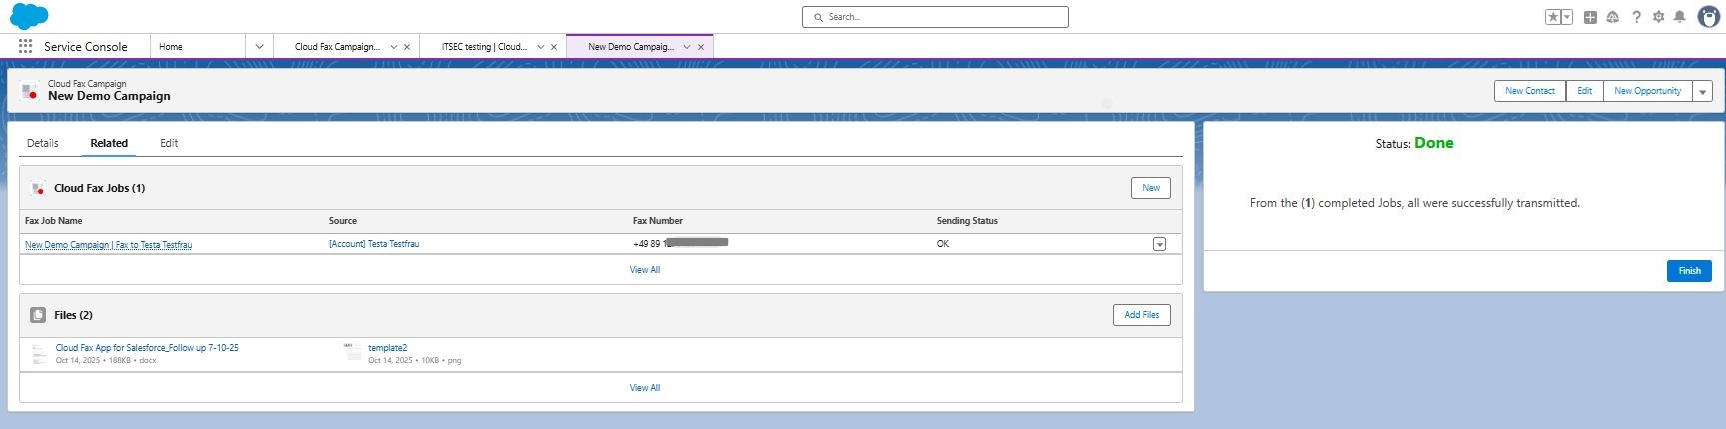
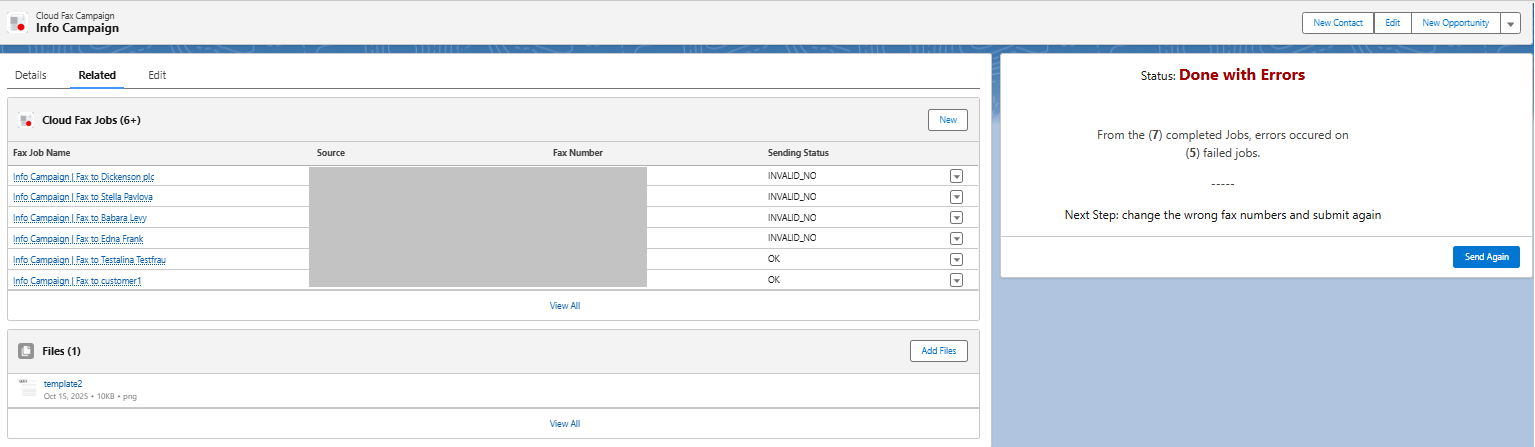
(Optional) Click the Related tab to view each individual fax job and its status.
Handle failed fax jobs
If any fax fails to send, it gets the corresponding failed status. You can review the details and resend the fax:
Open the campaign and go to the Related tab.
In the Sending Status column, find entries with the failed status.
Click the failed fax job to open its details.
Review the problem details to identify the issue (for example, an invalid number).
See the Transmission status codes - Outbound Fax for more details.If needed, correct the recipient number or other data.
Click Resend to send the fax again.
Sending individual faxes from a contact
You can send individual faxes directly from a contact record. First, add the provided flow to your contact page layout.
Add the flow to the contact page
Open a contact record.
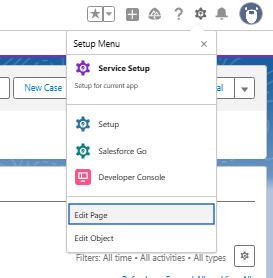
Click the gear icon in the top right and select Edit Page.
-> All available Salesforce and custom components are displayed in the left panel.
In the left panel, search for Flow.

Select Retarus Single Cloud Fax under Flow.
Activate the Submit active RecordID to Flow option.
Click Save to apply your changes.
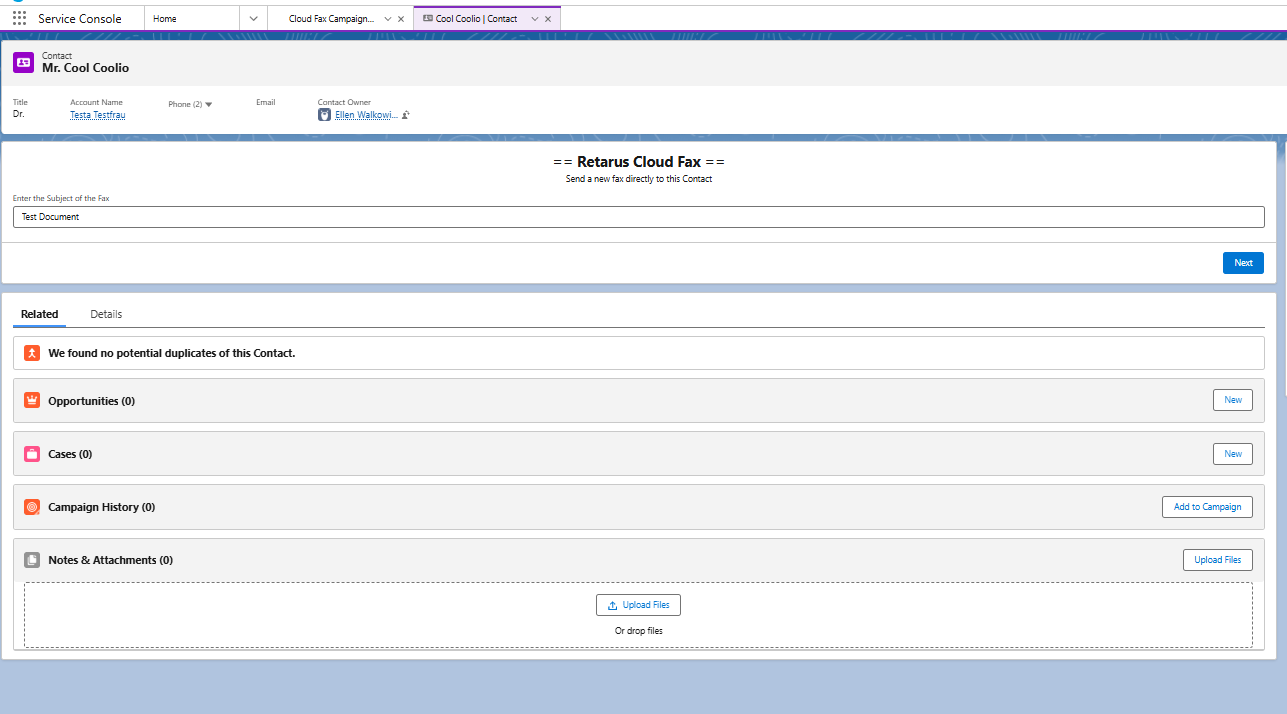
Send a fax from a contact
Open the contact record.
Find the Retarus Single Cloud Fax component.
Follow the on-screen instructions to compose and send the fax.
-> All Cloud Fax campaigns and single jobs appear at the bottom of the Cloud Fax Campaign Overview page.
Fax campaigns
Fax single jobs

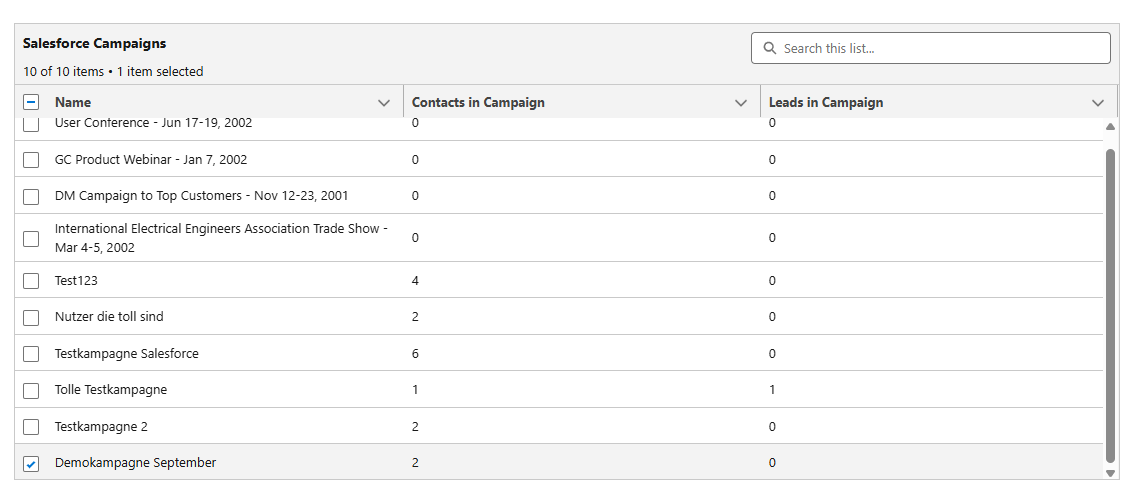
Using Salesforce standard campaigns
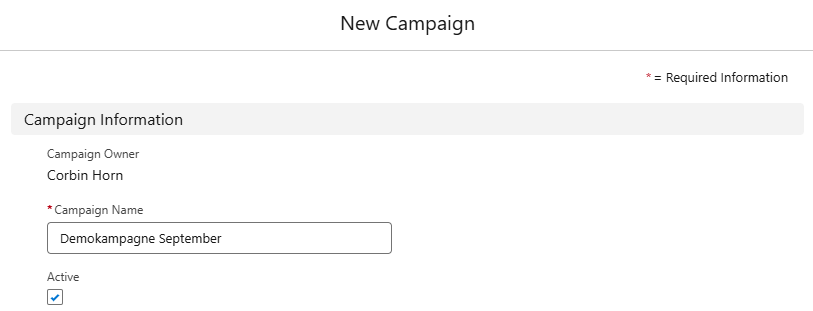
In Salesforce, you can access the Campaigns area through the App Launcher. To create a new campaign, click New. Alternatively, open and edit an existing campaign by selecting its name.

Next, enter a campaign name and set the campaign status to Active.
You can add new members (such as contacts, leads, and other records) in the Campaign Members section.

Once a campaign includes members who have provided a fax number, it will automatically appear in the Cloud Fax Campaign Management, where it can be selected to include all campaign members.