
Retarus WebExpress gives you the option of using blocklists, which ensure that your recipients do not receive any unwanted messages. Retarus WebExpress distinguishes between three types of blocklists: company-wide blocklists, user-specific blocklists, and the BITKOM Robinson Fax List (BITKOM = The German Association for Information Technology, Telecommunications and New Media), which applies only to fax numbers located in Germany. The objective of the BITKOM List is to protect private persons and companies against unsolicited advertising. It only applies to fax broadcasts and is completely independent of other Robinson lists (postal- and email, etc.).
Additional information is available at: http://www.retarus.de/robinsonliste.
Although this option only applies to addresses located in Germany, other countries may have their own Robinson lists. Please contact your Retarus Sales Engineer to obtain additional information on this topic.
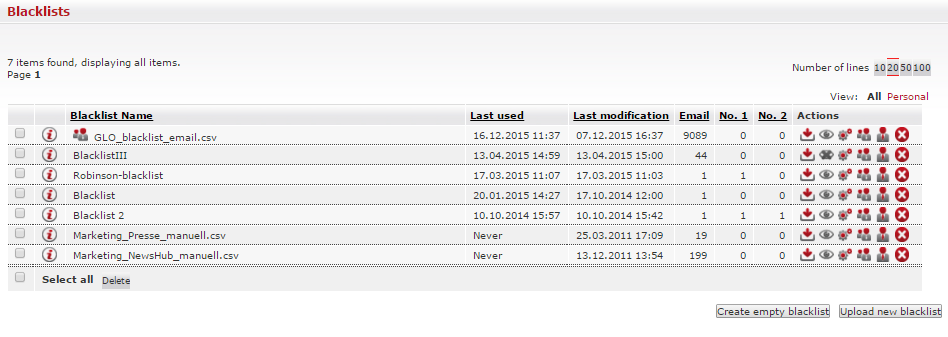
An overview of your blocklists is available by clicking on the Lists and then Blacklists tabs in the navigation function, where you can create blank blocklists, transfer blocklists and view or edit existing blocklists. Under the Actions tab, blocklists can be stored in CSV format, modified (both lines and columns) and deleted, all locally. Additionally, you can also specify whether the blocklist is visible only to your account or to all company employees. To define the blocklist as a global company blocklist ( ![]()
![]()
![]()
![]()
![]()
Creating an empty blocklist
In order to create an empty blocklist, click on the Lists and then Blacklists tabs in the navigation menu. In the window which then appears, select the Create empty blacklist button. You can then assign a name and description to your blocklist and configure the visibility level. With the Create blacklist button, you can create the list, which then appears in the overview.
An empty blocklist is required in order to use the Unsubscribe Link function (see Subscription and unsubscribe functions).

Sending a new blocklist
In order to import an existing blocklist in CSV, TXT, or XLS(X) format into Retarus WebExpress, click on Upload new blacklist under Blacklists. The options for sending a blocklist then appear.
The sent blocklist can be edited just like an imported distribution list; for example, you can define the column names.
With the automatic import function, you can also send blocklists directly from CRM systems. In addition, Retarus WebExpress recognizes the column headers for email, fax and SMS during the upload of the respective lists.