
This manual explains the process of assigning one or more telephone numbers to a specific profile and later removing them. In addition, basic information on this topic will be shown in order to demonstrate a broader view of it. This manual applies to the following products:
Familiarity with the main functionality and menu layout of the EAS portal is assumed.
Retarus Inbound Fax Services functional schematic
The graphic below shows a simplified version of the Retarus Inbound Fax Services functional schematic. Configuration of services via the EAS portal is based on this functional schematic, and the logical sequence of configuration steps will be depicted with the help of the menu tabs.
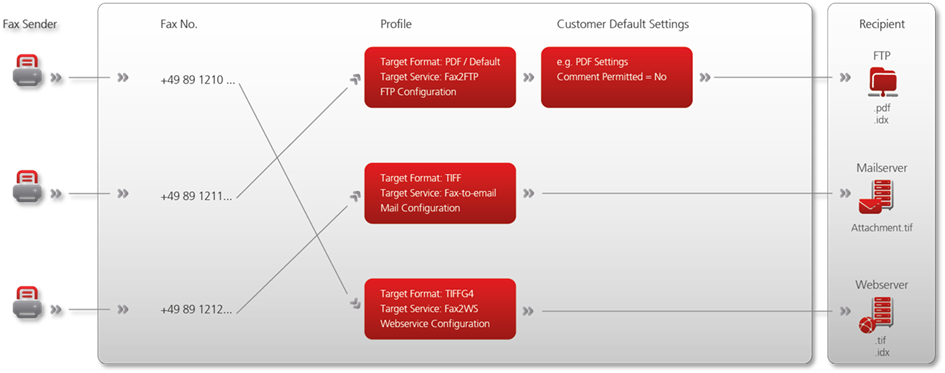
From the customer adminstrator’s perspective, the following sequence of steps results in the installation of an inbound fax service with which numbers can be assigned or removed:
Step 1: Configuration of customer settings
Step 2: Profile configuration
Step 3: Number assignment
Step 4: Number removal
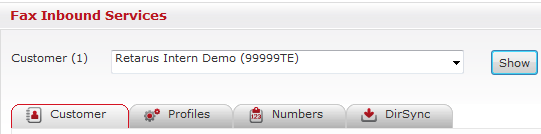
Tab: Customer
Tab: Profiles
Tab: Profiles
Tabs: Profiles / Numbers
Step 1: Configuration of customer settings
The first step consists of configuring general customer settings (Tab: Customer), including default values for certain settings. These default settings are used as long as no other values are configured at the profile level.
Step 2: Profile configuration
In the second step profiles are constructed. When creating a profile, you first set the service type and the service name (please note that you can only see and select services that you have contracted). Then you can configure the desired format, recipient settings (e.g., email addresses, FTP server configuration, etc.), as well as additional parameters. If a field is set to “Default”, the default value that has been defined beforehand in the customer settings will be used (please note: a default value cannot be defined for some of the customer settings). The current default setting is displayed in parentheses to the right of each parameter.
Step 3: Number assignment
After the profile has been created, you can assign one or more numbers to it. Click on the „Profiles“ tab to display the Profiles overview, highlight the desired profile and then click on the “Assign a new number” tab. A pop-up window then appears that displays all unassigned numbers. Using the checkbox located in front of it, select the corresponding number of your choice and then click on “OK” to assign it to the desired profile.
Step 4: Number removal
In order to remove a number from a profile, click on the profile in the Profile overview (Tab: Profiles), and then on the „Profile numbers“ button. All of the numbers assigned to the profile are then displayed. Click on the number(s) that you want to remove (multiple numbers may be selected), and then click on the “Delete” button. The number is then removed from the profile and reappears in the Number overview as an unassigned number. The number is again available for assignment to another profile.