
Tenant Administrators can delete multiple user accounts at once by uploading a CSV file containing their email addresses. Deletion runs in the background, so you can leave the page while it processes.
When a user is deleted, their account is disabled:
-
The user cannot sign in after deletion.
-
All roles and group memberships are removed.
-
The user’s name is changed to Former User in the system.
Only one deletion can run at a time per tenant. If you upload a file while a deletion is already in progress, it is queued and starts automatically when the current one finishes.
📌 A user cannot be deleted if they are the only assigned owner of a faxbox or user group. Reassign or add another owner before including them in a deletion file.
Preparing the CSV file
Before uploading, download the CSV template from the Bulk User Deletion screen (Users - Create User - Delete).
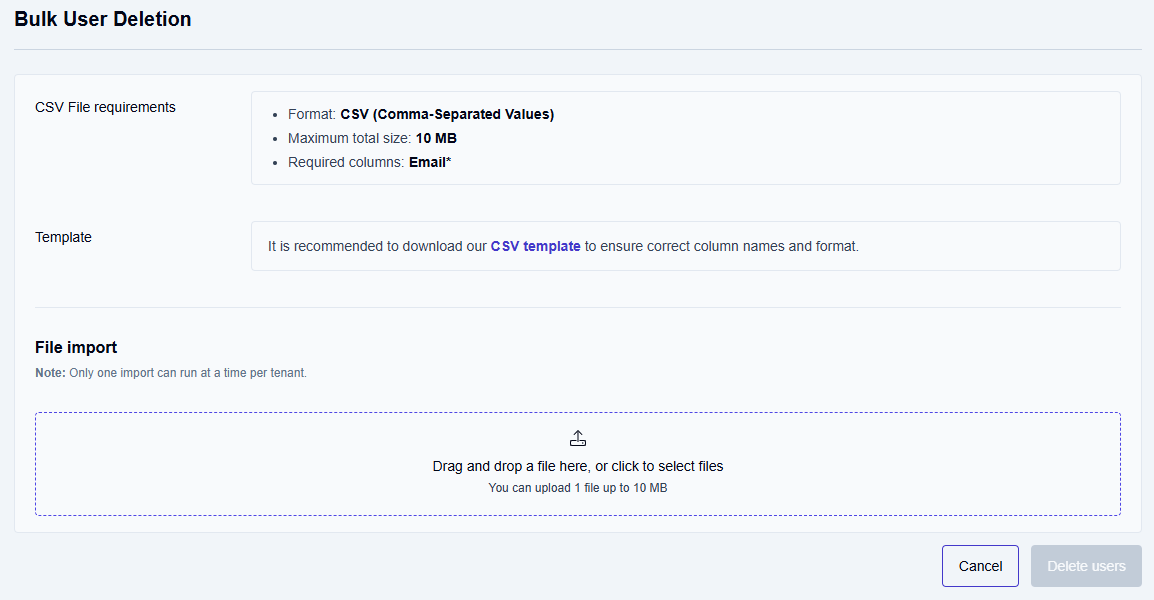
The file must contain a single column with the header Email, with one email address per row. It must use UTF-8 encoding, comma-separated values, and be no larger than 10 MB.
Deleting users in bulk
-
On the main Enterprise Fax Portal page, click Settings.
→ The Users page opens. -
Click the dropdown arrow next to Create User, then select Delete.
→ The Bulk User Deletion screen is displayed. -
Drag and drop your CSV file onto the upload area, or click the area to select a file.
-
Click Delete users.
Reviewing deletion results
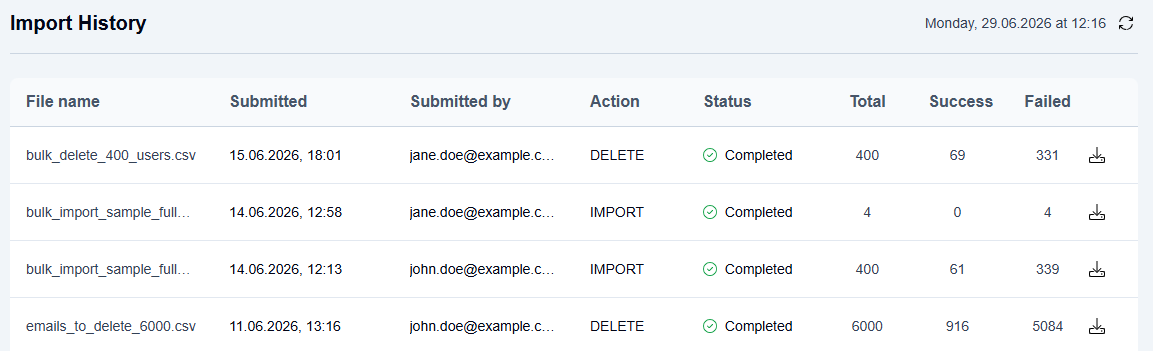
Bulk deletion results appear in Import history alongside bulk import operations. The Action column shows DELETE for deletion entries.
-
On the main Enterprise Fax Portal page, click Settings.
→ The Users page opens. -
Click the dropdown arrow next to Create User, then select Import history.
→ The Import history screen opens. -
To download results for a completed deletion, click the download icon in that row.