
The timezone and date range settings work the same way for both Inbound and Outbound Fax Reporting. These settings allow you to control the time period and timezone for the data displayed in your reports.
Changing the timezone
-
Open the relevant Reporting screen (FAX - Reporting - Inbound/Outbound).
-
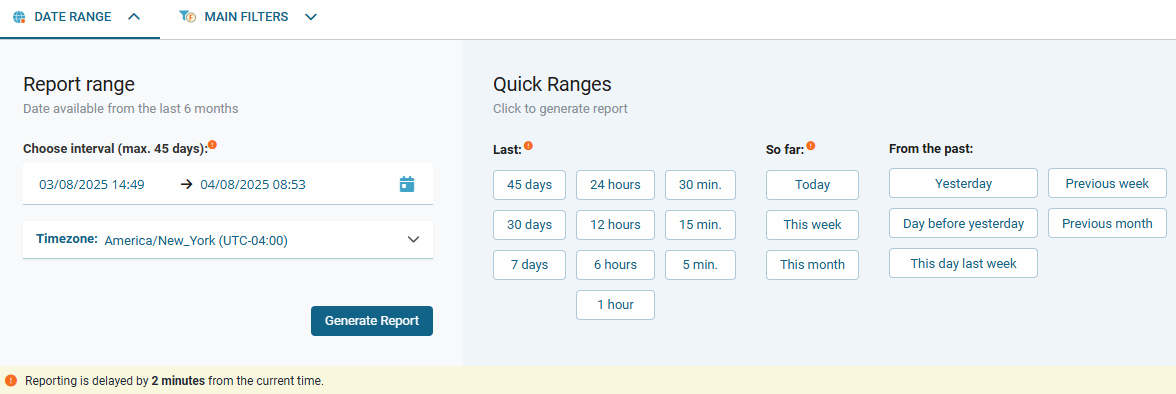
Click the DATE RANGE tab.
-> The section expands to display the date picker panel. -
In the Timezone dropdown, select your desired timezone from the list.
-
Click Generate Report.
→ The report is generated and displayed using the selected timezone.
Selecting a date and time range
You can generate reports for a specific custom date/time range or choose a preset quick range from the available options. The default range is Last 24 hours.
📌 Temporary data and time preferences
Date, time, and timezone settings are temporary. They reset to default values when you exit Fax Reporting.
To set a custom range:
-
Open the relevant Reporting screen (FAX - Reporting - Inbound/Outbound).
-
Click the DATE RANGE tab.
-
In the Choose interval field, use the two-month calendar to select a start and end date.
-
Adjust the time if needed.
-> The selected range can span up to 45 days within the six-month retention period. -
Click Generate Report.
→ The report is generated and displayed for the specified interval.
To use a preset quick range:
-
In the Quick Range section, click one of the available options:
-
Last – predefined past period
-
So far – from the start of a current period (e.g., this week or month)
-
From the past – for custom historical periods
The report is generated immediately after selecting a quick range.
📌 Timezone and date range are not saved in views
Timezone and date range settings are not part of any saved view configuration. When you load a Custom View or use an Advanced or Basic View, you’ll need to set your preferred timezone and date range each time you reopen the reporting screen.