
If you often use the same filters or column settings, you can save them as a custom view. This allows you to quickly restore your preferred report configuration without adjusting it each time.
Saving a custom view
-
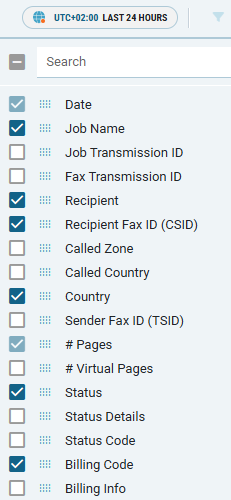
Click Columns to open the column selection sidebar.
-
Check the columns you want to display in the table.
-
Click Main Filters.

-
Apply your desired filters as needed.
-
Click Save View.
→ The Save View window opens.
-
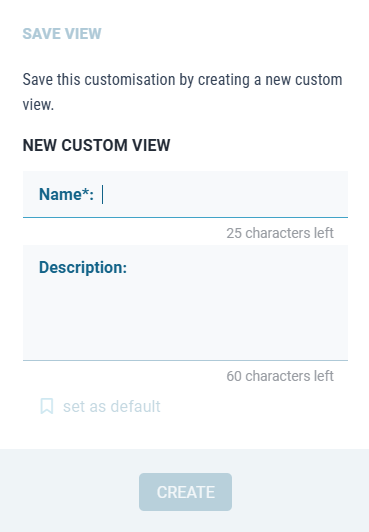
Enter a name and optional description:
-
Name (required, up to 25 characters): A short, clear name (e.g.,
My faxes - last 7 days). -
Description (optional, up to 60 characters): A brief explanation of the view’s purpose.
-
-
Optional: Set the view as default by clicking set as default.
The set as default option is disabled until a valid name is entered. -
Click Create.
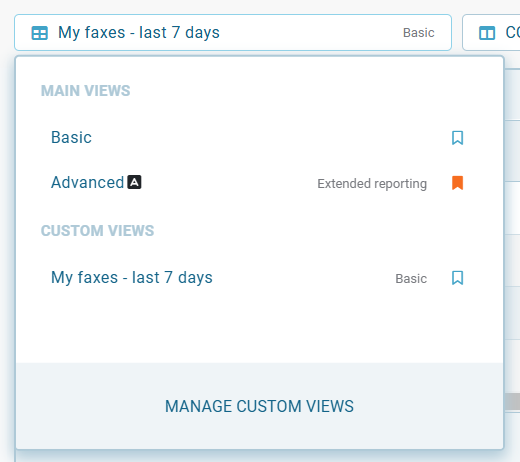
Once saved, the view appears in the Custom Views list. To apply it, select the view from the list.
Updating a custom view
There are two ways to update an existing custom view.
Update view content (columns or filters)
If you modify the active report — for example, by adding or hiding columns, or changing applied filters — you can save these adjustments back to the same view:
-
Choose the custom view whose content you want to update.
-
Make your desired changes in the reporting screen.
-
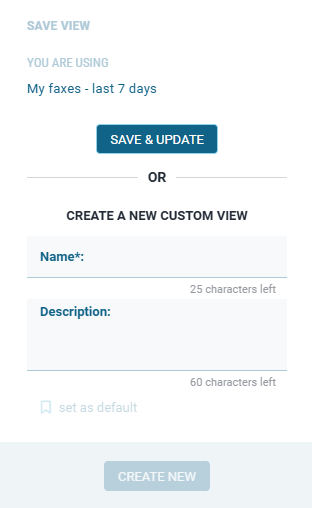
Click SAVE VIEW.
→ The Save View dialog opens.
-
Click SAVE & UPDATE to apply your new layout to the currently selected view.
You can also create a new view from the same dialog by entering a new name and clicking CREATE NEW.
Updating view properties
-
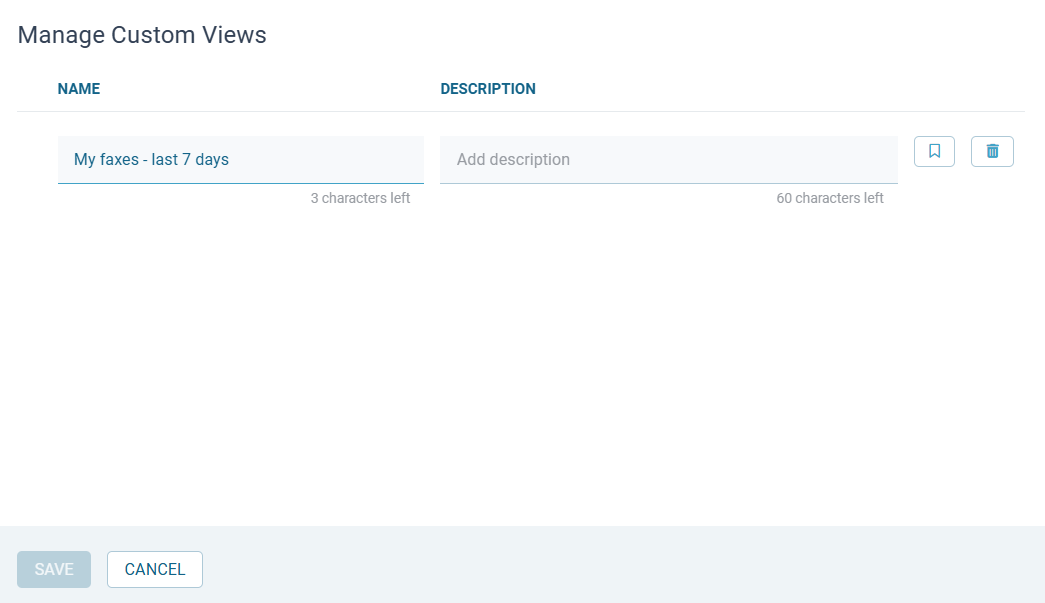
In the list of available views, click Manage Custom Views.
→ The Manage Custom View window opens.
-
Locate the view whose properties you want to change.
-
Update the name, description, or default flag as needed.
-
Click Save.
Deleting a custom view
-
Open the Manage Custom Views dialog.
-
Click the trash icon next to the view you want to delete.
→ The confirmation dialog opens. -
Click Yes, delete to confirm your operation.
-> The view is permanently removed from your custom views list.